Appearance
Managing the HydraCALC Database
The main database file for HydraCALC is Master.DAT which resides in the \HES\HydraCALC\Ver50\Data\Setup folder. This file contains all your pipe, fitting and valve data and is well worth protecting. We suggest that you back this file up regularly and keep the backup in a distant and safe location.
We keep an up to date Master.DAT in the downloads area of our HydraCAD.com website. You are welcome to copy and replace this file in your Setup folder. This will replace any pipe types and fittings that you may have added or changed on your system. If you want to save the changes you made, copy these files to another folder before loading or simply re-add your changes to the new file.
The PreDef.DAT file is another database file that resides in the Setup folder. This file specifies the connection between parts and the manufacturer s description PDF files. This file is also updated and available on our website.
We keep an updated folder of manufacturer's specification sheets on our website in the HydraCALC/Data/Product PDF's folder. These can be copied to the C:\HES\HydraCALC\Ver50\Data\Setup\Documentation folder.
How to Install Fittings into the Database
We create database files for most pipe and fittings. These files are kept on our website. Go to www.HydraCAD.com and login. Go to Folders > HydraCALC > Data. Here, there are folders with data zip files for valves, fittings and pipes. Download your desired files and place them in your local C:\HES\HydraCALC\Ver50\Data\Setup\ImportExport folder. Unzip the files to this folder.
Go to HydraCALC > Utilities > Alter Pipe/Fittings/ Utilities/ Load Single File. A dialog box will open at the local ImportExport folder. Pick Fittings Files (.hft) or Pipe Files (.hpt) to view the appropriate files. Select and press Open. The item will be added to the list. You can also select Load All Files and all files in the ImportExport folder will be imported.
To display the new fittings in your right-click fitting display, assign a Short Name (A - Z or Aaa to Zzz) to it. Take care to avoid duplicating Short Names that may already be used.
How to Install Backflow and Device Curves into the Database
Those items with pressure/flow loss curves require a different method for importing than for fittings.

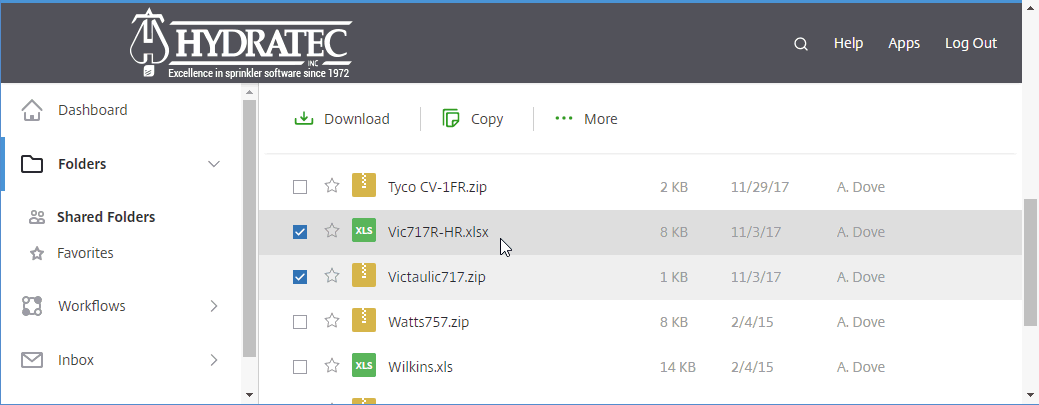
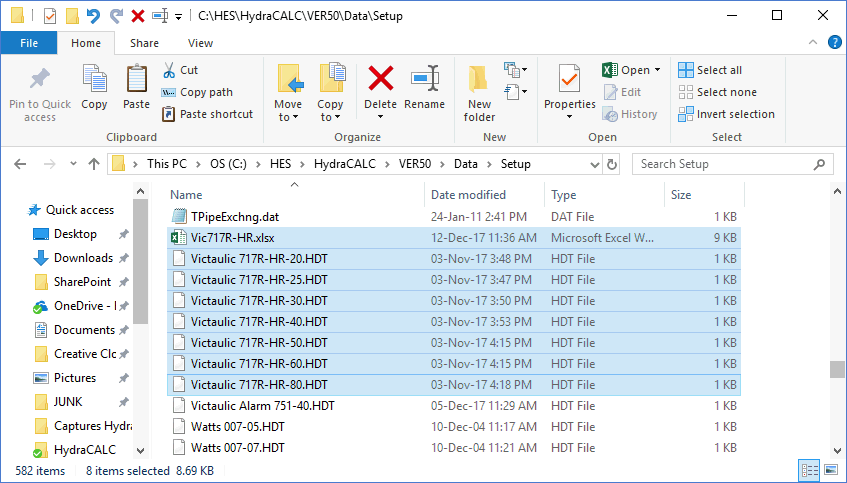
Go to www.HydraCAD.com and login using the link at the top left of the web page. Go to Folders > HydraCALC > Data > Backflows and Devices. Download your desired zip files and place them in your local C:\HES\HydraCALC\Ver50\Data\Setup folder. Unzip the files to this folder.
There will be associated Excel files with the zip files. Copy these to your Setup folder as well.

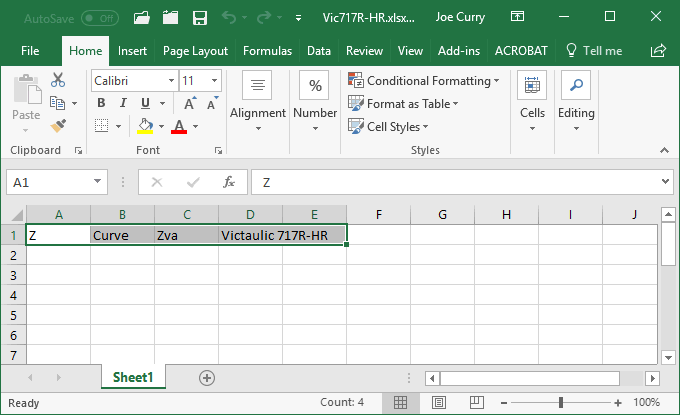
Open the Excel file you downloaded and highlight the text in the table. Pick Copy.

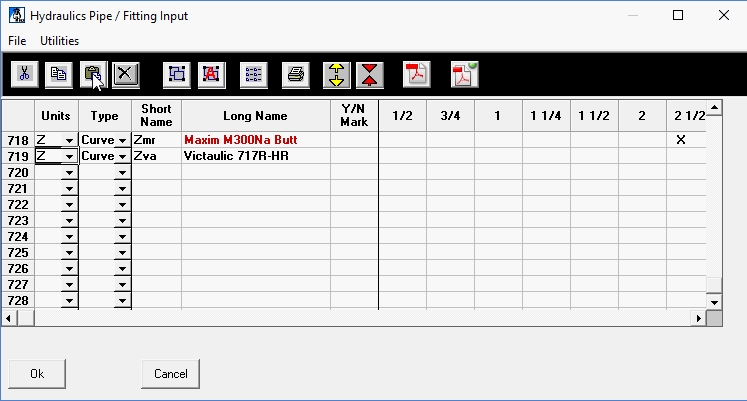
Go to HydraCALC > Utilities >Alter Pipe/Fittings. Scroll to the bottom of the data and click in the first open box you see. Pick Paste.

Select the OK button to close the Pipe/Fittings editor. Reopen the Pipe/Fittings editor to see an 'X' displayed next to each diameter for which there is a curve associated.
For associated optional .pdf documentation for items, extract the files to the C:\HES\HydraCALC\Ver50\Data\Setup\Documentation folder. Use the Define PDF File command to link the files to the part.

 HydraDOCs