Appearance
Tutorial #1b: Entering Mains
Move the cursor to row twenty and enter the note * MAINS.

Enter the mains data as shown here. Use a 3" Schedule 10 pipe. The Input Type is Mn-S. The elevations are 20 feet.
The pipe from nodes 21 to 22 is the system riser. Enter 4" Schedule 10. When you reach the Fitting cell right click to open the Fitting Input dialog box.
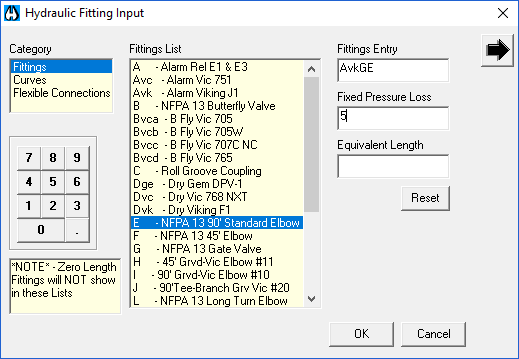
Select an Alarm Viking J1, NFPA 13 Gate Valve and a NFPA 13 90" Standard Elbow. Also enter a 5 PSI fixed pressure loss for a backflow preventer. Press OK to exit.

Complete row twenty-five as shown and enter the first two nodes for row twenty-six; 22 and TEST. Move the cursor to the Diameter cell and right click to open the Pipe Input dialog box.
This will be the underground pipe leading up to the water supply test point.
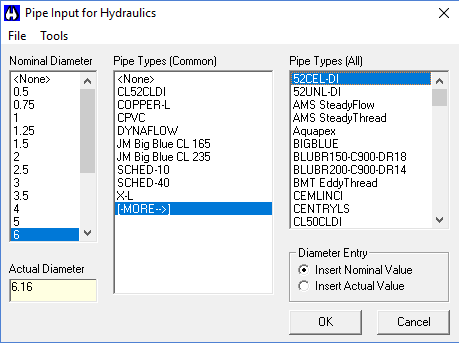
Select 6 and then [-MORE-]. More pipe types will appear in the list to the right. Select 52CEL-DI for cement lined ductile iron. Press OK to exit.

The underground length is 250 feet. Add a standard NFPA 13 90 elbow. The C-Factor will be 140 and the Input Type UG for underground. The elevation of node 22 is 0. The final entry is for the TEST node which has an elevation of 0.
If you haven t done so already, now is a good time to SAVE.

Now, you can enter the water supply information. Select the Water Source toolbar button. The Edit Water Supplies dialog box will appear.
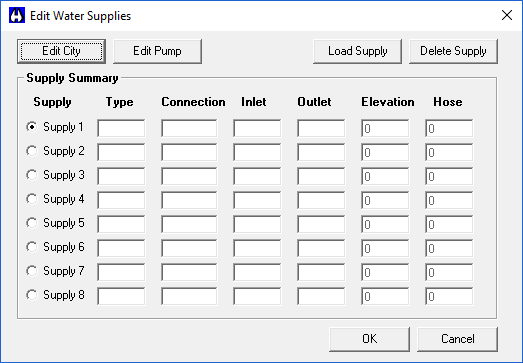
Press the Edit City button.
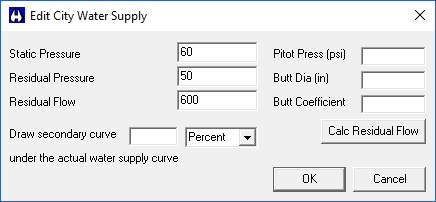
Enter the water supply data as shown here. Press OK. You will return to the Edit Water Supplies dialog box.
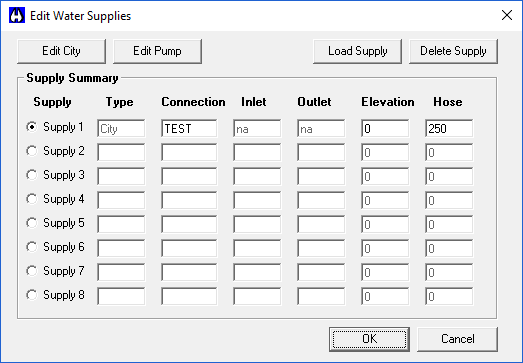
Enter TEST as the Connection. Enter 0 for the supply elevation. Enter a 250 GPM outside hose allowance. Press the Exit button to return to the System Piping screen.

H250 will appear in the K / Flow cell of the test row. This is the outside hose allowance that you entered in the Edit Water Supplies screen.