Appearance
Tutorial #1c: Calculating
Now, you are ready to run a calculation. Press the Calculate button at the top of the screen. The Pre-Calc Questions dialog box will appear.
The program automatically fills the Remote Point with the first node in your system that is a head. You can enter any node number here if it is a head. If you check the Auto Locate Remote Head option, HydraCALC will automatically find the most remote head for you. The most popular option is to leave the default node number and check Auto Locate Remote Head.
The Source Point is the node that is connected to the water supply and appears in the Edit Water Supplies dialog box. Set up the dialog box as shown in the figure and press OK.
The program will automatically perform an error check of your input. If no errors are detected, it will go on to calculate the system. Otherwise, refer to Error Checking under the Calculating a System section of this manual for more details. Following the calculation, dialog box here will appear. The system demand is shown as well as the safety pressure.
Pressing the Details button will expand the dialog box and display the number of passes required to balance the system. When you press the View button, the Calculation Summary will appear.

The report will include flowing node details as well as data on pipes. Close the file and return to the Hydraulic Calculation dialog box.
Press OK to exit.

The next step is to complete the Information Sheet. Press the Info Sheet button at the top of the screen. The following dialog box will appear.
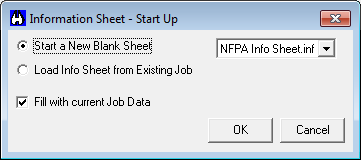
Select Start a New Blank Sheet and NFPA Info Sheet. Check the Fill with current Job Data box. Press OK.
Some of the fields will be automatically filled. Fill in the rest and press OK. The job information sheet will now be available to print with your final report. If you need to make modifications, press the Info Sheet button again and the sheets will open with your data entries.
Next, you will prepare the Schematic Diagram.
Press the Schematic Diagram button at the top of the screen if required for your grid system, however we will build one for this tree system for this example. Press the Build Nodes button from the dialog box that appears.
From the next dialog box, select Build with V50 Method.
This will automatically arrange the nodes for the Flow Diagram based on how your nodes were entered and their order in the input screen. Exit the dialog box.
Now, you can print your final report. Press Print Final from the File Menu.
The following dialog box will appear.
Use this dialog to set up what you want to appear in the report as well as the order. Set it up as it appears here and press OK.
When your setup is complete, press OK. Your report will open in HydraVIEW. From here you can view and print the report. If you plan to share the report electronically with people outside your organization, we suggest you install a PDF printer and print to that instead.