Appearance
Tutorial #5c: Schematic Diagram

Now, you can build a Schematic Diagram. Press the Schematic Diagram button. The Schematic Diagram Input dialog box will appear.
Highlight a few vertical columns as shown and right click the mouse. Select MN-G2 from the list.
This will list the nodes on the Back Main vertically.
Highlight a few rows vertically in column 8 and select Mn-G1. This will list the nodes for the Front Main.
At this point you must align the main nodes so that the rows line up correctly. Highlight column 8.
Press the Mirror Vertical button to reverse the order. Node 1 now lines up with Node 8 which is correct since they feed the same branch line.
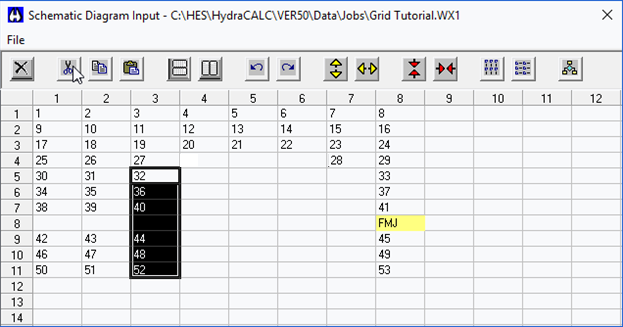
Highlight nodes 42, 46 and 50. Press the Cut button.
Move the cursor down one row and press the Paste button. Now, all the Front and Back main nodes line up correctly.
Now, you can insert the branch line nodes.
Highlight all the nodes and press the Connect Horizontal button.
The branch line and riser nipple nodes are inserted in the correct order.
Highlight the nodes as shown.
Press the Cut button.
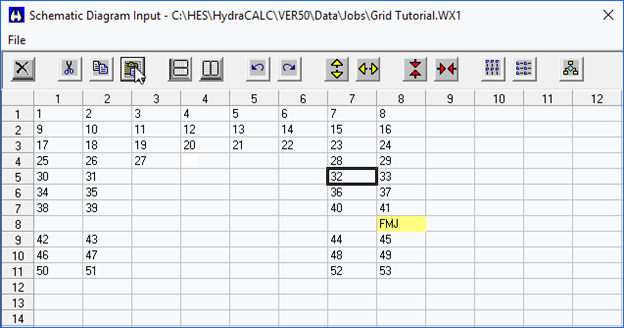
Move the cursor to column 7 and row 5. Press the Paste button. These nodes are at the top of the riser nipples and now are more clearly shown to be connected to the Front main.
Note that the FMJ (Feed Main Junction) is colored yellow. This means that there are more nodes to be shown. Pick the FMJ cell as well as one to the right and right click.
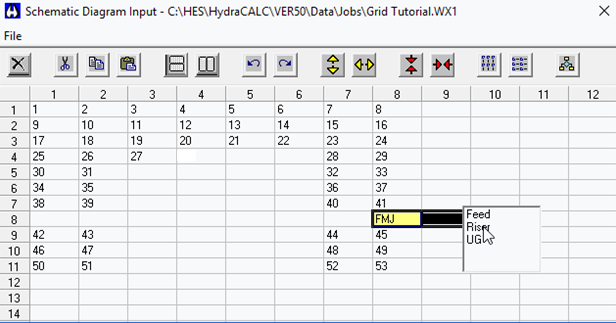
Select Feed from the list.

The Feed node inserted. Pick node 54 and a few cells below it and right click. Select Riser. Select 55 and a few cells to the right. Select UG from the list.
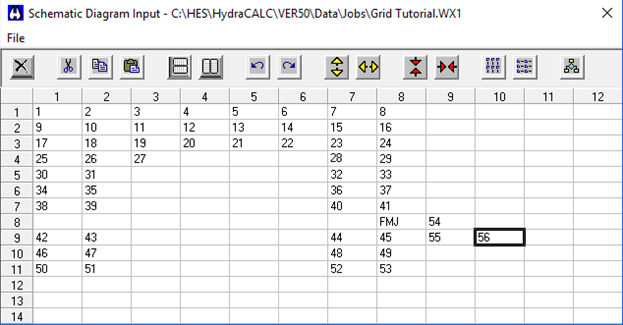
The final water supply node is inserted. This completes the Schematic Diagram. It can now be printed through the Final Report set up dialog box. Exit the Schematic Diagram Input dialog box to return to HydraCALC.
Select File > Print Final. This opens the dialog box for setting up the final report.
Check Schematic Diagram to have the Schematic printed. The Flow Diagram will appear in HydraVIEW.
The diagram will include node labels and flow rates. This completes the Grid Tutorial.