Appearance
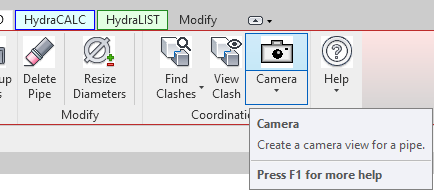
Camera
To jump to a video explaining the Camera button, click here.
Camera is used get a closeup view of a specific pipe in the project, typically used for in-Revit clash detection to see if that pipe, or any fitting attached to it, collides with something else in the Revit project.
Summary
- Camera is typically used in the internal / non-Navisworks clash detection process.
- From inside a Plan View, select the Camera button and choose a point on a pipe.
- You will now be in a 3D view, looking at that point on the pipe from a close-up perspective.
- This is useful to see if any of your pipes or sprinklers are colliding with any other piece of your 3D model, and showing how you can adjust or change accordingly.
Example video of the Camera Button
How Do I Use The Button?
Camera is used in plan view.
Picking Camera will prompt for a selection of a pipe. Select the pipe at the end farthest from the direction to walk.
Pick location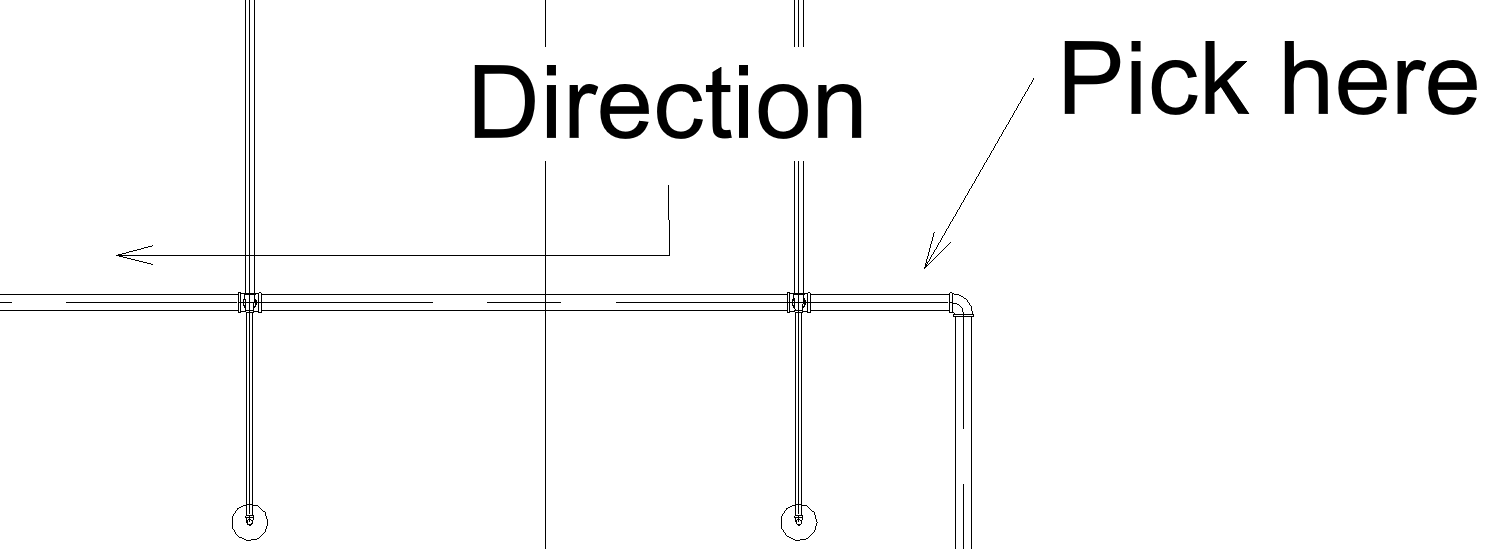 View
View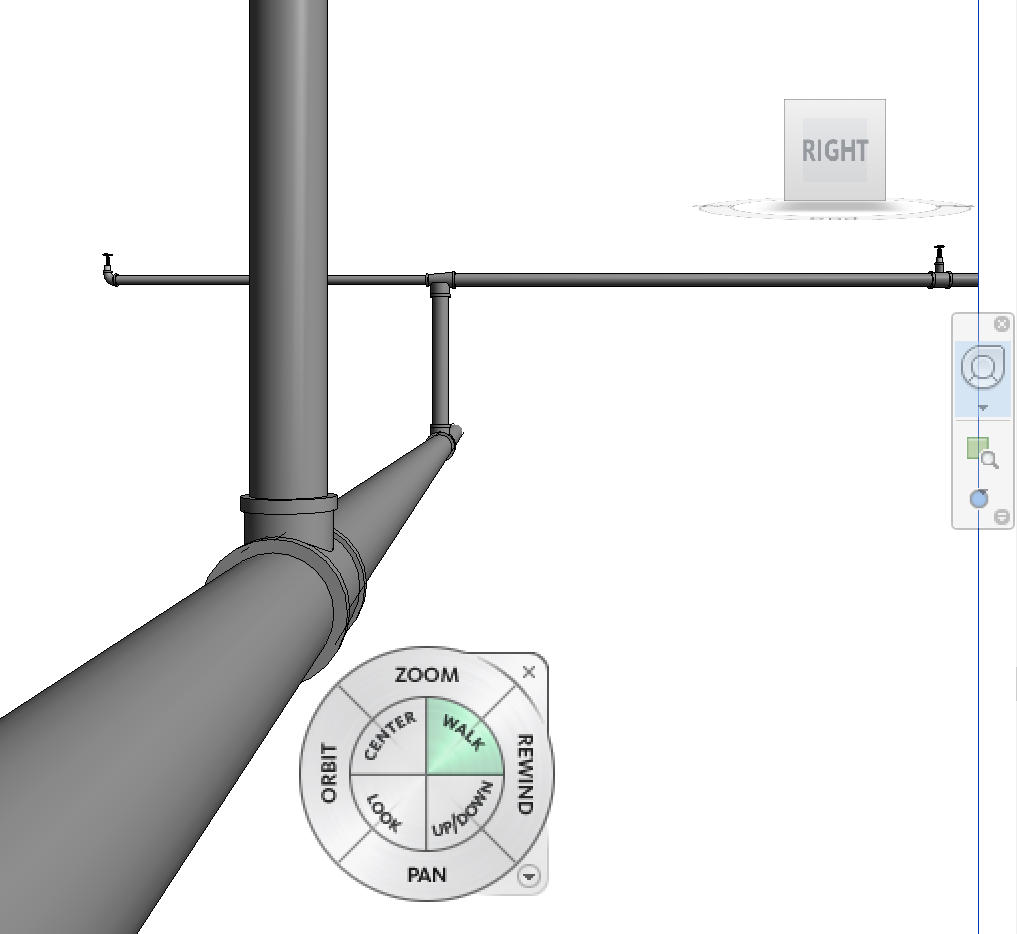
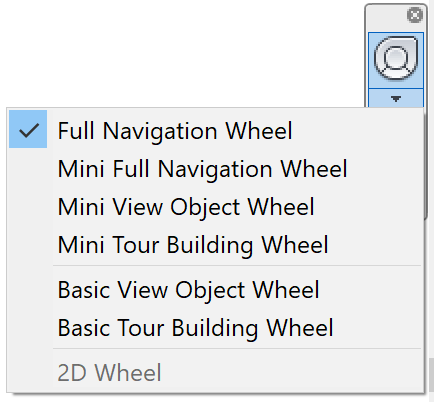
Use the Full Navigation Wheel or other to navigation wheel to walk thru you model.
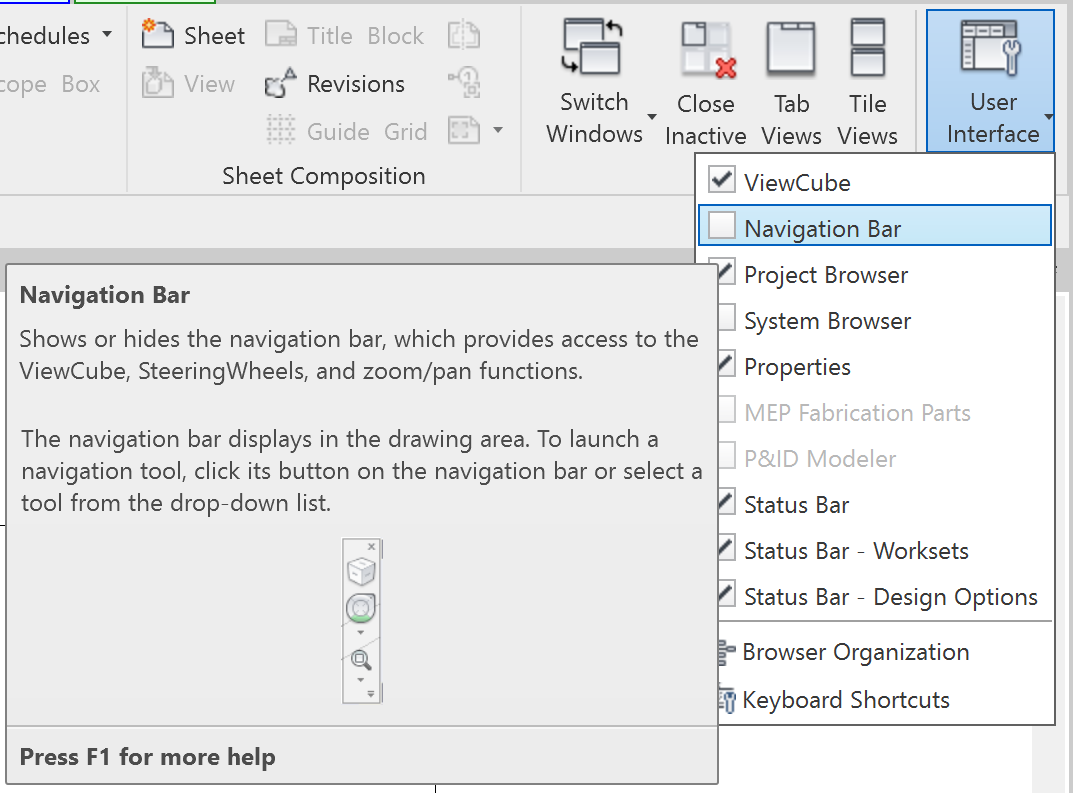
The Navigation Bar can be found in the View ribbon / User Interface
Camera Setup
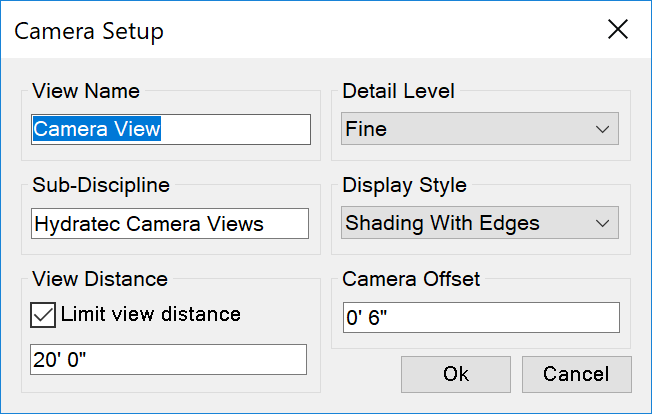
View Name
Set the name of the view that is created.
Sub-Discipline
Sets the Sub-Discipline of the created view.
Detail Level
Sets the view detail level.
Display Style
Sets the display style of the view.
View Distance
Limiting the view distance in the model speeds up view regeneration.
Camera Offset
Adjusts the starting point of the camera to offset from inside of the selected pipe.
Additional Help (Videos and additional resources)
For more help regarding the Camera button: click here
For other help that might be relevant to Camera: click here
HydraCARDs (Troubleshooting)
For HydraCARDs regarding the camera button: click here
For other relevant HydraCARDs: click here