Appearance
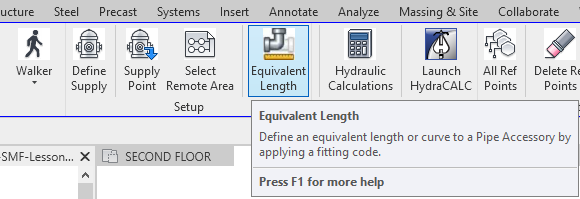
Equivalent Length
To jump to a video explaining the Equivalent Length button, click here.
Equivalent Length is used to define an equivalent length or curve to pipe accessories (Fittings, Curves, and Flexible Connections) by applying a code to each in the project. This code is used to get the data needed for the selected fitting so that it can be used to correctly calculate friction loss for the purposes of Hydraulic Calculations.
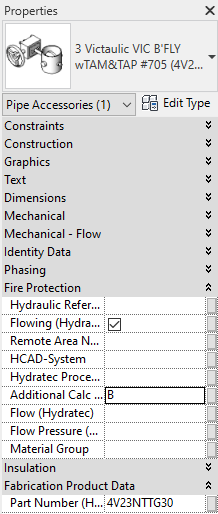
The property in which the code is assigned to, Additional Calc Information, is located under the Fire Protection category of any applicable pipe accessory. If the user knows the letter code needed for this property, it can be manually assigned here.
Summary
- Press the Equivalent Length button.
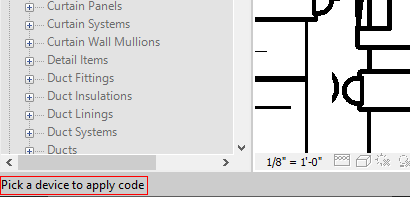
- The other buttons on the HydraCALC ribbon will become grayed out, and you will have to select a pipe accessory / device in the current view.
- A prompt on the bottom left side of the screen will appear indicating this, located here
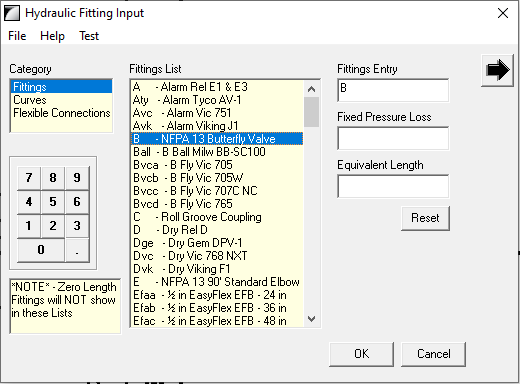
- After a pipe accessory is selected, the Hydraulic Fitting Input dialog box will open.
- Under the middle, Fittings List box, select the fitting / device that corresponds to the one used in the current Revit project.
- Each option has a code associated with it, which will be used to get the necessary data used to calculate friction loss when running Hydraulic Calculations.
- Once a selection has been made, and a letter code is shown in the Fittings Entry text box, press the OK button.
- If the are other instances of the same pipe accessory in the Revit project, and you would like all of those to also have the letter code applied to them, press Yes when asked: "Apply to all instances of this type?"
Example video of Equivalent Length Button
How Do I Use The Button?
Press the Equivalent Length button. After pressing, the buttons on the HydraCALC ribbon should become gray and no longer selectable. In the bottom left of the screen, there should be a prompt to pick a device in the project to assign a code to. Select a pipe accessory in the current view.
After selecting a pipe accessory, a dialog box should open. There will be three categories for different types of pipe accessories: Fittings, Curves and Flexible Connections. Corresponding to the pipe accessory selection, there will be a list of them in the middle Fittings List box.
Clicking on the option in the list that coincides with the fitting used in the project will have the letter code of that fitting inputted into the Fittings Entry text box on the right-hand side of the dialog box. This is also an opportunity to manually enter the letter code if the user knows it off the top of their head without having to select it via the Fittings List box.
Once the selection has been made, click OK to continue forward.
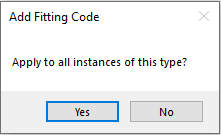
When trying to conclude using the Equivalent Length button, it is possible for this prompt to appear. If there are other instances of the fitting that a letter code has been applied to in the current open project, it will ask the user if this code should be applied to all as well. This is so that Equivalent Length doesn't need to be ran multiple times for the same type of fitting, only for each unique type in the project.
Additional Help (Videos and additional resources)
For more help regarding the Equivalent Length button: click here
For other help that might be relevant to Equivalent Length: click here
HydraCARDs (Troubleshooting)
For HydraCARDs regarding the Equivalent Length button: click here
For other relevant HydraCARDs: click here