Appearance
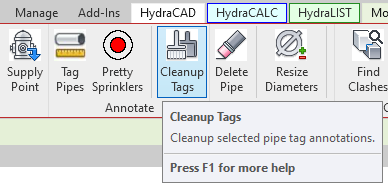
Cleanup Tags

To jump to a video explaining how to Cleanup Tags, click here.
Cleanup Tags is a feature that is still in active development. However, there is still useful tools within HydraCAD software and within Revit that can be used in cleaning up the tags in your Revit project, and making everything more visible and easier to see.
Summary
- Cleanup Tags' intended function currently doesn't work.
- However, listed on this page are other ways you can cleanup the tags in your project in the meantime.
Example video of how to cleanup tags
How Do I Cleanup Tags?
To begin, there are many types of tags that can be used to display a pipe's diameter and/or length. To see these options, select a pipe tag. If there are no tags in the project, they can be created by using the Tag Pipes button.
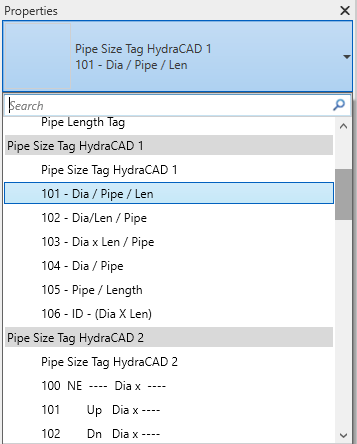
Once a tag is selected, mouse over to the big rectangle that contains the tag's name at the top of the Properties menu. Click it to expand the dropdown menu of other possible tag layout selections, shown below.

In this menu are options for alternate ways for tags to be laid out and displayed. Showing only the length, only the diameter, showing them in a certain order, etcetera. There are also different ways of writing and showing these measurements. Shown below are the differences between HydraCAD Pipe Size Tag options 1 and 2.
Center-to-center Tags
Pipe Size Tag HydraCAD 1

Pipe Size Tag HydraCAD 2

In this instance, HydraCAD Pipe Size Tag 1 has its measurements shown flat against the pipe, with the different options meant for the measurements to be shown above the pipe, a split, or only showing the diameter or length.
HydraCAD Pipe Size Tag 2 shows these measurements diagonally, either facing in a Northeastern heading, or a Southeastern heading, which can be changed.
There are also HydraCAD Pipe Size Text Tags, which have both a distinct advantage and disadvantage over the usual HydraCAD Pipe Size Tag. The advantage to the Text Tags is that they're 'neater' than the typical Pipe Size Tag. They show the measurements in a more shorthand way, shown below.
Pipe Size Text Tag HydraCAD 1

Pipe Size Text Tag HydraCAD 2

The disadvantage is that these Text Tags do not update their display automatically when their measurements are changed. The tags will only update when prompted, a notable example is when running the Walker command.
Cut Length Tags


Shown above is center-to-center tags (shown in blue) and cut length tags (shown in magenta). Having the tag set to the cut length is important when stocklisting, and all tags in the project can be converted to cut length tags all at once, programmatically, using the Fab View button. This creates a separate view below the current active one in the project browser, with Fabrication in the name. This allows for separate views for stocklisting, thus reducing clutter in the 'main' view.
Cut Length tags also have Pipe Size Tags and Pipe Size Text Tags just as the center-to-center tags do, shown here. They follow the same shorthand measurement format, except show the cut length of the pipe. They are selectable in the properties dropdown, same as the previous tag options. If they are not shown in this menu, it is possible the Setup button will need to be ran from the HydraLIST ribbon before using these tags.
Leader Lines
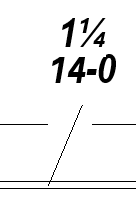
Leader lines can be used to draw a line from the tag / measurements to a certain spot in the project, and allows you to move the tag off of a pipe or have it point at something more relevant for the information its showing.
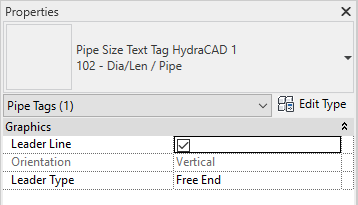
To toggle leader lines, check the option located under the properties of a tag.

Now the tag may be repositioned and it will draw a line towards what its referencing.

Additional Help (Videos and additional resources)
For more help regarding the Cleanup Tags button: click here
For other help that might be relevant to Cleanup Tags: click here
HydraCARDs (Troubleshooting)
For HydraCARDs regarding the cleanup tags button: click here
For other relevant HydraCARDs: click here

 HydraDOCs