Appearance
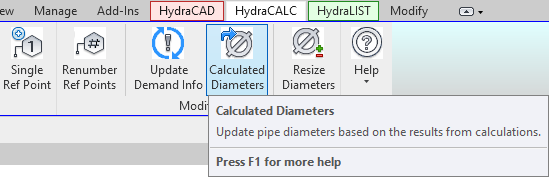
Calculated Diameters
To jump to a video explaining the Calculated Diameters button, click here.
Calculated Diameters it used to sync the diameters that have been changed after running through Hydraulic Calculations. After returning to the Revit project, it is possible the measurements in the drawing have not changed to match according to a change done in the calcs.
Simply clicking this button after returning from the calcs will change the data displayed in all relevant tags in the current view in order to display the correct information. This will only affect the pipes and fittings used during the hydraulic calculation.
Summary
- If the diameters in the view differ from the diameters in the calcs, use this button to update them.
- Look at the diameters before pressing the Calculated Diameters button.
- Click the Calculated Diameters button.
- Ensure that the diameters have changed to the correct measurement after the button press.
Example Video of Calculated Diameters Button
How Do I Use The Button?
To use Calculated Diameters, there must be a difference between the diameters in the current project and the ones used during Hydraulic Calculations, likely caused by changing them during calcs.
If this is true, click the Calculated Diameters button. The pipe tags displaying the diameters that were different from the calc will be changed.
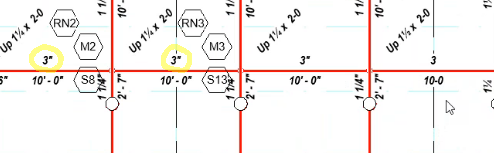
After the button is pressed, these measurements will be updated to the new values.

Additional Help (Videos and additional resources)
For more help regarding the calculated diameters button: click here
For other help that might be relevant to calculated diameters: click here
HydraCARDs (Troubleshooting)
For HydraCARDs regarding the calculated diameters button: click here
For other relevant HydraCARDs: click here