Appearance
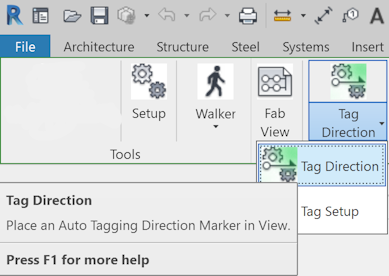
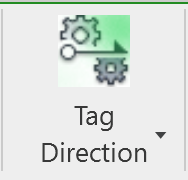
Tag Direction

To jump to a video explaining the Tag Direction button, click here.
NOTE: Please run setup from the HydraLIST ribbon before executing any commands related to stocklisting and tagging, so all the properties are added for everything to run properly. Especially if you want to manually identify section islands via Section ID Override.
Tagging runs of pipe using Tag Direction, typically done in a Fabrication View, is a prerequisite needed for running the Create Stocklist command.
Unlike its brother and counterpart, Tag Setup, Tag Direction is deigned to be an easier and more streamlined way of setting tags or names needed for pipes to be identified with inside of a stocklist.
Summary
- Please note: Before running any stocklist commands, please have a fully completed and connected model ready for stocklisting.
- Press the Tag Direction button when you are prepared to tag pipes for stocklisting.
- In the Tag Direction options...
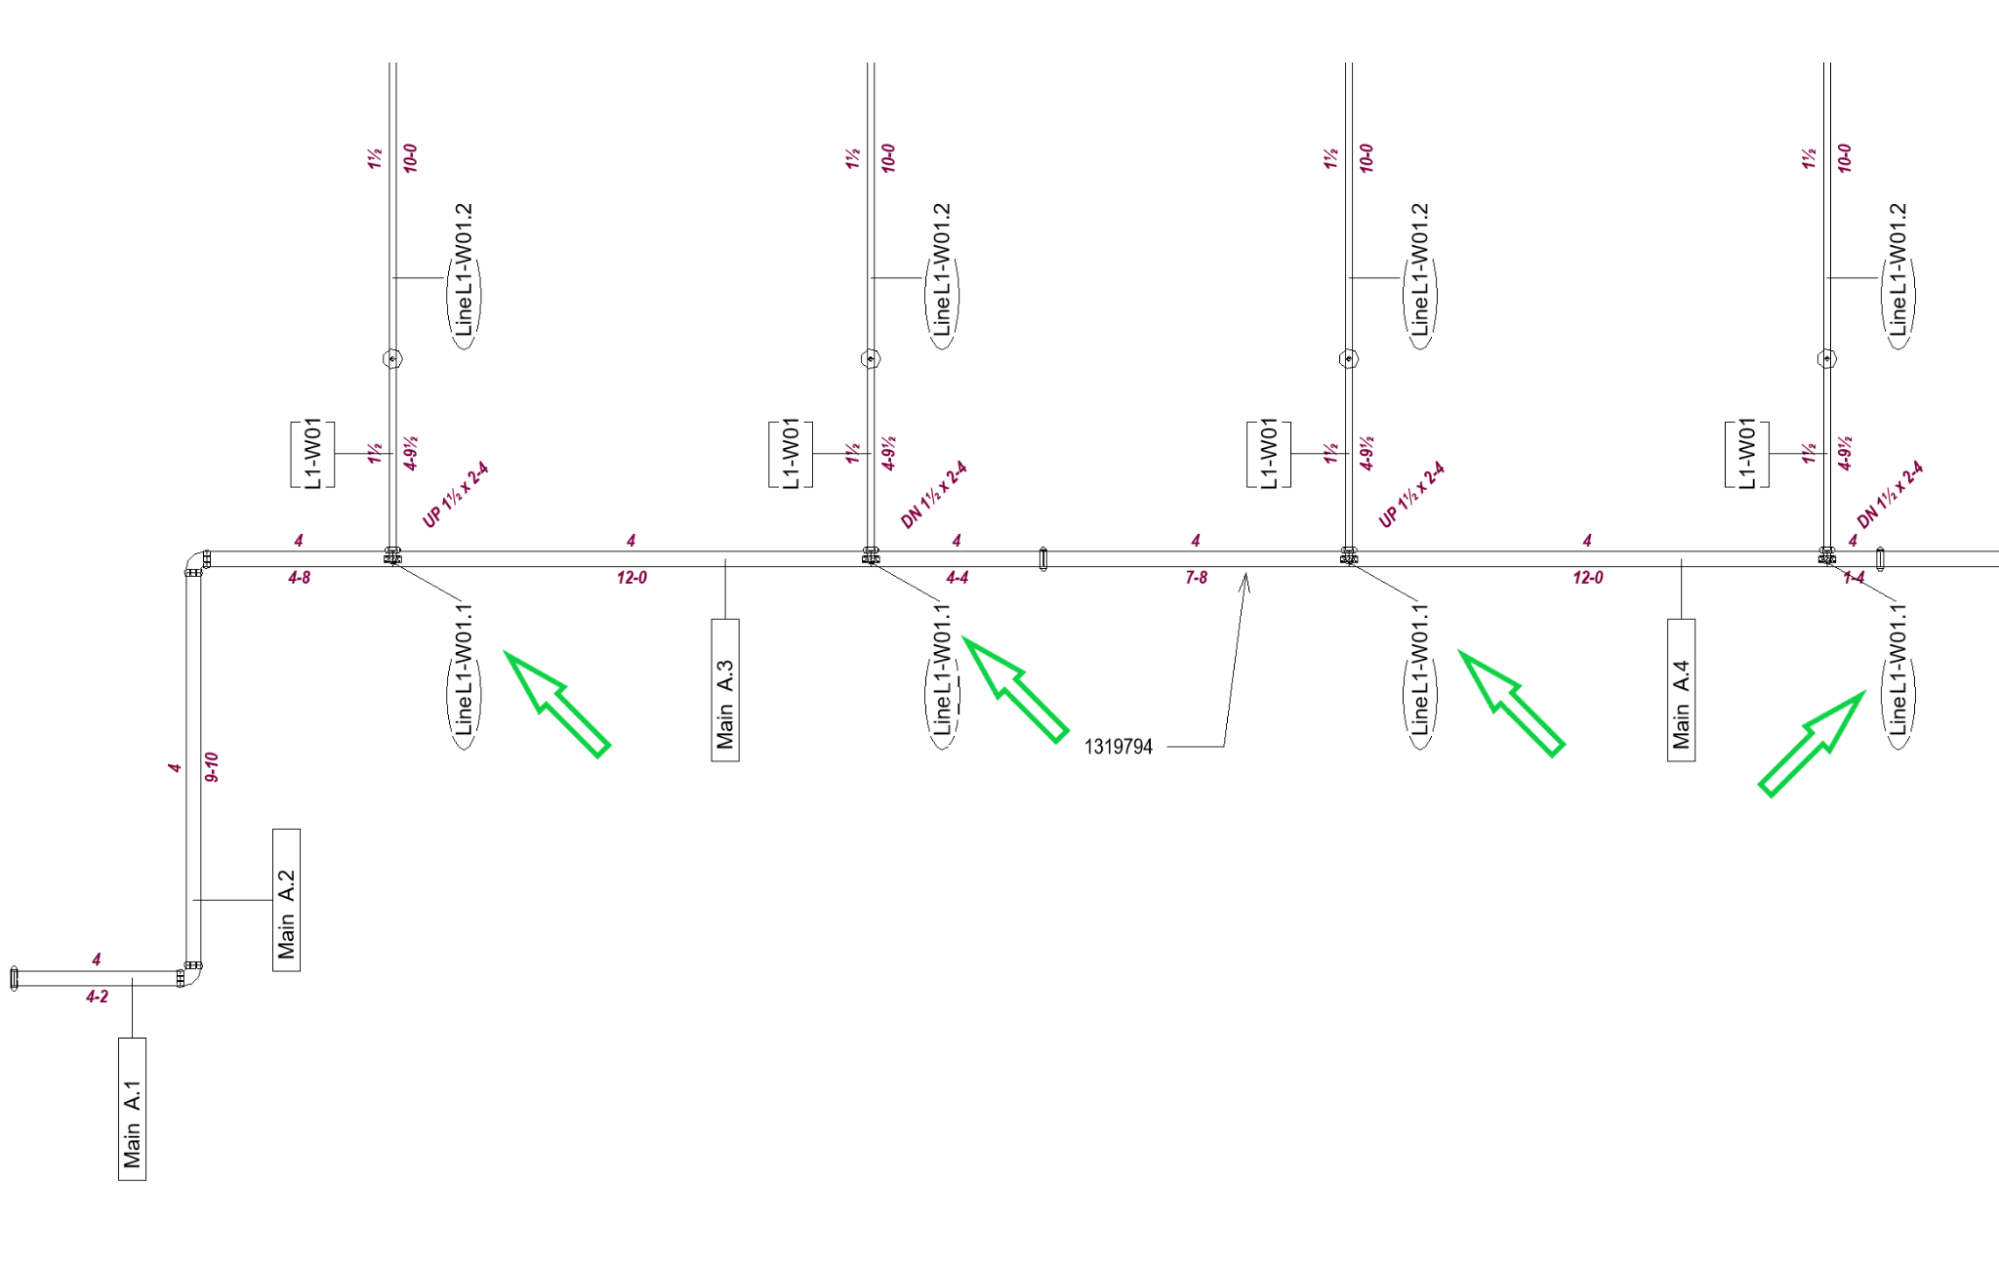
- Select Section Direction Marker, this is used to place a HydraLIST Tag Direction Start Point at a user specified location inside of the plan view. The sequence of Section ID labels is based on the distance to this annotation’s location.
- User Defined Section ID can be used if you are not confident with AutoLIST automatically determining section islands (groups of pipes to determine Section IDs). If you would like to manually adjust these yourself, follow the guide written in this documentation here.
- Set Section Start can be used when Auto Tagging places the start of the welded piping section on the opposite end of what may be desired, in order to change / override it. The user will be prompted to pick the end of the pipe for the section start.
- Split Section can be used when a particular run of pipe is very large, and could benefit from being tagged separately. A good example of this is a long main, with the section being split at an elbow or coupling into 2 parts.
- Make the desired choices described from the options above.
- You can now run the typical Stocklist command and it will use the tag directions / information you selected here.
Example video of Tag Direction Button
Prerequisite: Connected model
System piping modeled with consistent pipe types for welded mains, welded branch lines, and threaded pipe.
Picking will open the Auto Tag Section Setup dialog box.
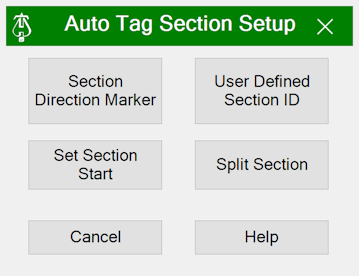
Section Direction Marker
Prompts the user to place the generic annotation named HydraLIST Tag Direction Start Point on the floor plan.
The sequence of Section ID labeling start points is determined by the distance to this annotation’s location.
Picking this button will prompt the user to pick a point on the plan view to place the HydraLIST Tag Direction Start Point.
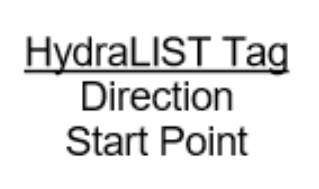
Any existing instances will be deleted and the new one added.
User Defined Section ID
Pick Setup from the HydraLIST ribbon. 
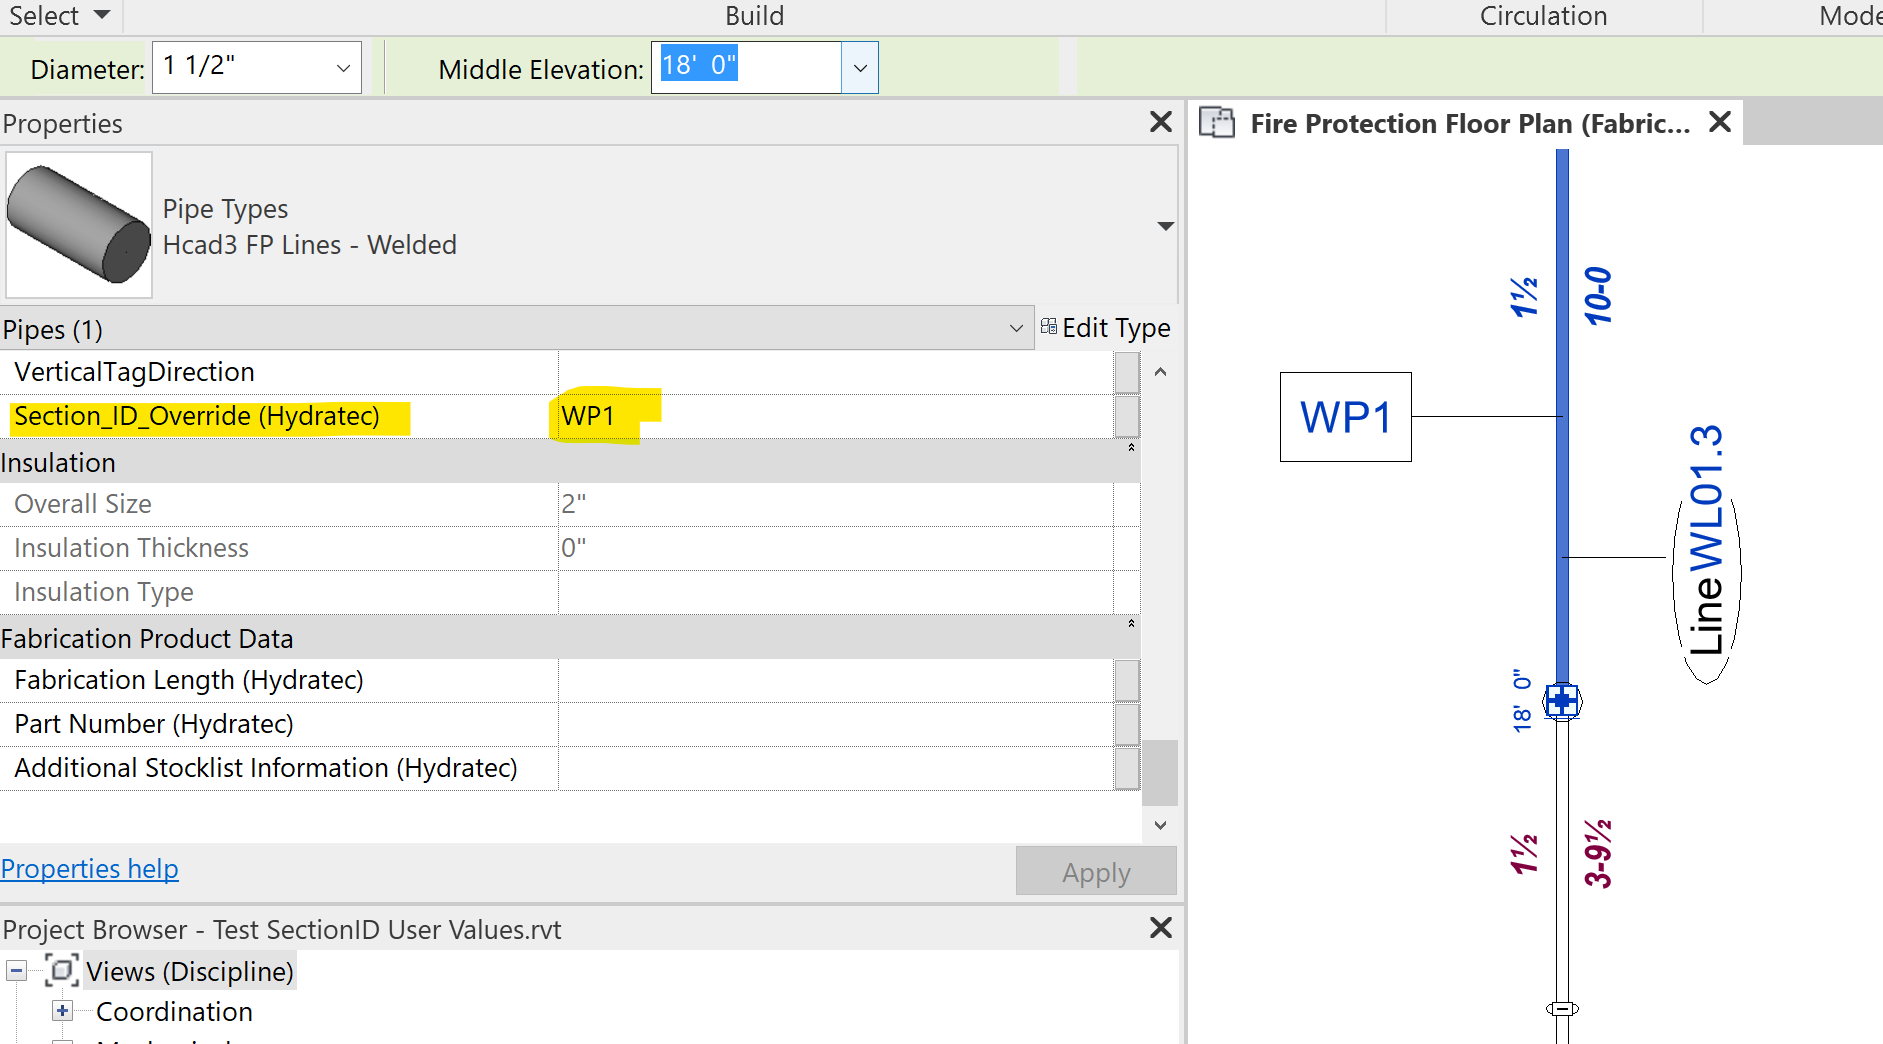
If missing, a new property is added to the pipes along with the current properties. Section_ID_Override (Hydratec)
Getting Started
If you are not confident where AutoLIST will determine section islands (groups of pipes to determine Section IDs), run an AutoLIST using default Section ID settings.
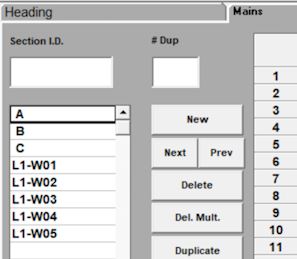
Setting up User Defined Section ID values:
Pick Tag Direction from the HydraLIST ribbon.
Pick User Defined Section ID

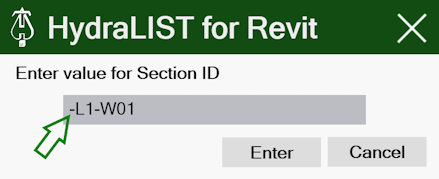
Click Enter.
Select any one pipe of the section island to override.
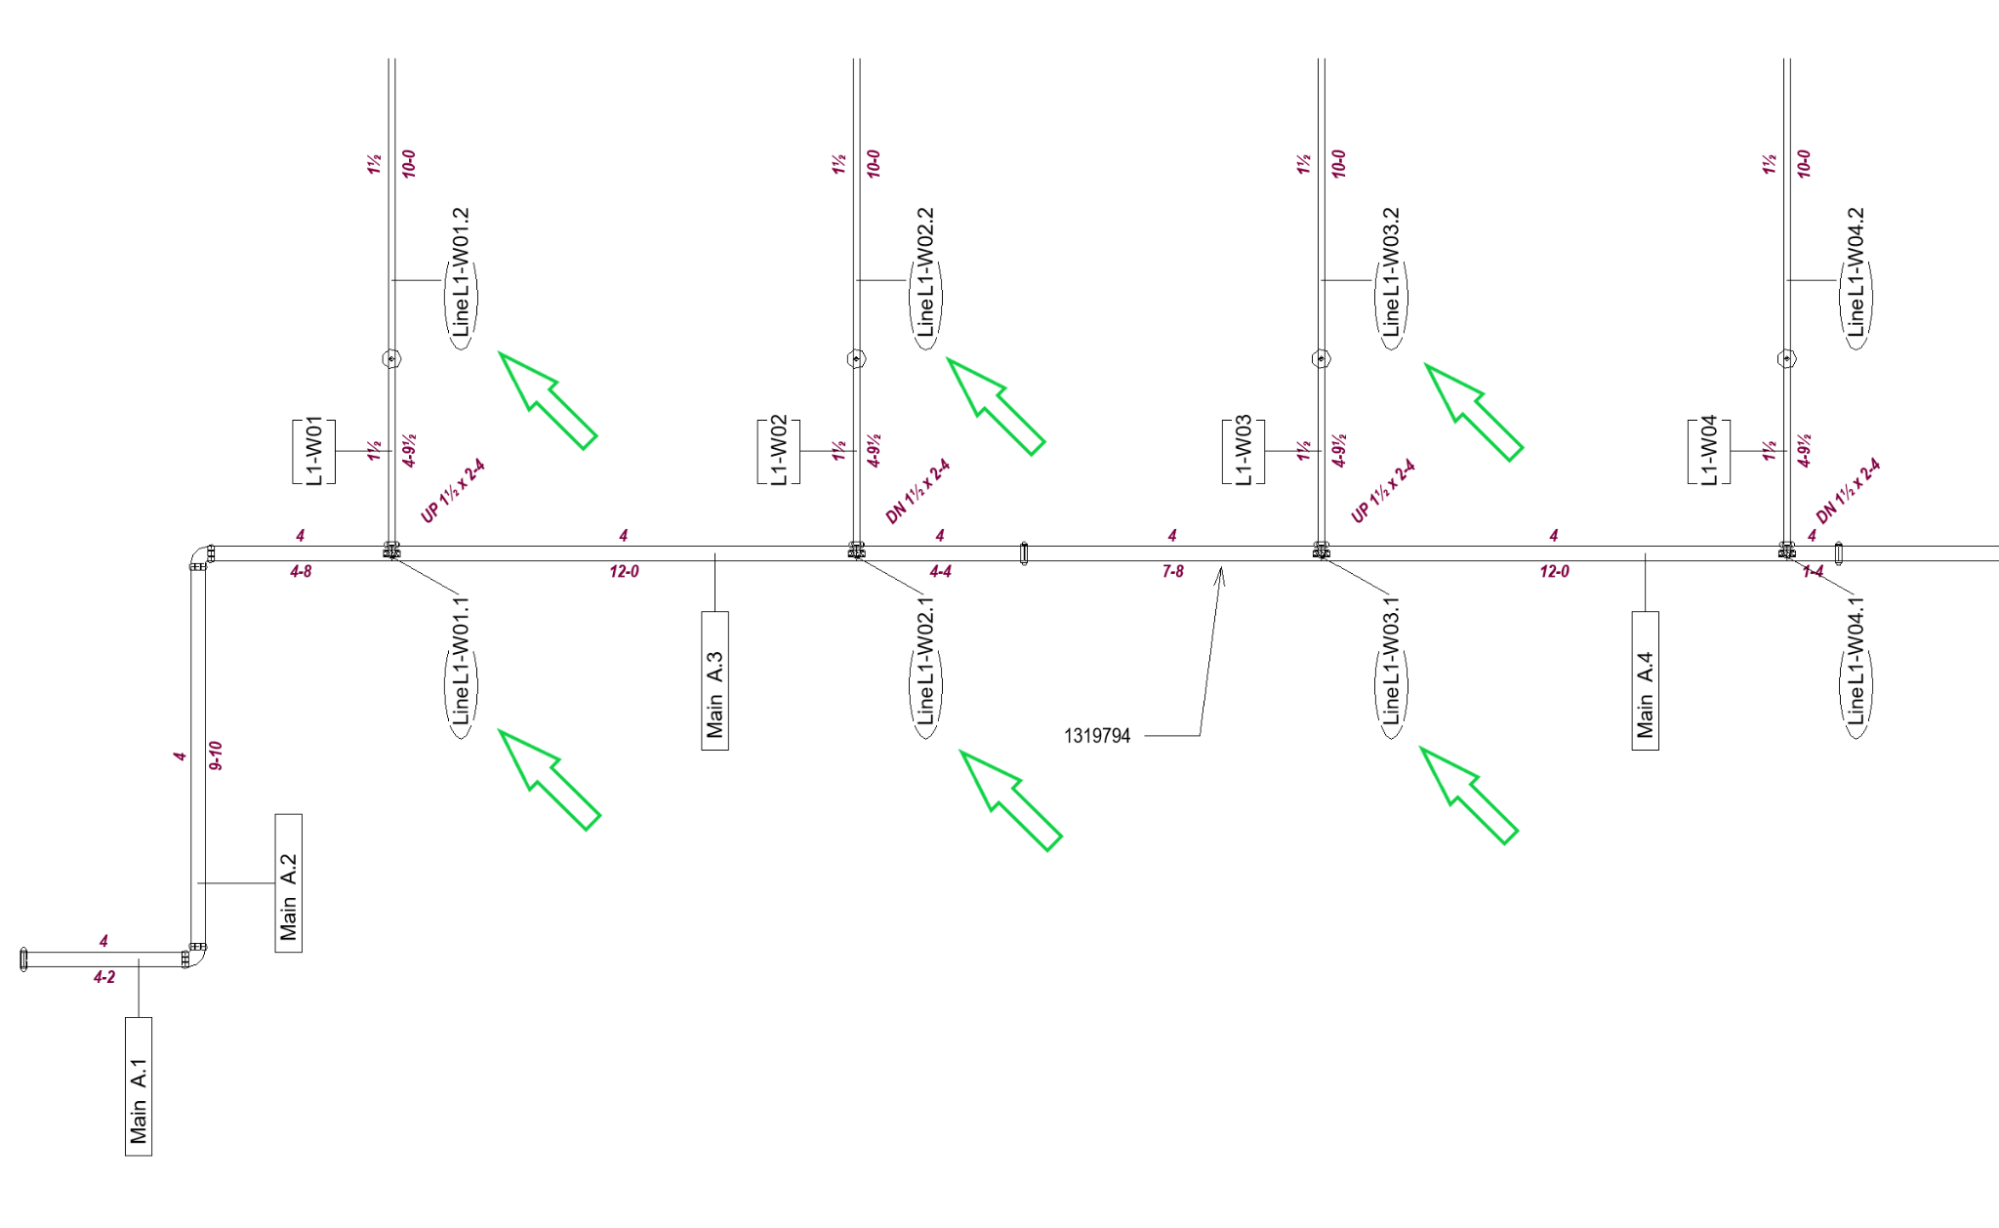
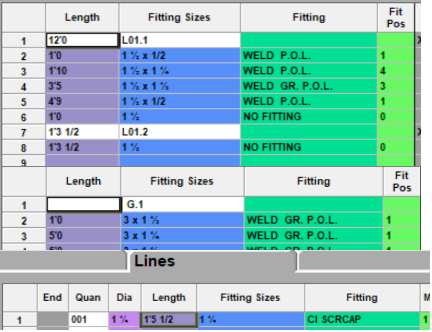
The Override Section ID Tag - HydraCAD tag will be placed at the midpoint of the selected pipe and increment for the next pipe
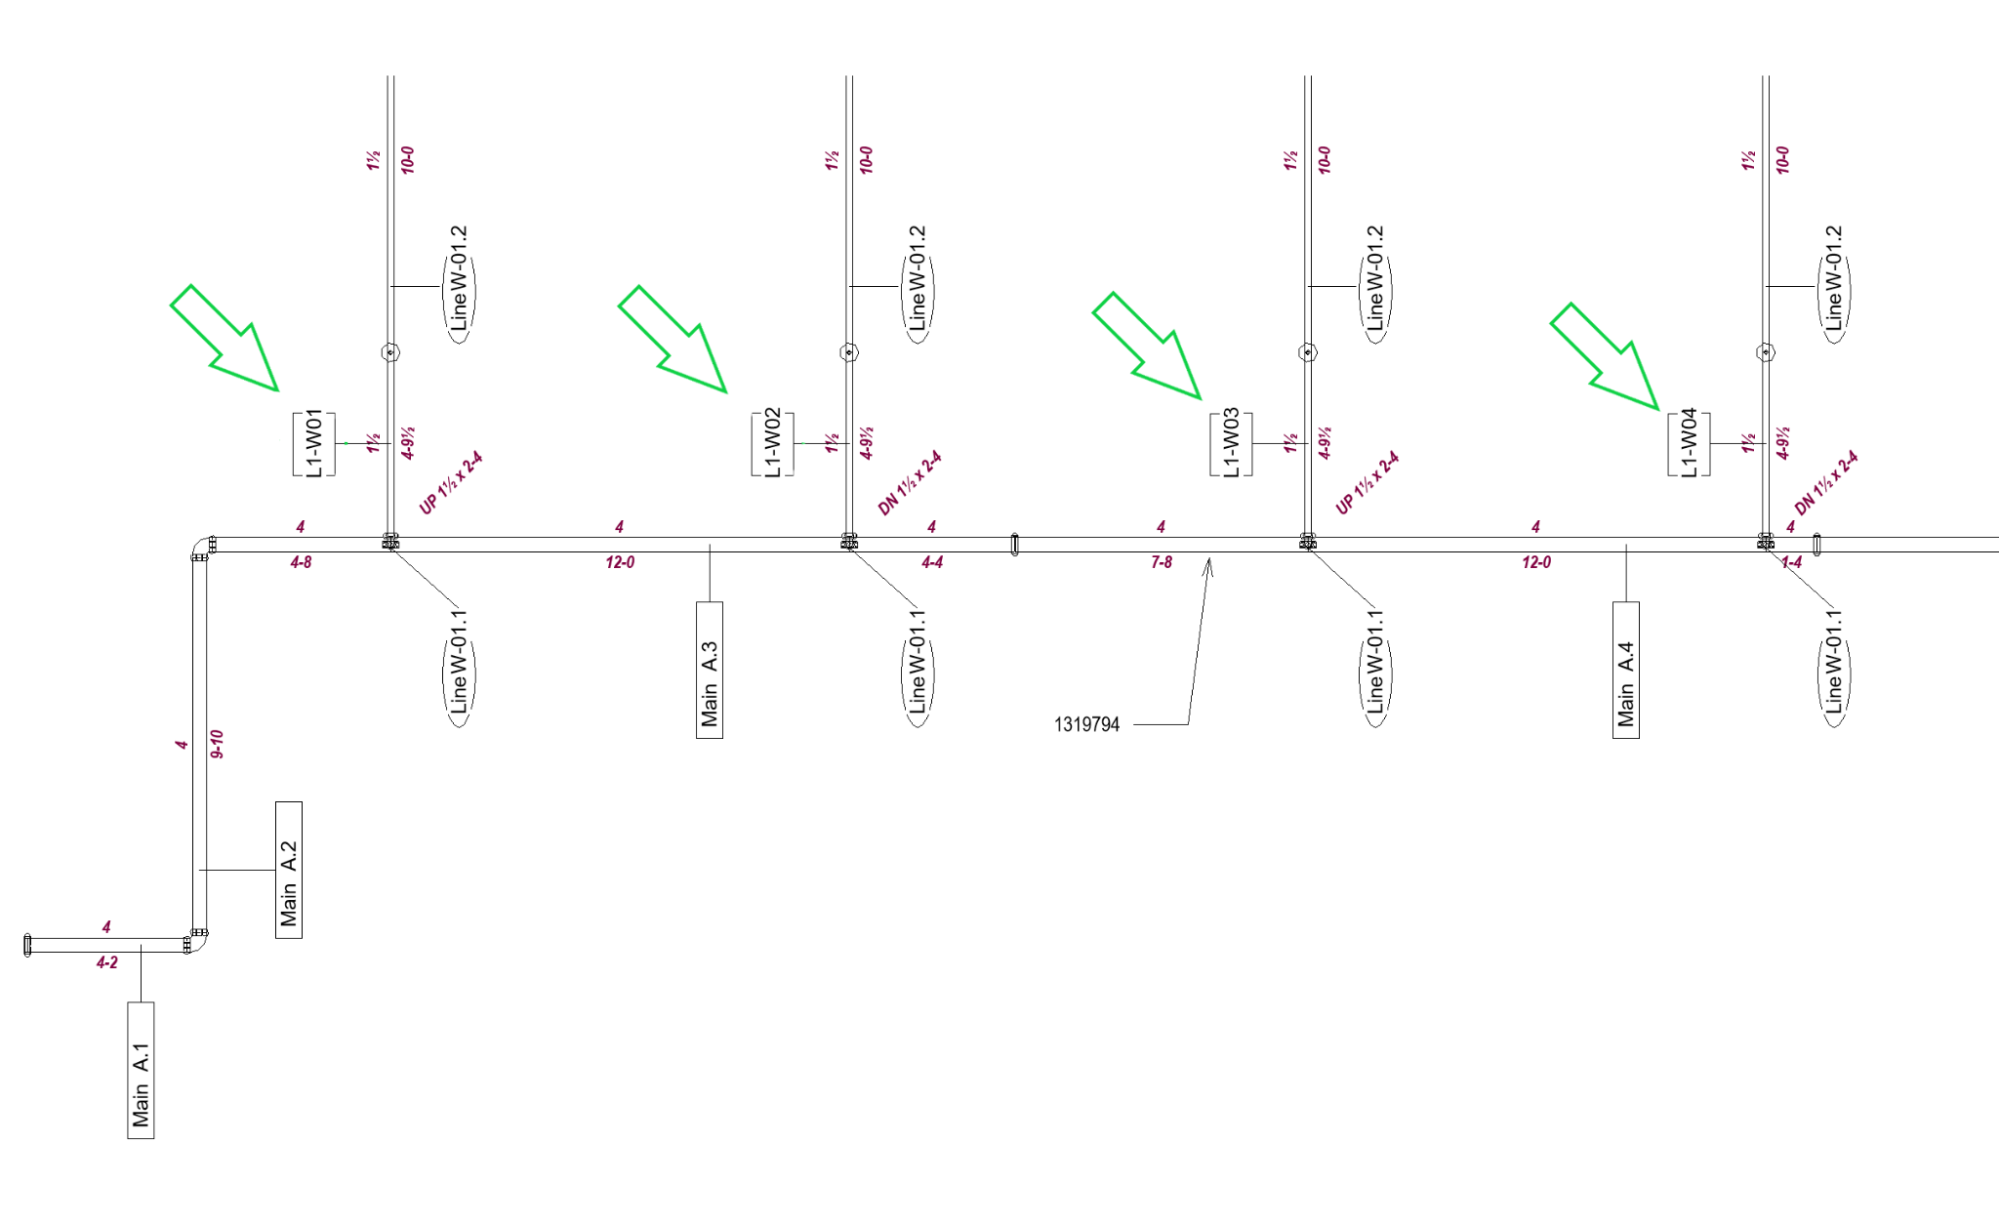
Result after re-running AutoLIST:
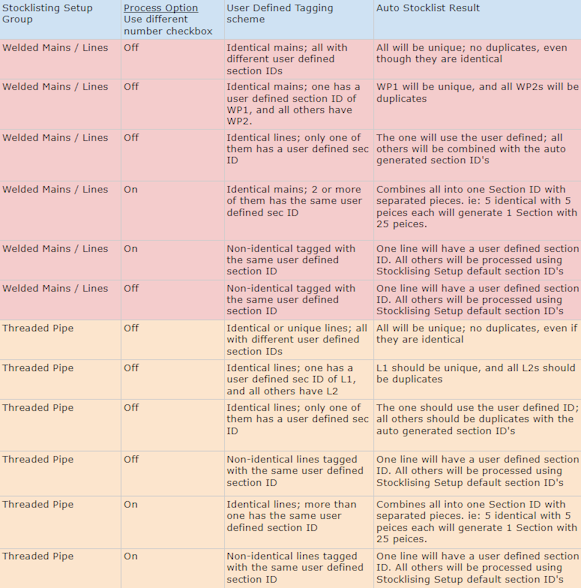
If you know that the sections will be duplicates you will need to tag them with the same section override value.
Add a - to the beginning of the inputted value to prevent it from incrementing.
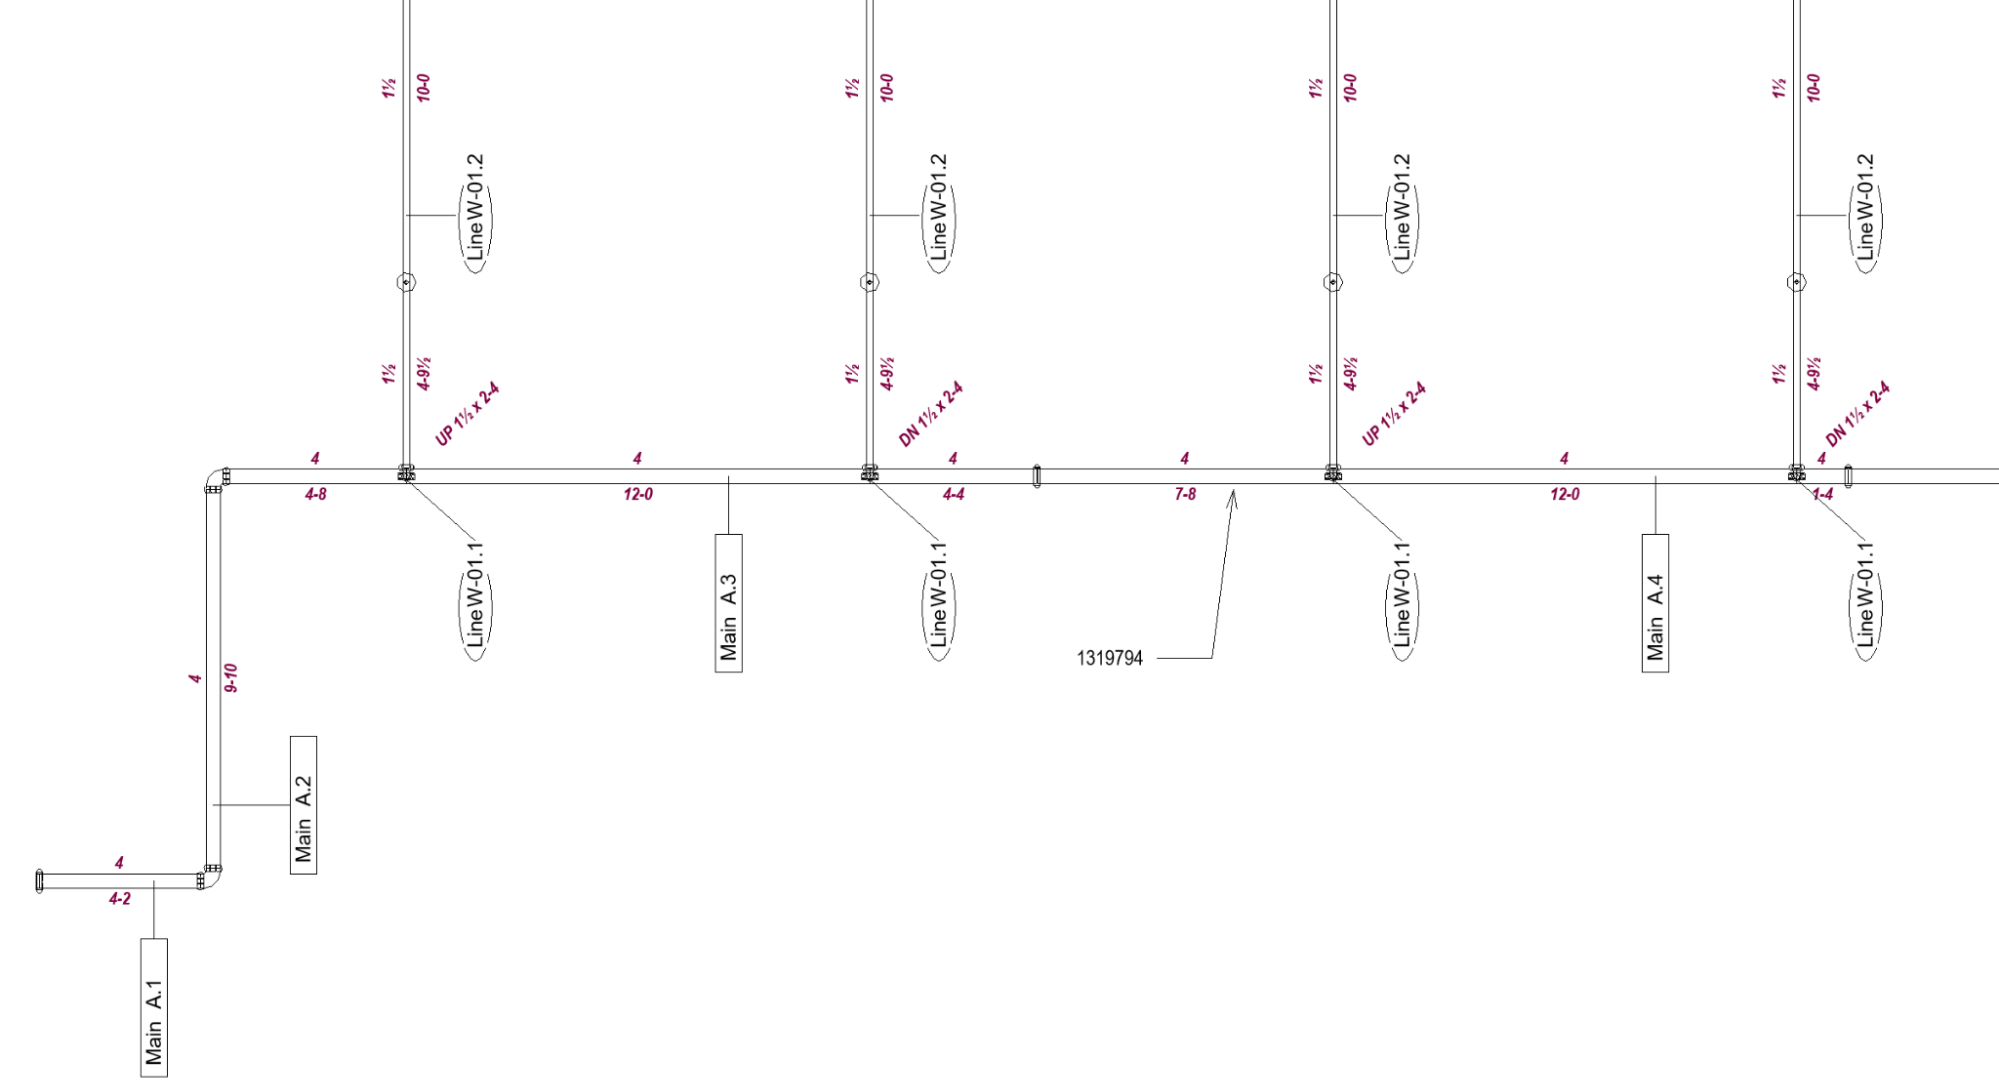
See below for User Defined Tagging scheme results:
Set Section Start
In some circumstances Auto Tagging will place the start of the welded piping section on the opposite end of what may be desired. Pick this button to change that location. The user will be prompted to pick the end of the pipe for the section start.
Special situations:
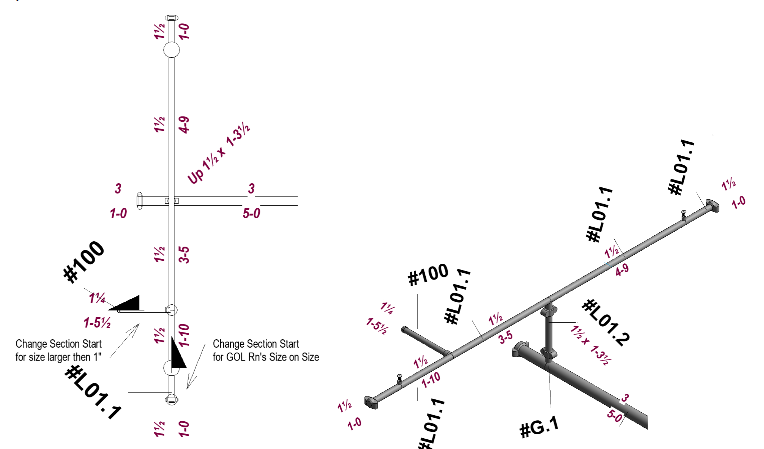
Welded Lines - GOL with Size On Size RN’s - Use Set Section Start on the latter end of the run of pipe, nearest to the cap.
Split Section
If an autotagged section is unusually large, pick the Split Section button. The user will be prompted to pick the end of the pipe for the section split. It is suggested you pick a pipe at an elbow or coupling.
Special situations:
Welded Lines with fitting on fitting connection off main. The user will need to add a Split Section to the welded line coming off a welded main to a fitting with no pipe between them.
Threaded pipe that originates at a Welded Line / Main, that isn't all 1" pipe. At the beginning of the run of threaded pipe, nearest to the welded main, use Split Section
Cancel
Will close the dialog box
Help
Will open this Help document
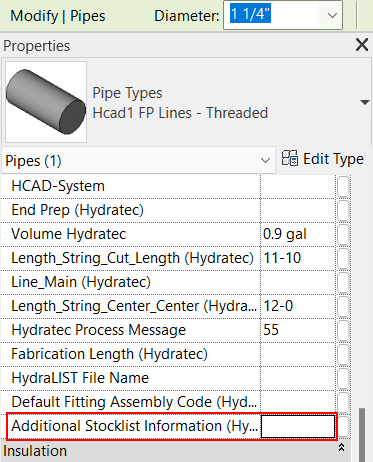
After successfully running the command, info will be added to the property shown above. This should not be manually edited, or set without use of the Tag Setup, Tag Direction or Stop Sign command. Having bad info in the property shown above could causes errors, and cause these commands to not function properly.
Additional Help (Videos and additional resources)
For more help regarding the Tag Direction button: click here
For other help that might be relevant to Tag Direction: click here
HydraCARDs (Troubleshooting)
For HydraCARDs regarding the Tag Direction button: click here
For other relevant HydraCARDs about Tag Direction: click here