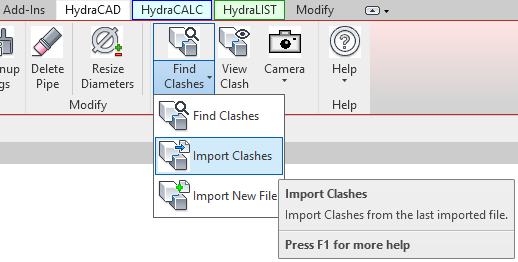
Appearance
Import Clashes
To jump to a video explaining the Import Clashes button, click here.
Import Clashes is used to take the clashes found from a dedicated Clash Detection software (namely, Navisworks) and display them in the Revit project so they can be fixed.
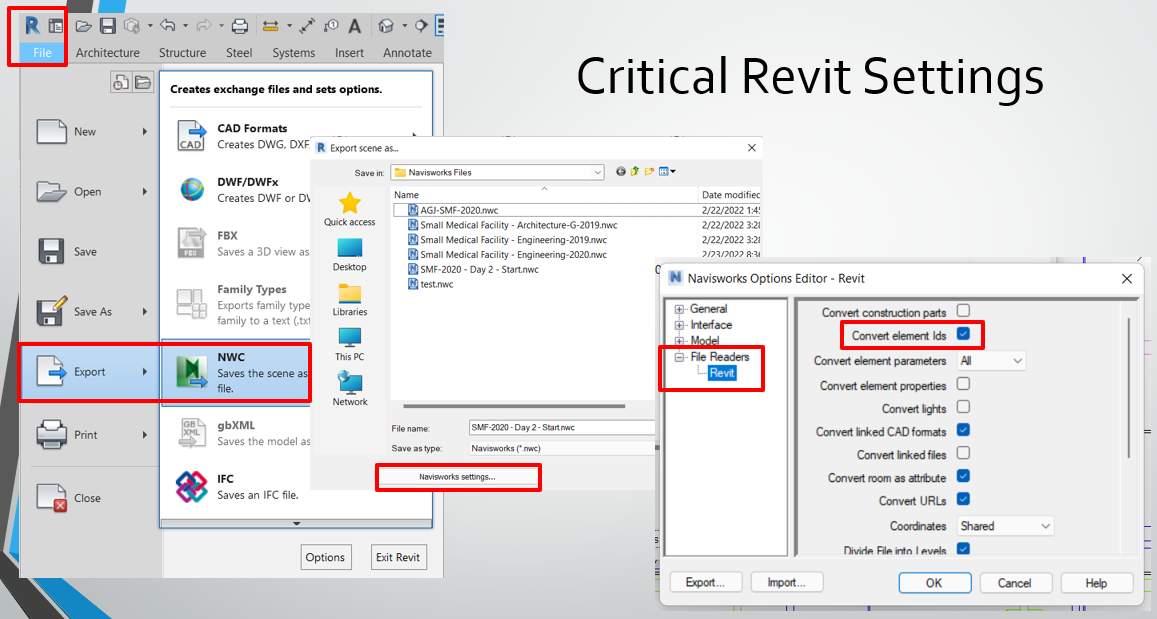
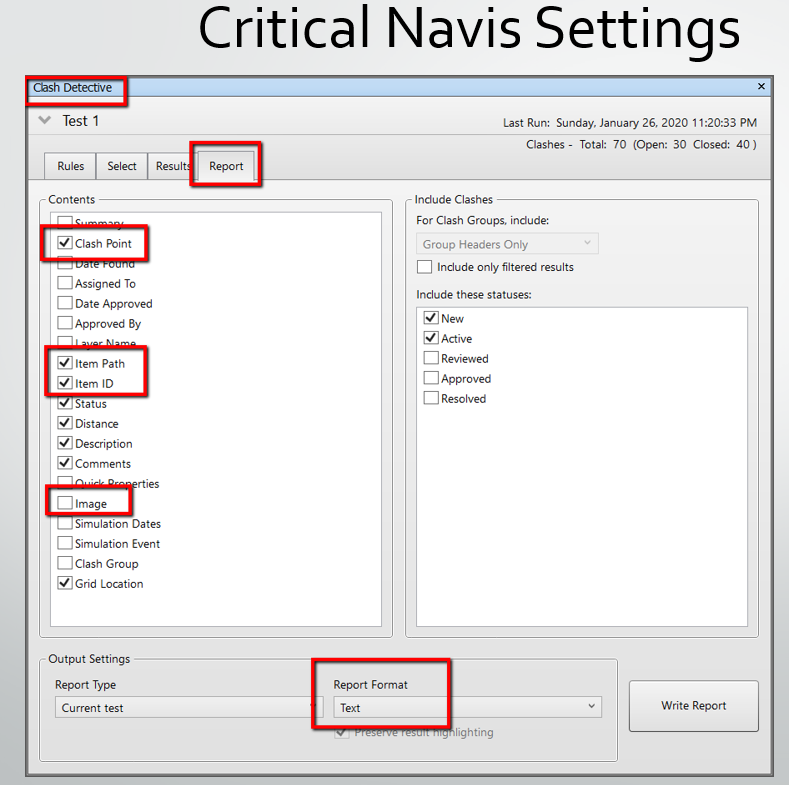
In order to import the clashes from Navisworks into Revit, certain options must be selected when writing the clash report to a file. The report must include the Clash Point, Item Path and Item ID while also NOT including Image as it makes the file too messy. The file format chosen must also be a text (.txt) file.
Summary
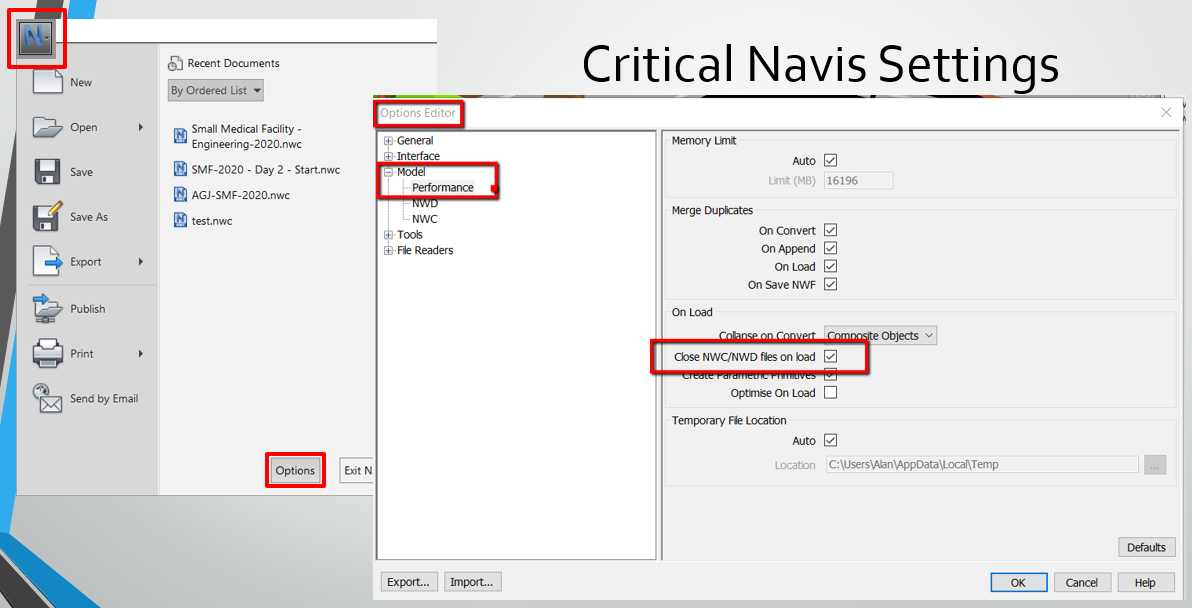
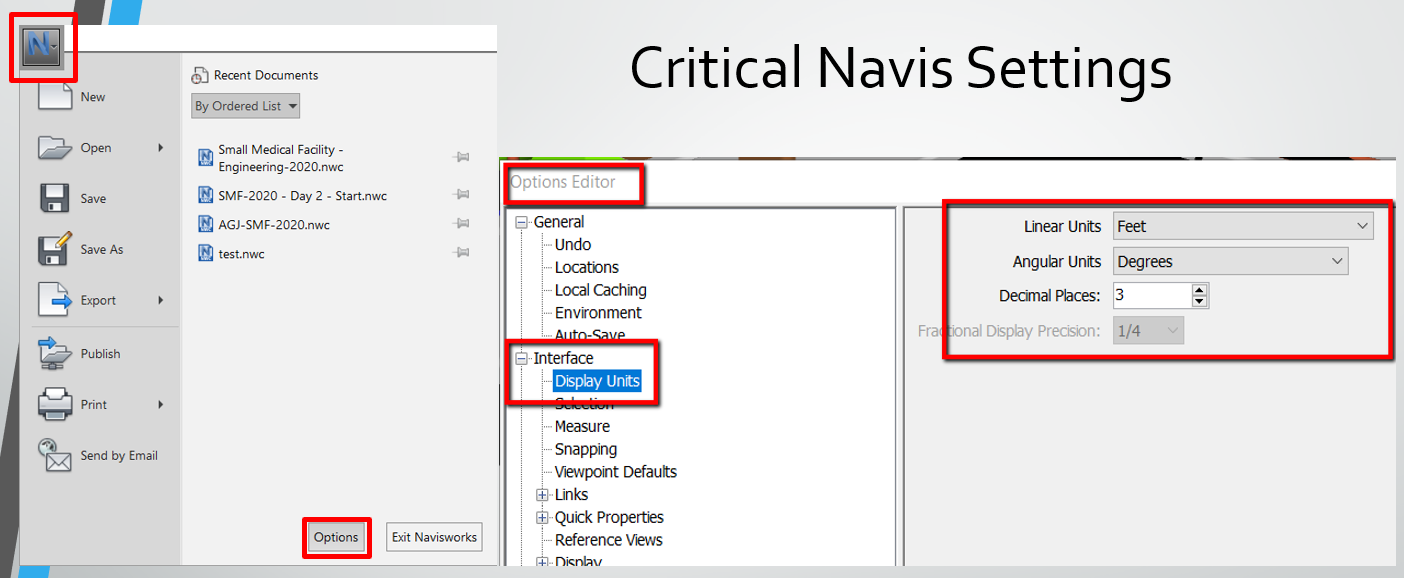
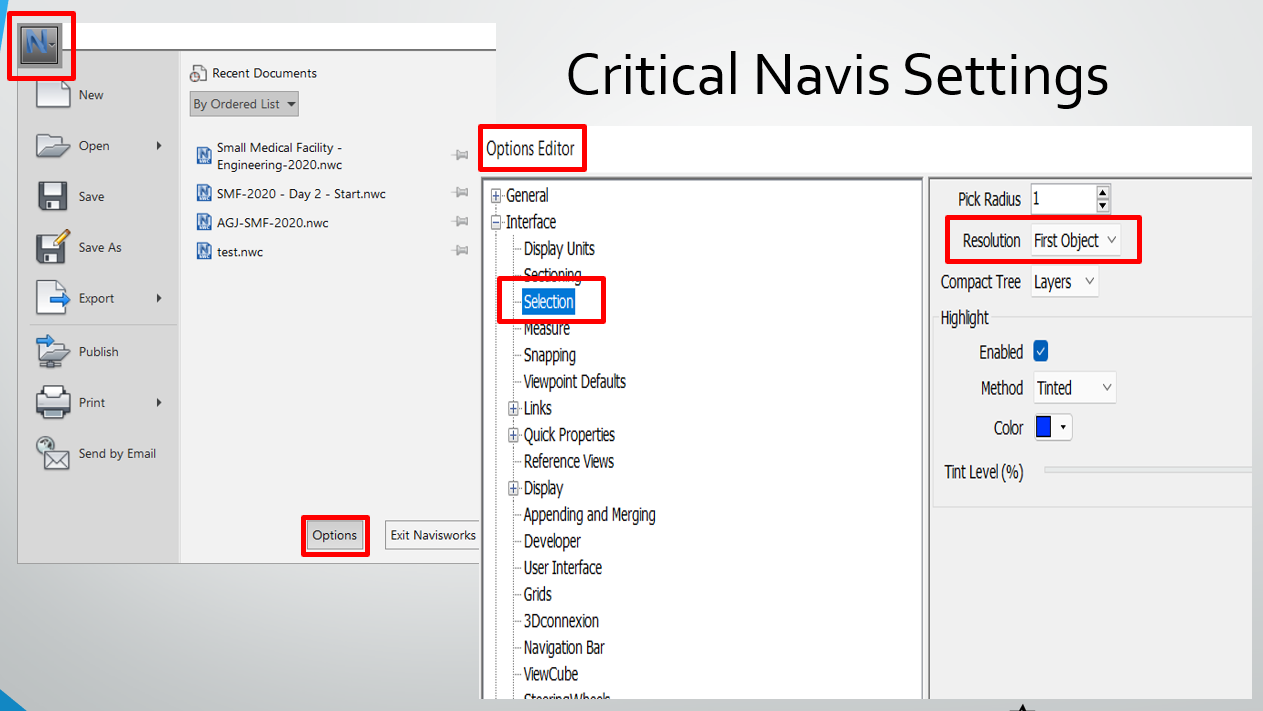
- Some settings must be changed both in Revit and in Navisworks for the Import Clashes and Import New File buttons to function properly.
- An overview of these settings that must be changed is shown here
- In Navisworks, once all Clashes are found via Clash Detective, write the clash report. Detailed instructions on how to do so can be seen in the video here.
- When writing the Clash Report, ensure that the options to include Clash Point, Item Path and Item ID are selected. Set the Report Format to Text.
- Do NOT select Image as it makes the written file too messy.
- These selections being made is shown here
- Do NOT select Image as it makes the written file too messy.
- When writing the Clash Report, ensure that the options to include Clash Point, Item Path and Item ID are selected. Set the Report Format to Text.
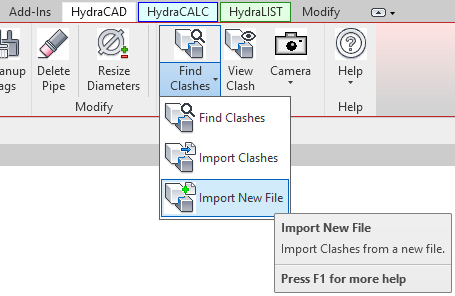
- Once finished in Navisworks or other clash detection software, select the Import New File option under the Find Clashes button's dropdown menu.
- Select the Clash Report text file created earlier.
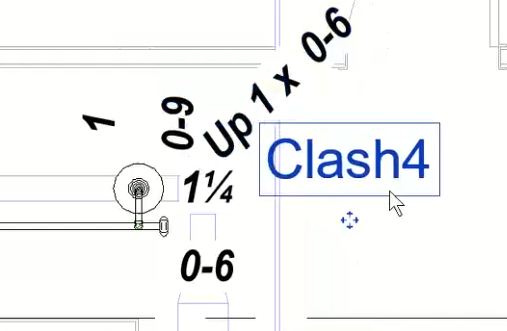
- The clashes discovered by that software are now visible in Revit for troubleshooting, indicated by Clash Bubbles being created in the project.
- After changes are made to the clash report in Revit and Navisworks as they are solved, subsequent updates of the file can be done by clicking Import Clashes on the Find Clashes button's dropdown menu instead of Import New File.
Example video of Import Clashes Button
How Do I Use The Button?
Critical Revit & Navisworks settings
These settings must be changed in order for these tools to function properly. The images below show what needs to be adjusted.
Now, How Do I Use The Button?
Import Clashes is used in tandem with another Clash Detection software to display them in your Revit project. In our example, Import Clashes will be used with Navisworks' Clash Detective. Prior to using import clashes, use Navisworks or your choice of clash detection software to find clashes of the fire protection plan with other architectural or engineering plans. Once all the clashes are found, write the clashes to a Clash Report, which can be seen done in the video here or in the picture below.

Certain options must be selected for the Clash Report to be compatible with Import Clashes. The options: Clash Point, Item Path and Item ID must be selected, which are shown in the image above boxed in Red. Images must NOT be selected, as it will fill the file with needless text that will disrupt the importing process.
Once those items are selected or unselected, the file must be written as a text (.txt) file, which can be seen selected in the picture above, also boxed in red.
After all these options are set correctly, save the file. Open that file in Revit by selecting Import New File from the Find Clashes dropdown menu.
After the import is complete, Clash Bubbles will appear in the project where they are located. Double clicking on the Clash Bubbles will allows the user run the View Clash command, showing the clash in Revit via a 3D View. View Clash can be read about further here.
After changes are made to the clash report in Revit and Navisworks as they are solved, subsequent updates of the file can be done by clicking Import Clashes on the Find Clashes button's dropdown menu instead of Import New File.
Additional Help (Videos and additional resources)
For more help regarding the import clashes button: click here
For other help that might be relevant to import clashes: click here
HydraCARDs (Troubleshooting)
For HydraCARDs regarding the import clashes button: click here
For other relevant HydraCARDs: click here