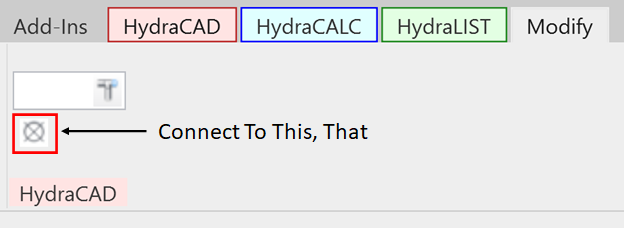
Appearance
Connect To This, That
To jump to a video explaining the Connect To This, That button, click here.
The Connect To This, That command quickly links two fire protection system objects by moving or extending the second object to the first objects nearest open connector. It supports pipes, fittings, and valves, with optional Ctrl click to move entire connected groups while preserving alignment.
Summary
- Activates a tool that connects two system objects by matching their nearest open connectors.
- First selected object stays fixed; second object moves or extends to create the connection.
- Works with pipes, fittings, and valves; pipes may extend when aligned or go crooked if misaligned.
- Holding Ctrl during the second selection moves the entire connected group while preserving orientation.
- Supports continuous “pick–pick” operation until Esc is pressed to exit the command.
- Can be combined effectively with Align To This, That for efficient 3D layout and pump room/riser assembly.
Example video of Connect To This, That Button
How Do I Use The Button?
The Connect To This, That tool in Hydratec for Revit is designed to quickly and accurately connect two system objects—pipes, fittings, valves, or other components—by finding and joining their nearest open connectors. It eliminates guesswork, speeds layout, and prevents alignment errors.
1. Prerequisites (optional)
• Preselect one object by picking nearest the open connector you wish to target • In the description below, this becomes the First Selection
2. Where the Tool Is Located
• The command is found on the Modify ribbon in Revit, represented by a small square icon. • It can also be launched with keyboard shortcut CX, if assigned.
3. How the Command Works
The command functions in a repeating “first pick, second pick” cycle until you press Esc to exit.
First Selection
- Select the object that you want the second object to connect into.
- The tool looks for the nearest open connector on the first object, based on where you clicked.
- This first-picked object stays fixed—it does not move.
Second Selection
- After the first object is chosen, select the object you want to connect to it.
Depending on what the second object is and whether you hold Ctrl, different behaviors occur:
Graphic Summary of various behaviors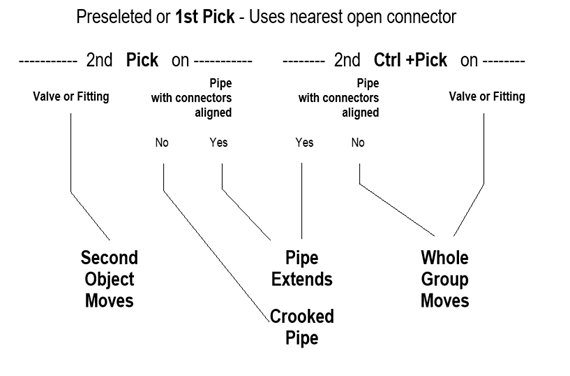
4. Behavior When Selecting the Second Object (No Ctrl Key)
Second object is a fitting or valve
- The fitting/valve moves so its nearest open connector aligns with the first object’s connector.
- Revit determines which pipes lengthen or shorten during the adjustment.
Second object is a pipe
- If the pipe is aligned with the first object’s connector
- The pipe will extend automatically to complete the connection.
- If the pipe is not aligned
- The pipe will attempt to connect by “bending,” often resulting in a crooked pipe that generally requires undoing.
- This is the situation the Ctrl click enhancement is designed to avoid.
- If the pipe is aligned with the first object’s connector
5. Behavior When Using the Ctrl Key (Enhanced Mode)
Holding Ctrl while selecting the second object changes the behavior significantly:
Moving entire connected groups
- The tool moves the entire group of objects connected to the second object, maintaining their orientation and alignment as a rigid assembly.
- This prevents crooked pipes and preserves geometry—especially valuable in pump rooms and riser assemblies.
What happens based on object type
- If the second object is a pipe and is aligned → It still extends (same as standard pick).
- If the pipe is not aligned → Instead of bending, the whole group moves to make a clean connection.
- If the second object is a fitting or valve → That entire connected cluster moves as one rigid system.
6. Continuous Workflow
- The command automatically repeats: after connecting two objects, you may continue selecting first object → second object pairs until you press Esc.
This makes rapid assembly of complex piping geometry possible.
7. When and Why to Use It
- Particularly effective in 3D views, where it’s easier to see directional relationships.
- Ideal for building pump rooms, risers, and any configuration with multiple pipes entering and exiting in multiple directions.
- Often used together with the “Align To This, That” command for faster, cleaner system layout.
8. Error Conditions
- If no valid connector pair is found between the two objects, the tool will show an informative warning and will not create the connection.
- If there is a continuous connected path from the 2nd object back to the 1st object (perhaps in a gridded system) then the user will be notified and not objects will be moved
9. Best Practice Summary
- Use standard picks when alignment is already good or where simple connections are desired.
- Use Ctrl + pick whenever you want to avoid crooked pipes or want a whole assembly to move as a rigid block.
- Always pick first the object that should remain fixed.
- Press Esc to exit when finished.
Additional Help (Videos and additional resources)
For more help regarding the Connect to this, That button: click here
For other help that might be relevant to Connect to this, That: click here
HydraCARDs (Troubleshooting)
For HydraCARDs regarding the connect to this, that button: click here
For other relevant HydraCARDs: click here