Appearance
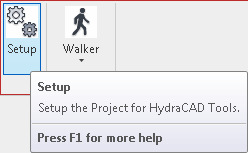
Setup
To jump to a video explaining the Setup button, click here.
Setup is run so that all of the Hydratec for Revit software will have all the details and properties they need to function. There is a Setup button located in each ribbon, for HydraCAD, HydraCALC, and HydraLIST. It must be ran from each of these button to cause all the properties to be created.
To begin and conclude setup, click the button.
Summary
- Click the Setup button and allow it to create properties needed Hydratec software
- Note: this must be ran for each piece of software: HydraCAD, HydraCALC and HydraLIST
- After a waiting for this process to complete, properties will be added to all the needed objects.
- Visible examples of this can be seen here.
Example video of Setup Button
How Do I Use The Button?
Click the button. Upon clicking, all of the necessary properties needed for the program to function will be created - this may take a minute, so if there is a pause that is normal.
A loading circle could appear next to your mouse cursor, this shows that the setup is running.
Upon finishing setup, everything should be in place that is needed to make Hydratec for Revit software work.
Example
An example of exactly what setup does is provided below, showing the properties it can add to an object after running.

Additional Help (Videos and additional resources)
For more help regarding the Setup button: click here
For other help that might be relevant to Setup: click here
HydraCARDs (Troubleshooting)
For HydraCARDs regarding the setup button: click here
For other relevant HydraCARDs: click here