Appearance
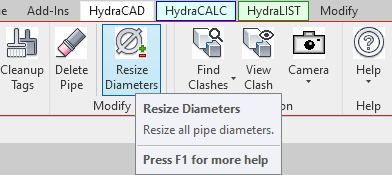
Resize Diameters
To jump to a video explaining the resize diameter button, click here.
Resize Diameters is used to resize the diameters of pipe in the fire protection plan exactly according to the user's specifications. The button itself is mainly used for resizing threaded pipe, and there is an alternate method shown here that is more useful when resizing welded pipe.
Prior to using Resize Diameters, the pipes which need to be resized must be selected. This can be done manually or with the help of the System Walker, detailed here.
Summary
Select pipe prior to clicking the Resize Diameters button, either manually or via the Walker button.
- Click the Resize Diameters button
- You will be met with a setup pipe sizes dialog box, shown here.
- If the Continue options is grayed out, the currently selected family in the Pipe Types drop down menu must be further defined.
- This can be done by click the button Load Defaults, or by entering information manually if the defaults are not what is wanted.
- Once all the data is entered as needed, click Apply. The Continue button will now be selectable.
- If the Continue options is grayed out, the currently selected family in the Pipe Types drop down menu must be further defined.
- Press continue to proceed to the Pipe Schedule window.
- Here you can edit the sizes of lines, mains, undergrounds, etc.
- After making sizing changes, check the 'Apply Info on OK' check boxes, so the changes will be counted upon finishing.
- Here you can edit the sizes of lines, mains, undergrounds, etc.
- After making all the changes, click Ok.
- This button is mostly used to resize the diameters of threaded pipe, for more information on resizing welded pipe, click here.
Video Example of Resize Diameters Button
How Do I Use The Button?
Resizing Threaded Pipe
Before selecting the Resize Diameters button, there must be pipe selected that is to be resized. This can be done either by manual selection of the pipe that needs to be changed, or via the system walker - which will get either all the pipe in the project, or stop at a certain point which the user can define. This process can be read about in more detail here.
Once there is pipe selected, resizing can be started by selecting the Resize Diameters button.
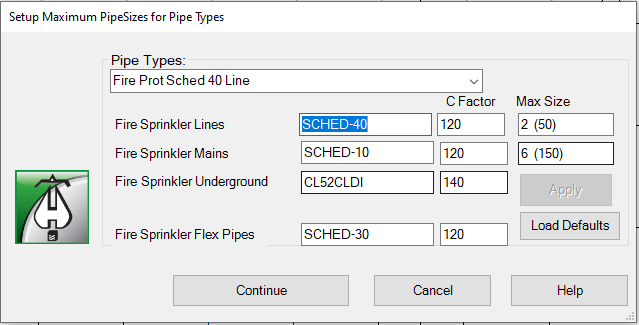
Before sizing changes can be made, the pipe families need certain information before moving forward. If the Continue button on the bottom left is grayed out, information must be provided for the maximum diameter sizes, HydraCALC pipe types, and C factors before continuing.
This can be done manually by entering specific information that you want, or default information can be used by clicking the Load Defaults button. Once all the information required is entered, clicking apply will make the continue button selectable again.
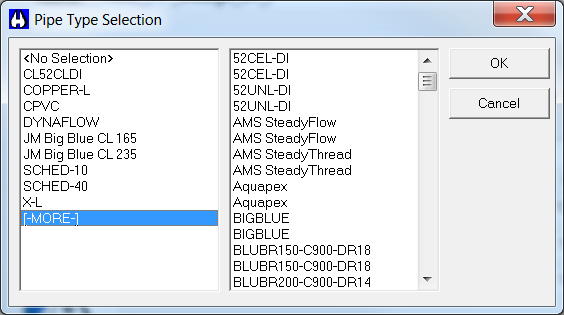
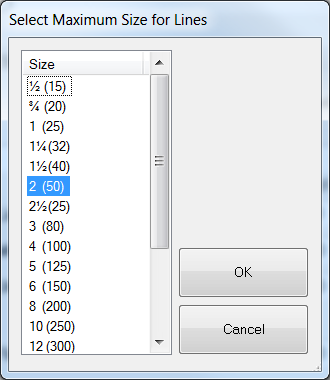
Separate windows can be opened when adjusting the pipe type selection or maximum sizes, by double clicking. This will offer a list of pipe types or sizes, guaranteeing information will be entered correctly and without spelling errors, etc.
After clicking Continue, the pipe schedule dialog box will open.
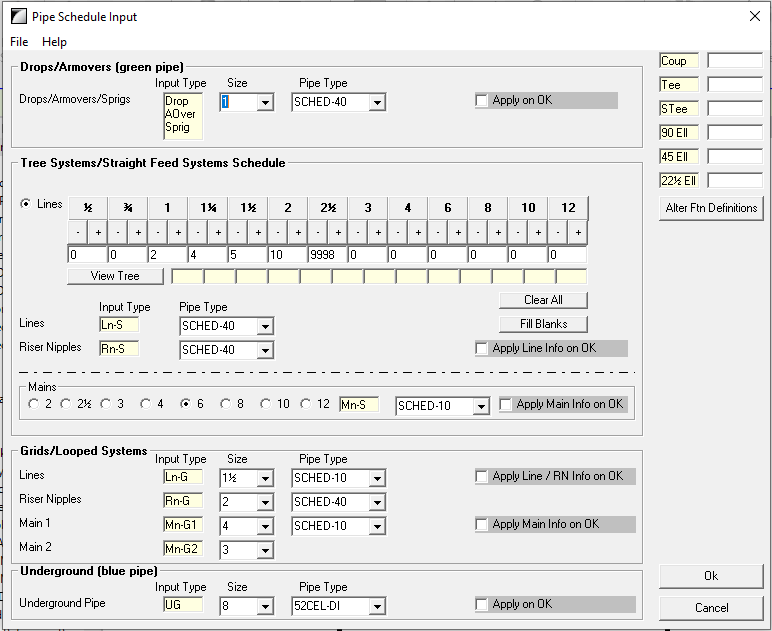
Here, the sizes of Mains, Lines, Undergrounds, etc, can be changed.
For an example, the sizes of the Mains will be changed. This is done by selecting the radio button of the size they are wanted to be changed to, as shown below.
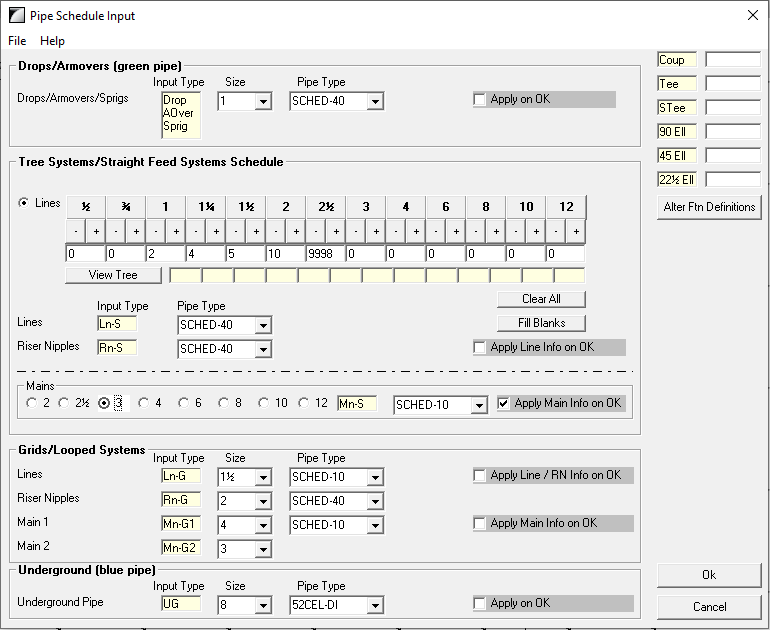
After making changes to the type of pipe, in this example the mains, ensure the Apply Info on Ok check box is selected. This is required so that changes can be made to the project after leaving the pipe scheduler.
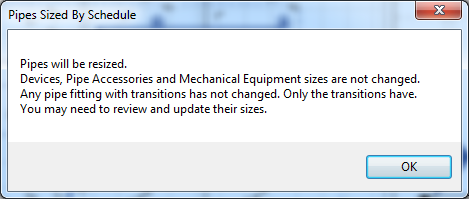
Once all changes are made, clicking Ok will save them. There will be a warning saying that the pipes will be resized, indicating what will be effected.
Resizing Welded Pipe
To resize welded pipe, this can be done easily from editing the Pipe Size and Type Schedule. This can be accessed from the toolbox, located under the Help button on the far right side of the HydraCAD or HydraCALC ribbon, shown below.

Click the sub-option titled Import from the latest Toolbox and this window should open:
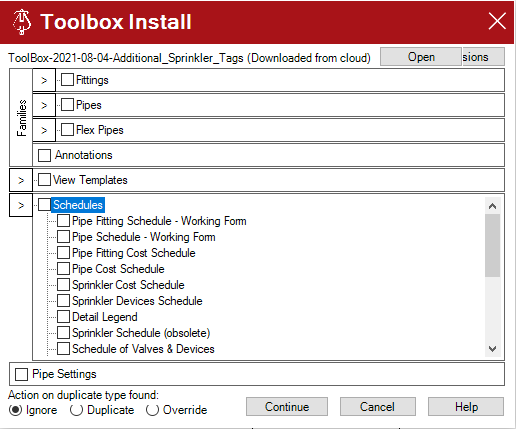
Navigate to the Schedules section and expand it via clicking the > icon. Scroll down slightly until the selectable option Pipe Size & Type Schedule is in view. Check that, and select Continue.
A new window should open up beside the currently active view, displaying the Pipe Size & Type Schedule.
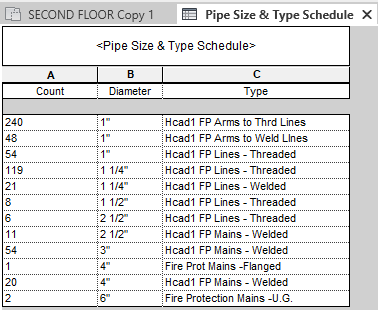
From here, the count, diameter, and type of pipes can be changed by clicking on the dropdown of that cell and selecting a new option, or by typing in the new value.
Additional Help (Videos and additional resources)
For more help regarding the resize diameters button: click here
For other help that might be relevant to resize diameters: click here
HydraCARDs (Troubleshooting)
For HydraCARDs regarding the resize diameters button: click here
For other relevant HydraCARDs: click here