Appearance
Auto Stocklist
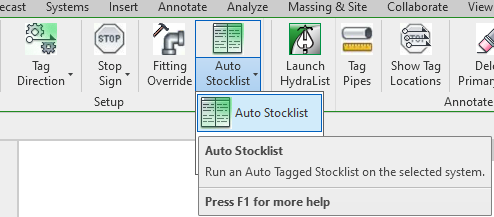
To jump to a video explaining the Auto Stocklist button, click here.
Auto Stocklist is a new feature introduced in HydraLIST for Revit's 10.0.009 update. This update and this tool makes the prerequisites needed to be done in the project in order to create the stocklist much more streamlined. All Auto Stocklist requires is using the Walker command to select the pipes, fitting, etc that need to be listed, and complete the mapping shown in the dialog box. This process is shown in the video here
Summary
Example video of Auto Stocklist Button
How Do I Use The Button?
Picking will start the Auto Stocklist process and open the Stocklisting Setup dialog box.
Setup Options
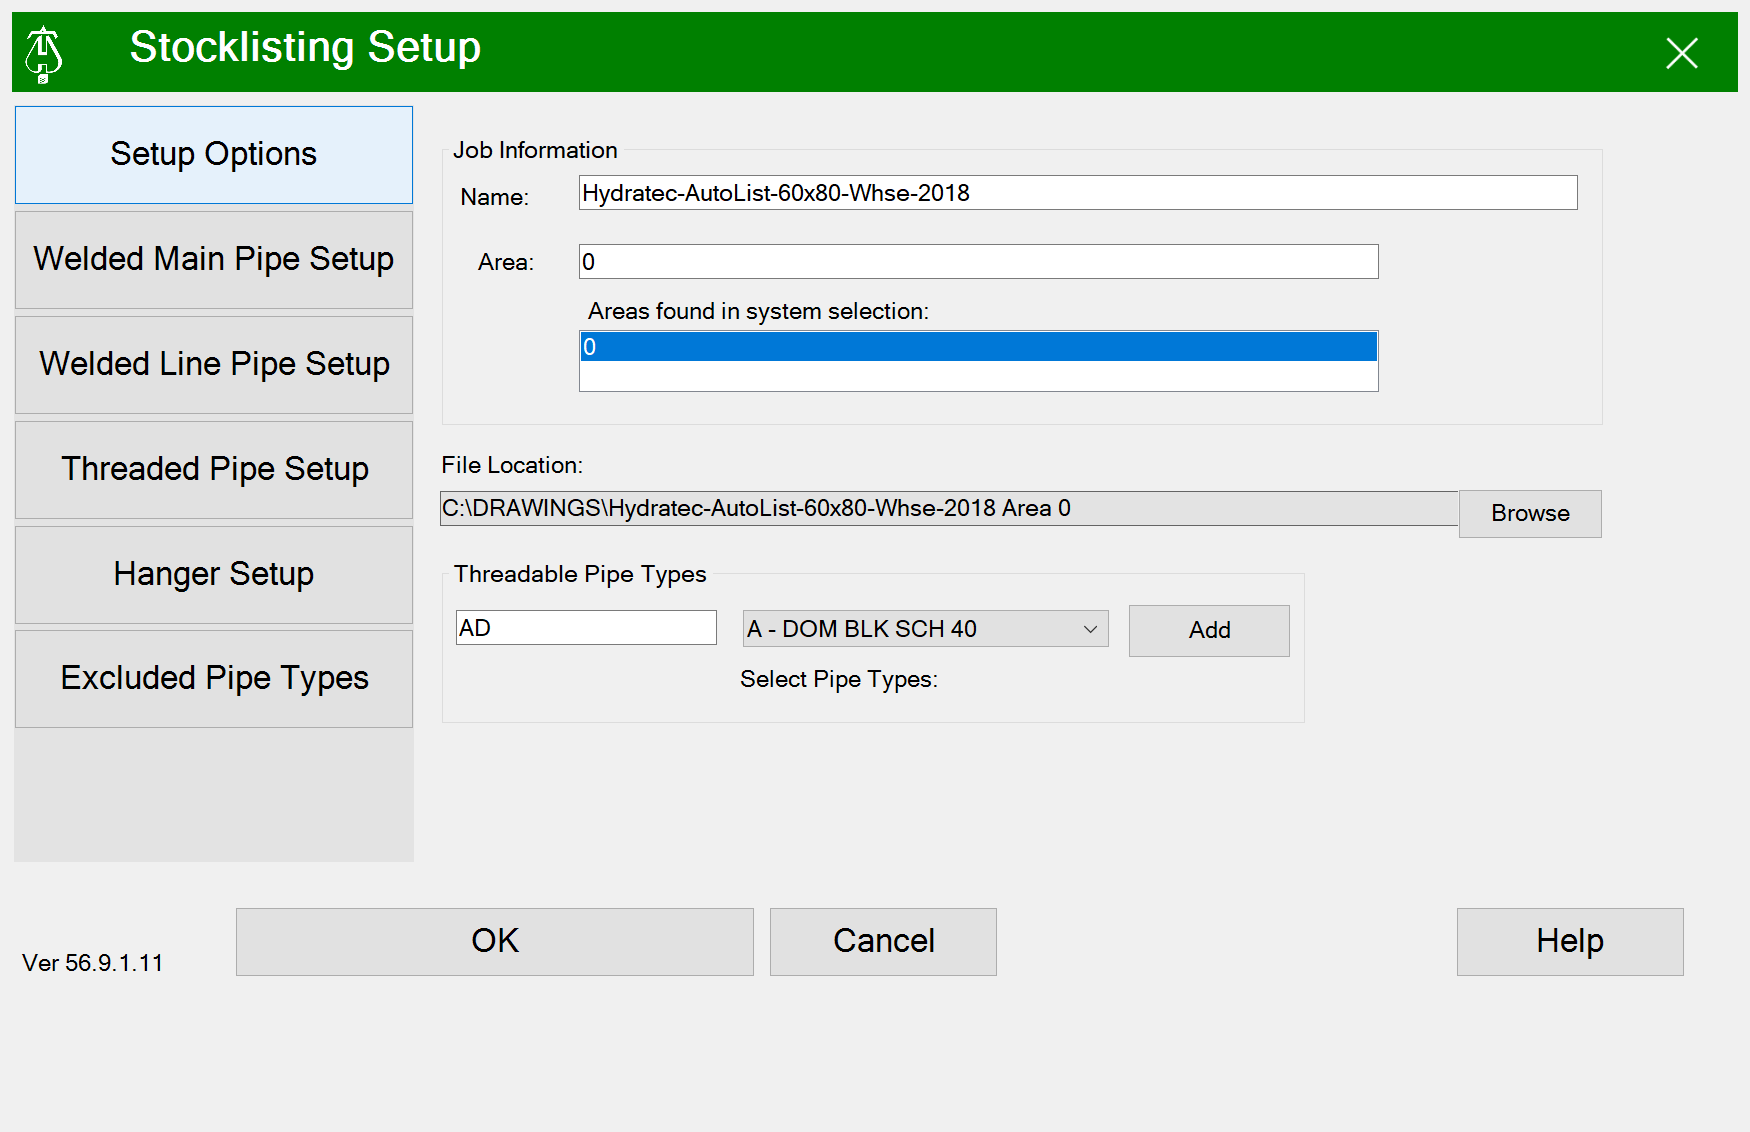
Job Information:
Name:
- Name for the stocklist file. Defaults to the name of the model file.
Area
- Description for area being stocklisted.
Areas found in system selection:
- List of any area names associated with previous stocklists that are found in the selected system pipes. The Area will default to the first one in this list.
File Location:
- Directory path where the stocklist will be saved. Upon successful processing this location gets saved with the Revit model and will be used in subsequent stocklisting until changed by using the Browse button. A warning dialog box will display if this directory cannot be reached by the local computer.
Threadable Pipe Types:
- HydraLIST pipe types that are threadable. You can add a pipe type by selecting one from the pulldown list and picking the Add button.
Welded Main Pipe Setup, Welded Line Pipe Setup, Threaded Pipe Setup
These dialogs have similar entries for processing the stocklist.
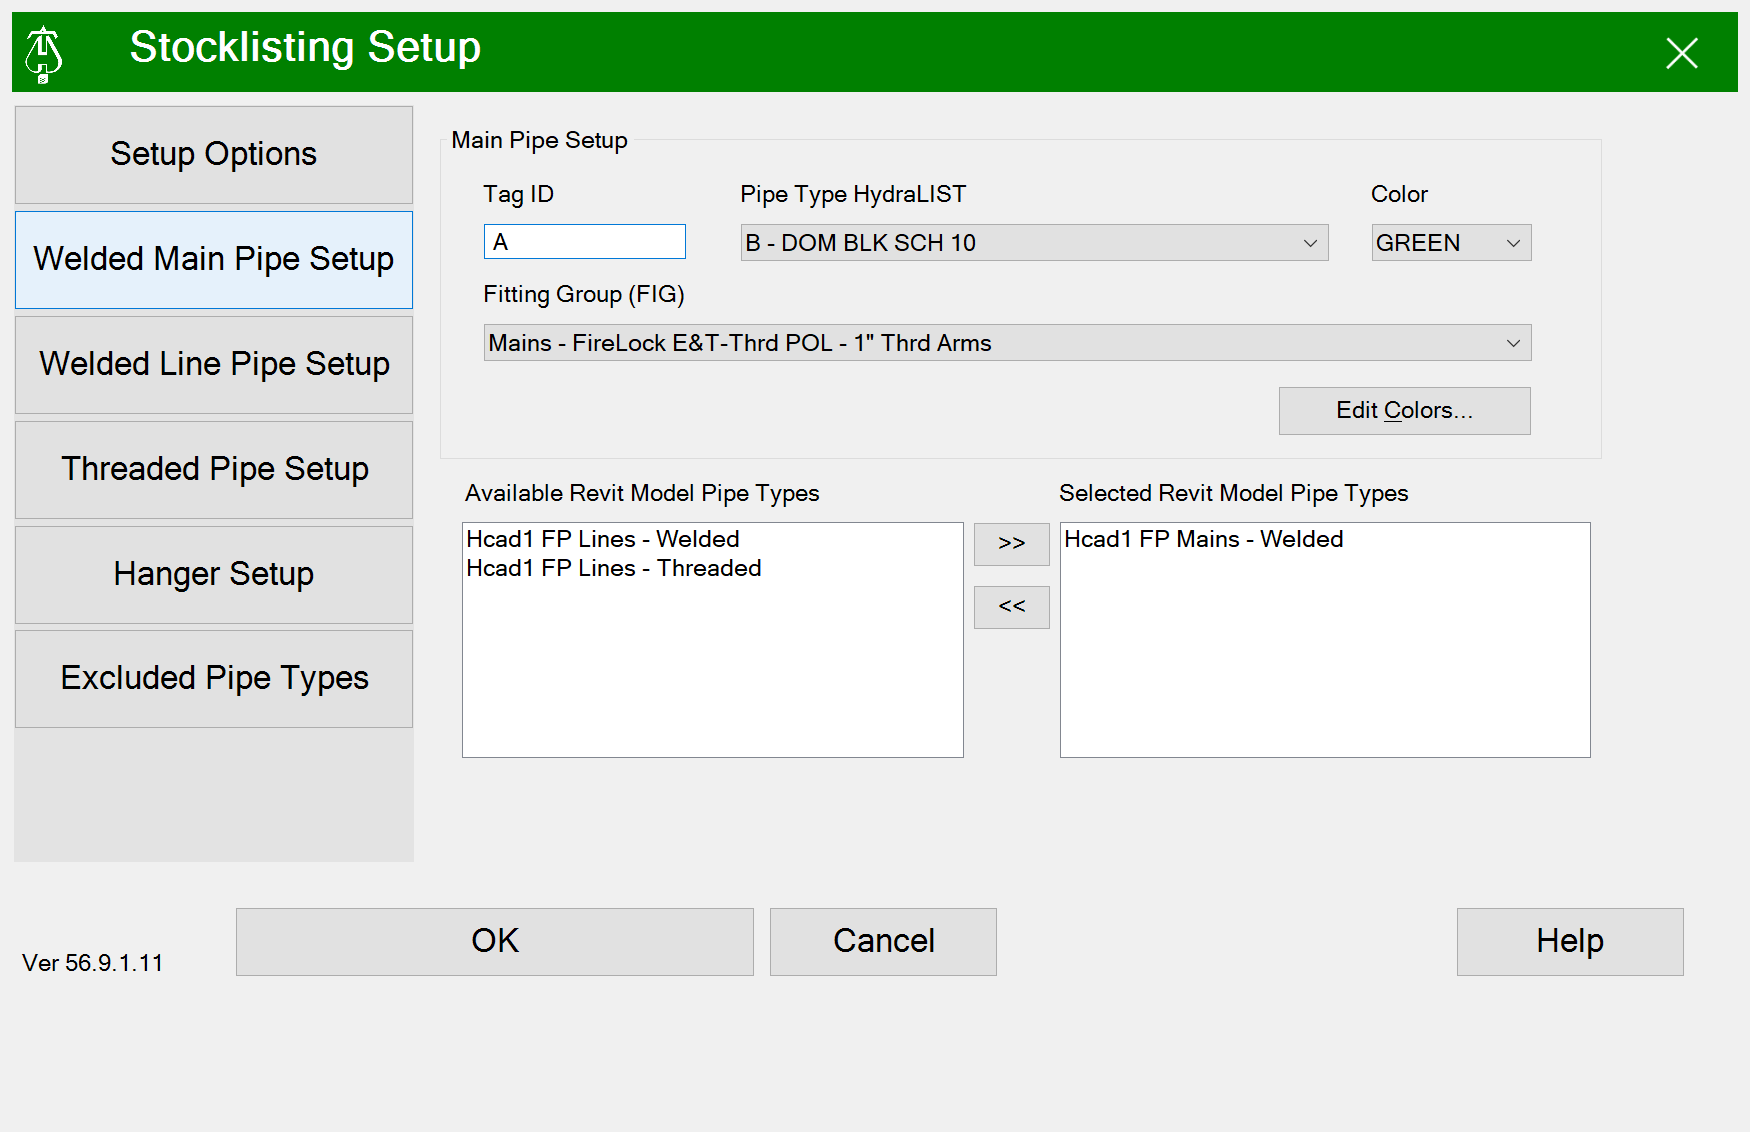
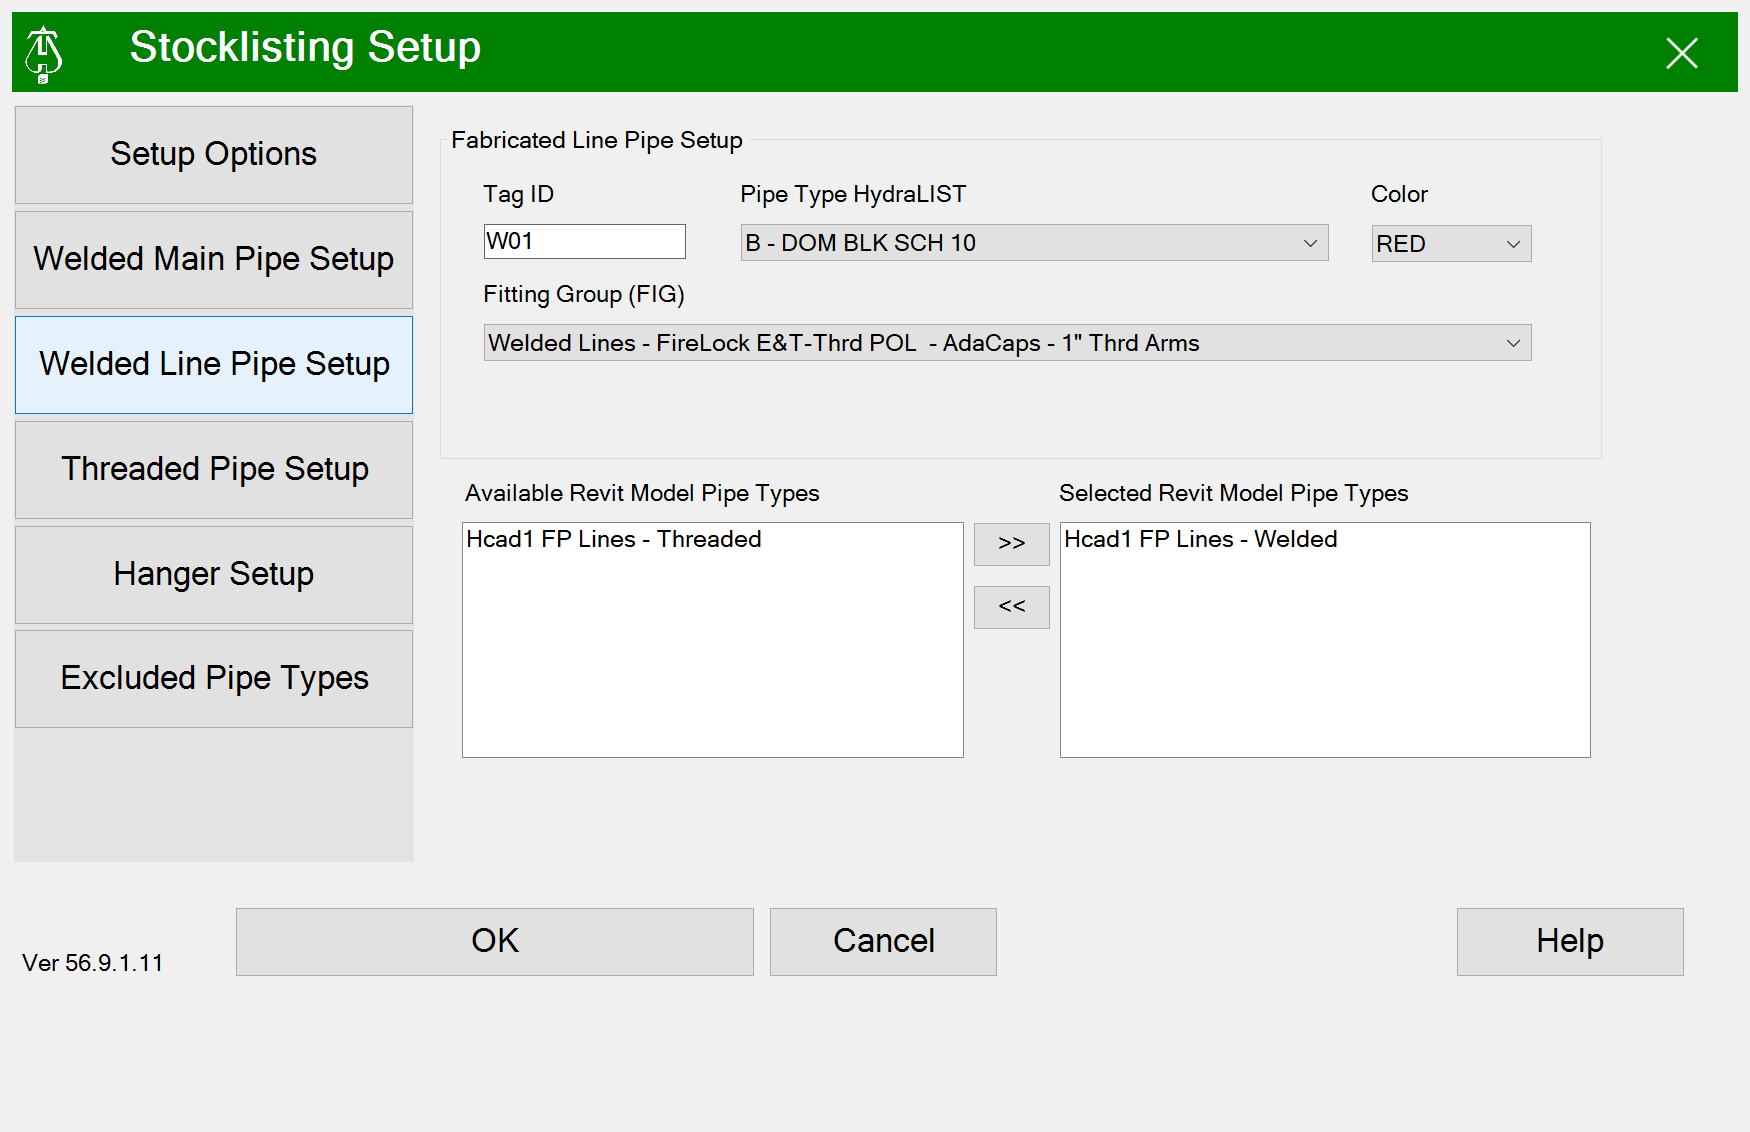
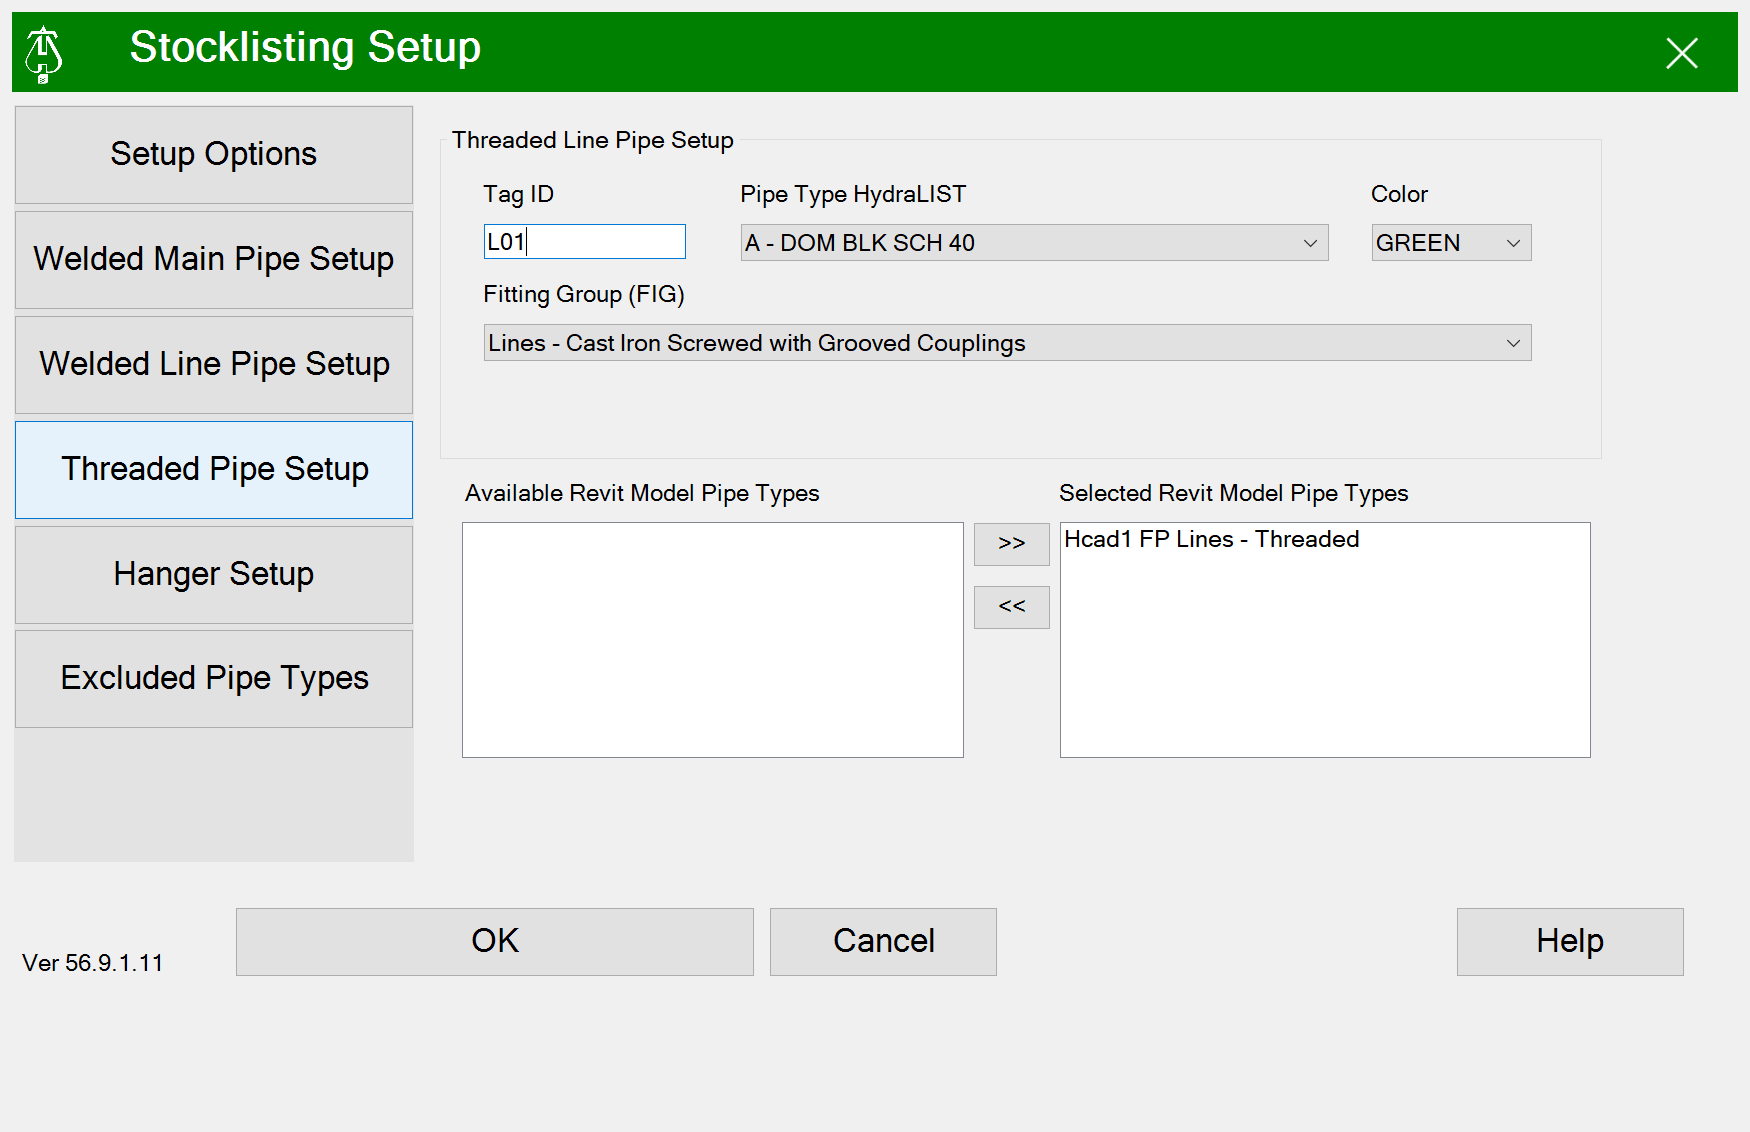
Tag ID:
Enter starting label for this fabrication group. The id’s will automatically increment to the next letter or number using the last character in the tag label.
NOTE: How AutoList Reads Tags:
- AutoList separates 'Welded' tags and 'Threaded' tags into distinct groups
- Within each group, tags are sorted alphanumerically
- Numbered tags (0, 1, 2, etc.) are listed before lettered tags (A, B, C, etc.)
- Preventing 0-0 Cut-Lengths: The way tags are structured influences the AutoList output
- Tagging Convention for Mains and Branch Lines: It's important not to tag welded mains with letters (A, B, C) and welded branch lines with numbers (1, 2, 3) directly
- If you need to use these IDs, put a space in front of your Main ID (e.g., Main A should be tagged as Main _A). This ensures proper sorting, with numbered tags appearing before lettered tags
- Duplicate Listings: Placing two listing tags pointed at each other will result in the same pipe being listed twice from opposite directions. A stop sign between them is necessary to avoid this duplication, except when using GOL RNs + Adacaps
Pipe Type HydraLIST:
- Select HydraLIST pipe type for fabrication group from the pulldown list.
Color:
- Select color for HydraLIST bundling for this fabrication group.
Fitting Group (FIG): Select from pulldown the HydraLIST fabrication instructions for processing this group.
Selecting Revit Model Pipe Types to be processed for this fabrication group.

Pick one or multiple Revit Model Pipe Types in the left list and pick the center direction indicator to move it to the right list.


You can move Revit Model Pipe Types from the right to left side by selecting it and picking the << direction indicator.
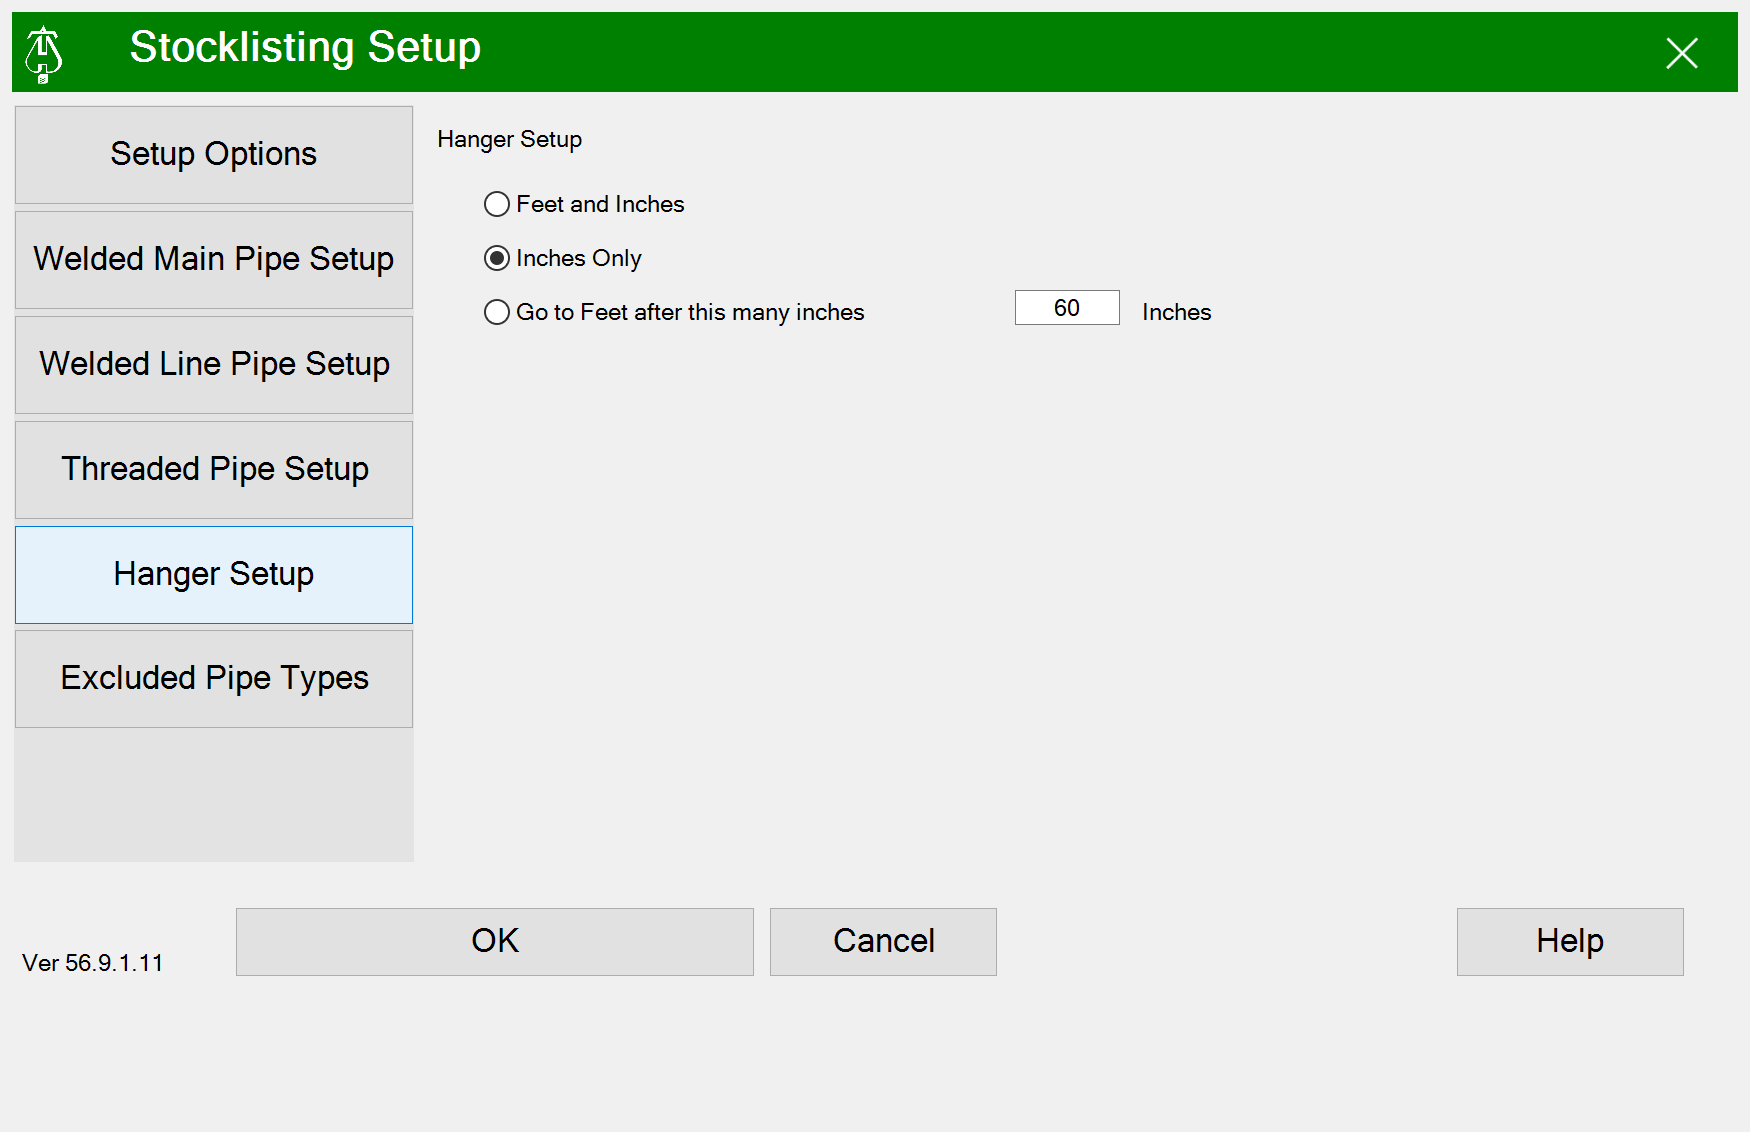
Hanger Setup
Click the radio buttons to set the format of the hanger rod length s in HydraLIST
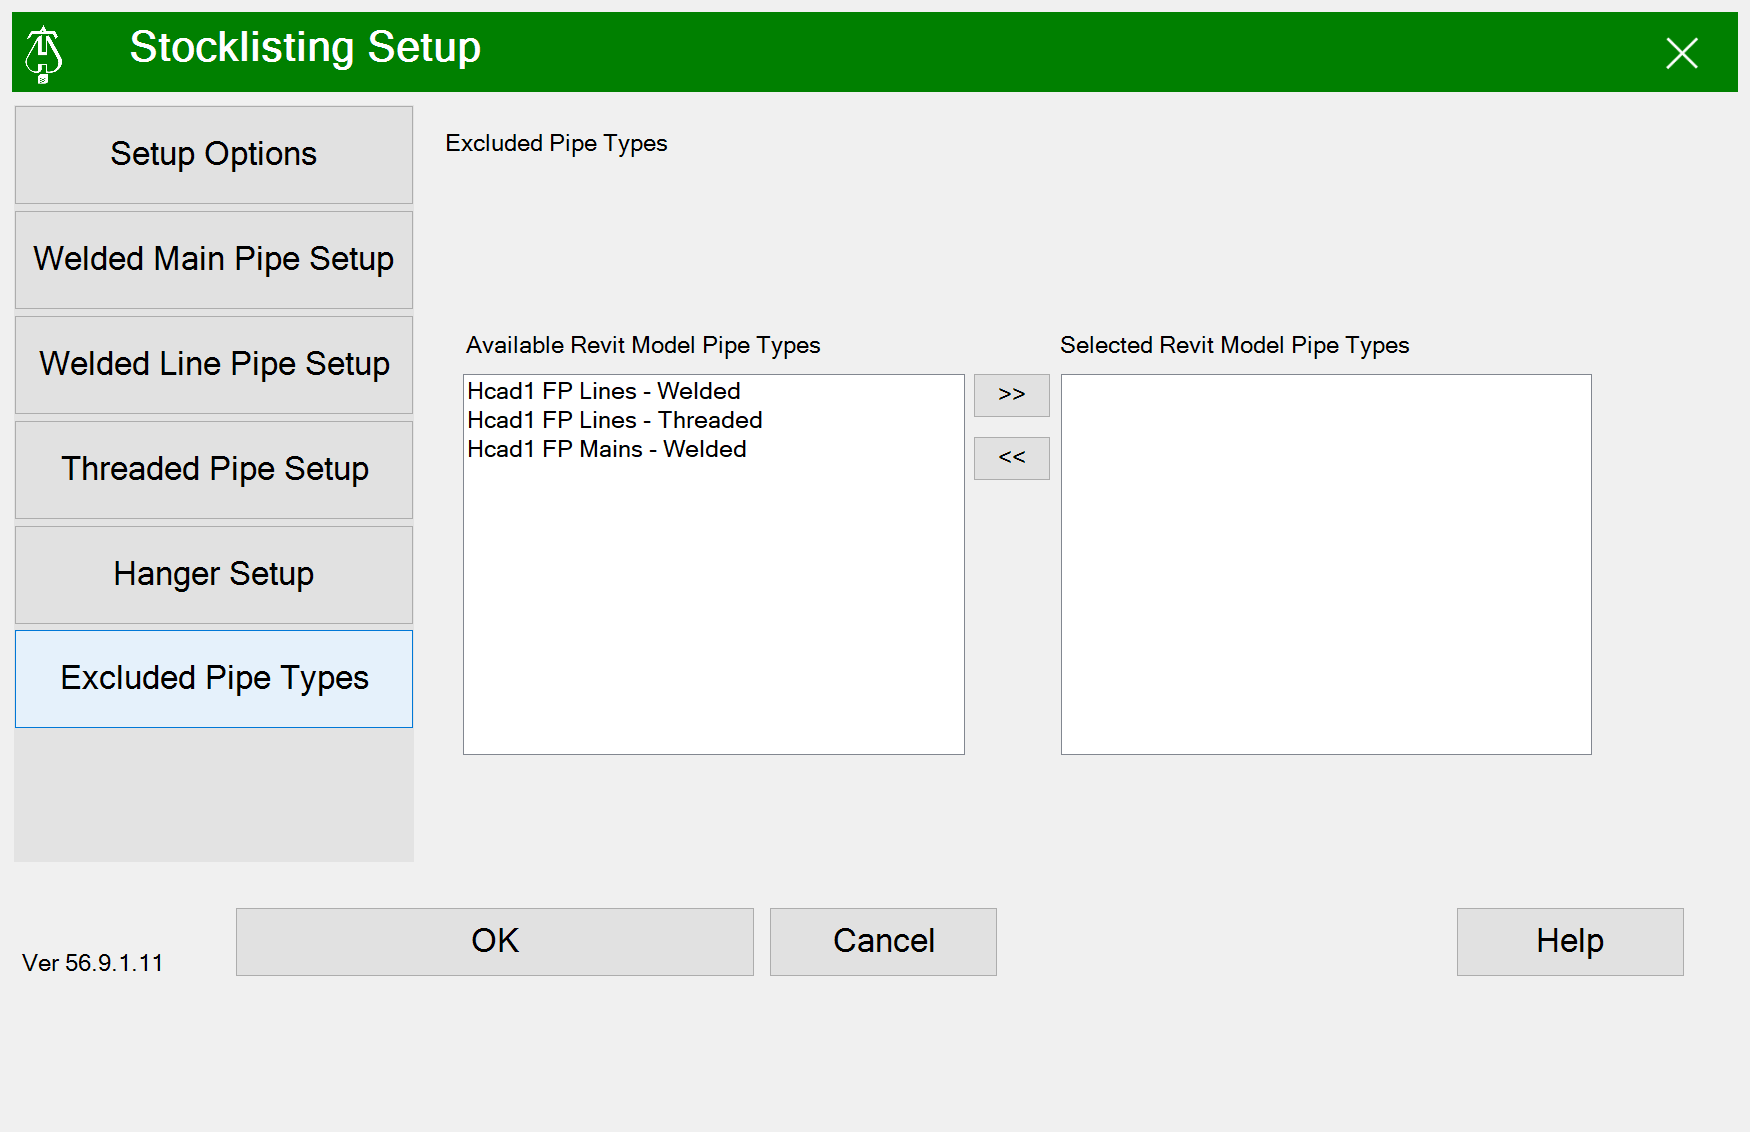
Excluded Pipe Types
- Selecting Revit Model Pipe Types not to be processed for this stocklist.
- An example would be stocklisg welded lines and excluding the armovers and drops.
OK
Will create and open the HydraLIST file.
Cancel
Will close the dialog box
Help
Will open this Help document
Create Stocklist
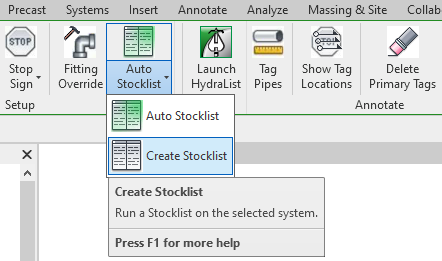
To jump to a video explaining the Create Stocklist button, click here.
Create Stocklist is used to, as the name implies, create a stocklist of the pipes and fittings used in the fire protection plan. Prior to running the stocklist, certain prerequisites must be met in order for it to function properly, those are detailed: here.
After a successful running of the create stocklist command, it will open the HydraLIST standalone application, supplied with information from Revit, to review the stocklist.
Summary
- Warning: Prior to running Create Stocklist, some prerequisites must be met, detailed: here.
- Click Create Stocklist
- Make sure the boxes / sections for Heads, Pipes, Hangers and Options is lit up green.
- If they are not, either manually enter the information in those sections as desired, or click Load Defaults, as seen here.
- Once all the information is correctly mapped, click Continue and run the stocklist.
Example video of Create Stocklist Button
How Do I Use The Button?
Prerequisites
Prior to running Create Stocklist, ensure that the fire protection drawing meets the following prerequisites:
- At least one pipe, or run of pipe, must be assigned a LISTing tag. This can be done via the Tag Setup command.
- While not required, it is recommended this is done in a Fabrication View for ease and to avoid clutter in the project.
- A stocklist cannot pass through, or list through mechanical equipment (Example: Pumps).
- A Stop Sign can be placed to indicate where the listing process should end.
If all of this is satisfied, click Create Stocklist.
It will open up a new window, which will require additional information on the first running of Create Stocklist.
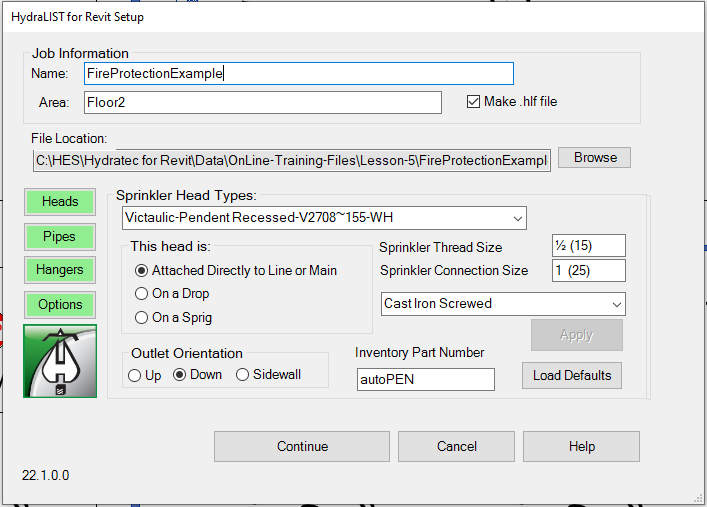
If any of the boxes or sections labelled *Heads, Pipes, Hangers and Options is not lit up green, they require information to be mapped to them before proceeding.
By clicking on the boxes in question, the information in those sections can be manually entered to the user's specifications or done automatically by clicking Load Defaults as seen below. After making any changes, click Apply to ensure that at the end of the information mapping process, the greyed out Continue button will become selectable again.
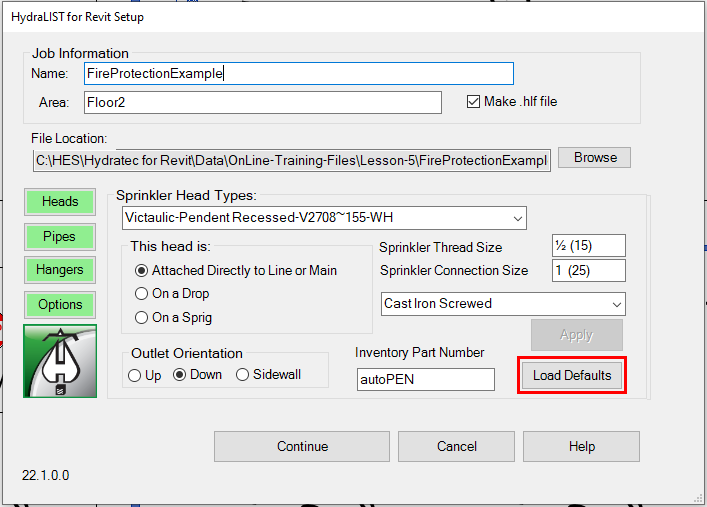
Once all of this is completed, the Continue button should be selectable whereupon clicking, information will be transferred to the HydraLIST standalone application where the newly created Stocklist can be reviewed and changed if need be.
Additional Help (Videos and additional resources)
For more help regarding the Auto Stocklist button: click here
For other help that might be relevant to Auto Stocklist: click here
For more help regarding the Create Stocklist button: click here
For other help that might be relevant to Create Stocklist: click here
HydraCARDs (Troubleshooting)
For HydraCARDs regarding the auto stocklist button: click here
For HydraCARDs regarding the create stocklist button: click here
For other relevant HydraCARDs about auto stocklist: click here
For other relevant HydraCARDs about create stocklist: click here

 HydraDOCs