Appearance
Supply Point

To jump to a video explaining the Supply Point button, click here.
Supply Point is used to indicate which fitting in the project is to be used as the supply point for various hydraulic and pipe sizing calculations. There can only be one supply point active in the project at a time. The Supply Point also functions as a System Divider, as detailed here in the Walker page.
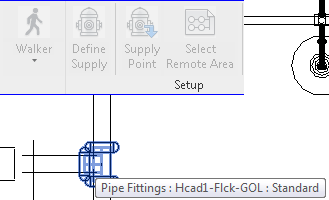
Supply Point is a button in both the HydraCAD and HydraCALC ribbons, its place in both of them is pictured above.
Summary
- From within a Plan View, Ceiling Plan or Section View, Click Supply Point
- Click any fitting inside project to set it as the Supply Point
- Note: There can only be one Supply Point at any given time, placing a new one down will replace a previous one.
- Supply Points also act as a System Divider, seen here.
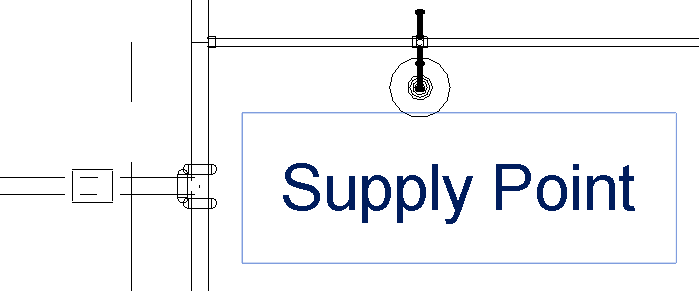
- After selecting a fitting, the supply point tag / header will be placed on the fitting you selected. Drag it to the new desire location so it's not in the way, etc.
Example video of Supply Point Button
How Do I Use The Button?
Click the Supply Point button. After is it pressed, other buttons on the HydraCAD or HydraCALC ribbon will be greyed out and you will be prompted to select an element. Select any fitting in the current project to mark it as a supply point, as seen below.
Once the fitting is selected, the Supply Point tag / header will be placed on the fitting selected. Move the tag to the new desired location so it's out of the way by clicking and dragging.
Having a active supply point in your project is a prerequisite needed for Define Supply.
Additional Help (Videos and additional resources)
For more help regarding the supply point button: click here
For other help that might be relevant to spacing & layout: click here
HydraCARDs (Troubleshooting)
For HydraCARDs regarding the supply point button: click here
For other relevant HydraCARDs: click here