Appearance
Single Ref Point

To jump to a video explaining the Single Ref Point button, click here.
Single Ref Point is used to:
- Add reference points to specific pipe fittings, typically used after reference points have been applied to most devices and other fittings in the project after running Hydraulic Calculations or using the All Ref Points button.
- To add reference points, even before the first Calculation being ran, in order to reference something that wouldn't otherwise be created automatically. (For example, at the top of the riser)
Reference points must not be blank in order to be handled by the Calc process correctly.
Summary
- Single Ref Point is used to add a reference point to pipe fittings typically missed when automatically applying reference points after the use of Hydraulic Calculations or when using the All Ref Points button.
- To add a reference point to a pipe fitting that is still meant to have one, simply click the Single Ref Point button.
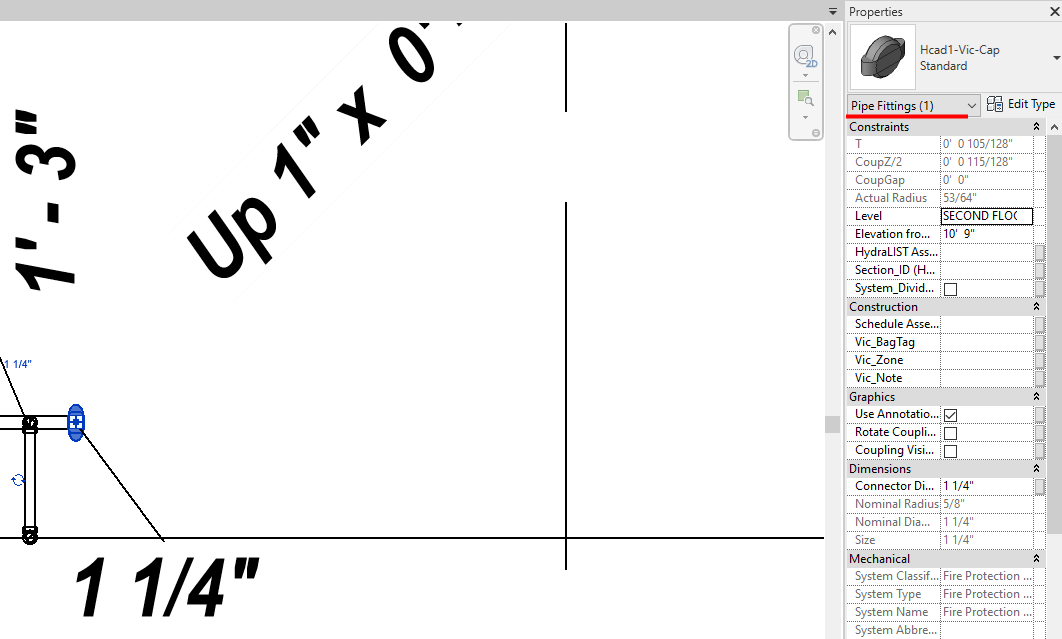
- After the button is selected, click any pipe fitting open in the current view of the project. Note: For this button to work, the object type must be a pipe fitting.
- To add reference points, even before the first Calculation being ran, in order to reference something that wouldn't otherwise be created automatically. (For example, at the top of the riser)
- Processes that create reference points will automatically number any pipe, fitting, etc. where the diameter or the flow changes. The top of the riser, or the intersection of the cross-main and the feed main often do not involve a change of the diameter or the flow, and are a good example of when Single Ref Point is particularly useful.
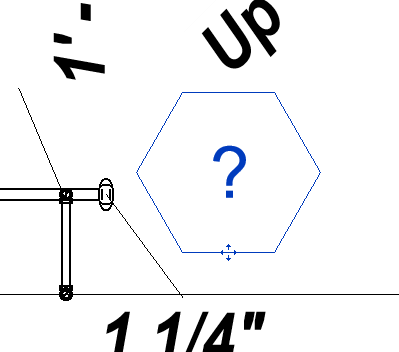
- A blank reference point should appear of a pipe fitting is selected.
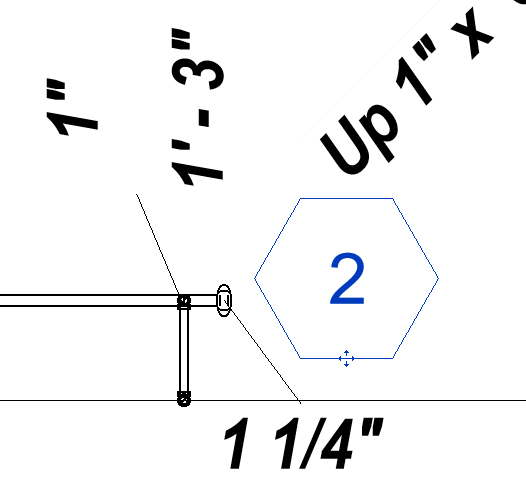
- To change the name or number of the reference point, click the middle of the blank reference point to select it, then double click again afterwards.
- This will allow the tag / ID of the reference point to be assigned as whatever the user desires.
- Note: Reference point's names have a 4 character limit, and must consist of numerical and capital letters only.
- Note: Reference points must not be blank in order to be handled by the Calc process correctly.
Example video of Single Reference Point Button
How Do I Use The Button?
Press the Single Ref Point button. Select the pipe fitting in the project you wish to apply the reference point to. Note: For the button to work, the object type you're trying to apply the reference point to must be a Pipe Fitting, to tell if it's a pipe fitting, look at the object type, listed above constraints.

If the object is a pipe fitting, select the Single Ref Point button and then click on the pipe fitting. A blank reference point should appear near the pipe fitting that was chosen.

Click in the center of the blank reference point, and then double click to open up a text input box where a name or number can be set for the given reference point.

Additional Help (Videos and additional resources)
For more help regarding the Single Ref Point button: click here
For other help that might be relevant to Single Ref Point: click here
HydraCARDs (Troubleshooting)
For HydraCARDs regarding the Single Ref Point button: click here
For other relevant HydraCARDs: click here

 HydraDOCs