Appearance
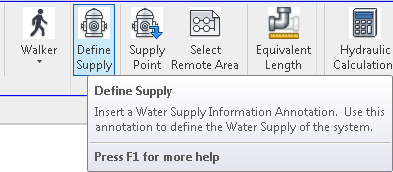
Define Supply
To jump to a video explaining the Define Supply button, click here.
Define Supply is used to insert an information box where the user selects, and allows the user to edit the details of a Supply Point. Having a supply point active in the project is a prerequisite to using the Define Supply button. Information on how to insert a supply point can be seen by following the link above.
Summary
- From within a Floor Plan or Section View, Click Define Supply
- Then select an area where you'd like a Water Supply Information Box to be placed.
- Ideally this is off to the side or bottom of the current project, to not interfere or overlap anything.
- This box will contain editable information directly linked to the active Supply Point in the project.
- NOTE: This does mean a Supply Point must be defined in the project to use this function.
- If that is not already done, you can follow the instructions here to do so.
- NOTE: This does mean a Supply Point must be defined in the project to use this function.
- Once this is done, you can edit the values of the supply point by interacting with the Water Supply Information Box.
Example video of Define Supply Button
How Do I Use The Button?
Click the Define Supply button. After it is pressed, select an area inside the current project where you'd like the information box to be displayed.
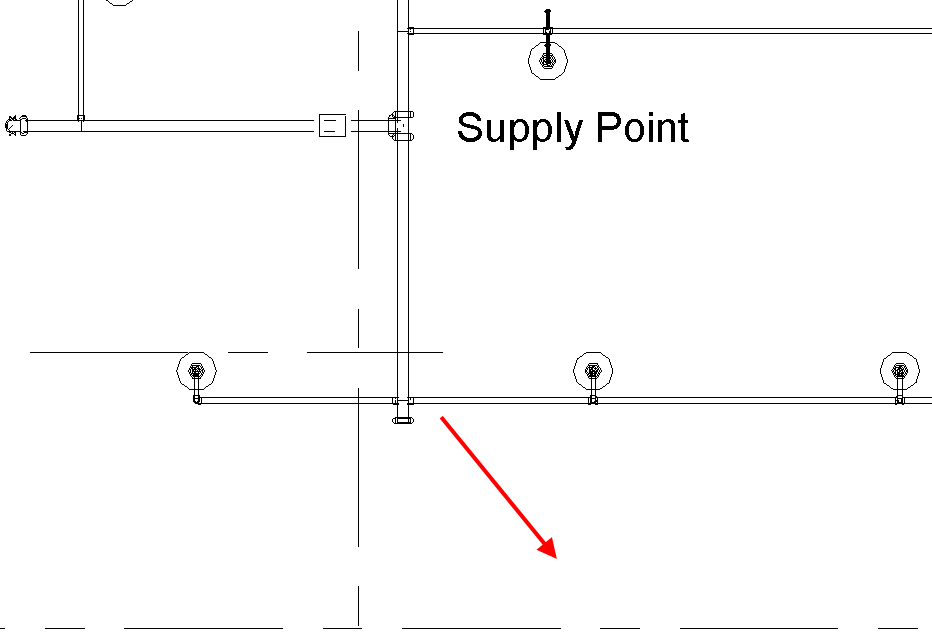
In this example, we chose to place it where the arrow indicates.
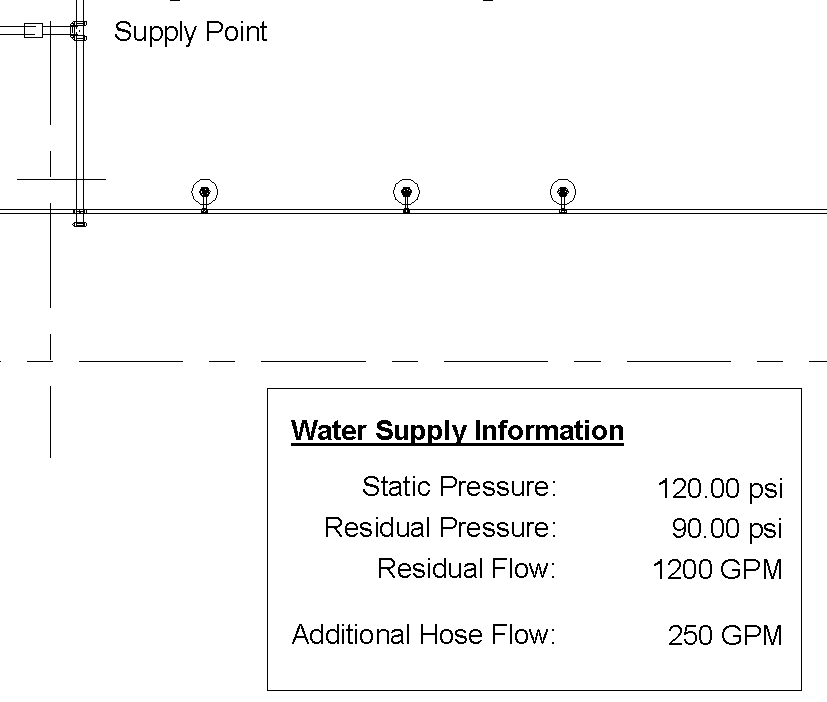
After the Define Supply information box is placed down, its text can be edited. The Water Supply Information is connected to the Supply Point indicated in the project.
From this box, you can change the Static Pressure, Residual Pressure, Residual Flow and the Additional Hose Flow.
Additional Help (Videos and additional resources)
For more help regarding the define supply button: click here
For other help that might be relevant to define supply: click here
HydraCARDs (Troubleshooting)
For HydraCARDs regarding the define supply button: click here
For other relevant HydraCARDs: click here