Appearance
Configure Head
To jump to a video explaining the Configure Head button, click here.
Configure Head is tool primarily used for adjusting the connection to a sprinkler head, or making a connection from a sprinkler head to the branchline. Changing to a riser, the drop configuration, etc. The Configure Head tool has easy ways to change a drop from down over and down, up over and down, etc. It can also be used only on a sprinkler head, and the selection options be used to make the connection to the branchline.
Summary
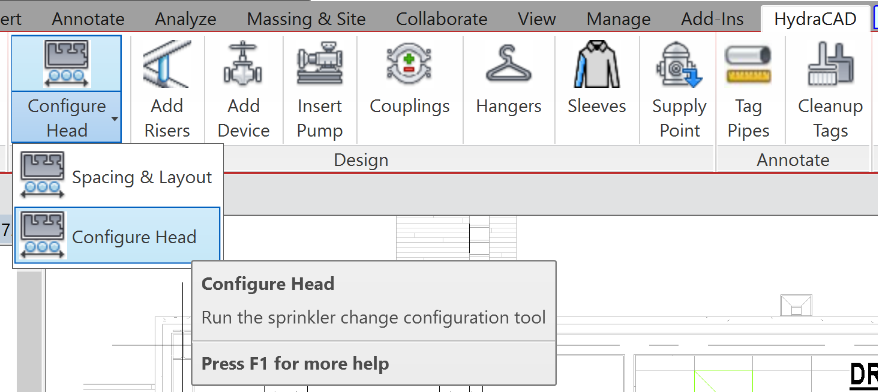
- From inside of a section view or 3D View, select Configure Head from the HydraCAD ribbon
- From the program's dialog box, in the configuration section, choose which type of head and pipe configuration you want. There are pictures and tabs showing and explaining these options.
- In the Connecting Pipe Data section**, the pulldown list will represent all the pipe types selected in the project. The type selected represents the piping that will connect the branchline to the sprinkler.
- In the Flex Pipe Data section, this can be used in place of connecting pipe data if the selection is meant to be something like a flex drop, etc. In this case, Flex Type's pulldown will be populated with the flex pipe types in the project. The selection in the pulldown will be the flex piping that connects the branchline to the sprinkler. The length input box is there to specify the flex length.
- Once all selections are made, use the pulldown in the bottom right to choose an action.
- Change Configuration adjusts an existing connection to the one specified your selection. For example, a up-over-and-down into a down-over-and-down to avoid colliding with any ductwork, etc.
- When applying this selection, either click and drag a window containing all sprinklers to be modified, or select a single one.
- Connect Head is used to connect existing heads in the project, currently with no connecting pipes, to the branchline.
- When applying this selection, First either use a crossing window to select all sprinklers to be connected to a single pipe or select an individual one. **Secondly, select the branchline pipe you'd like these all to connect to.
Example video of the Configure Head Button
How Do I Use The Button?
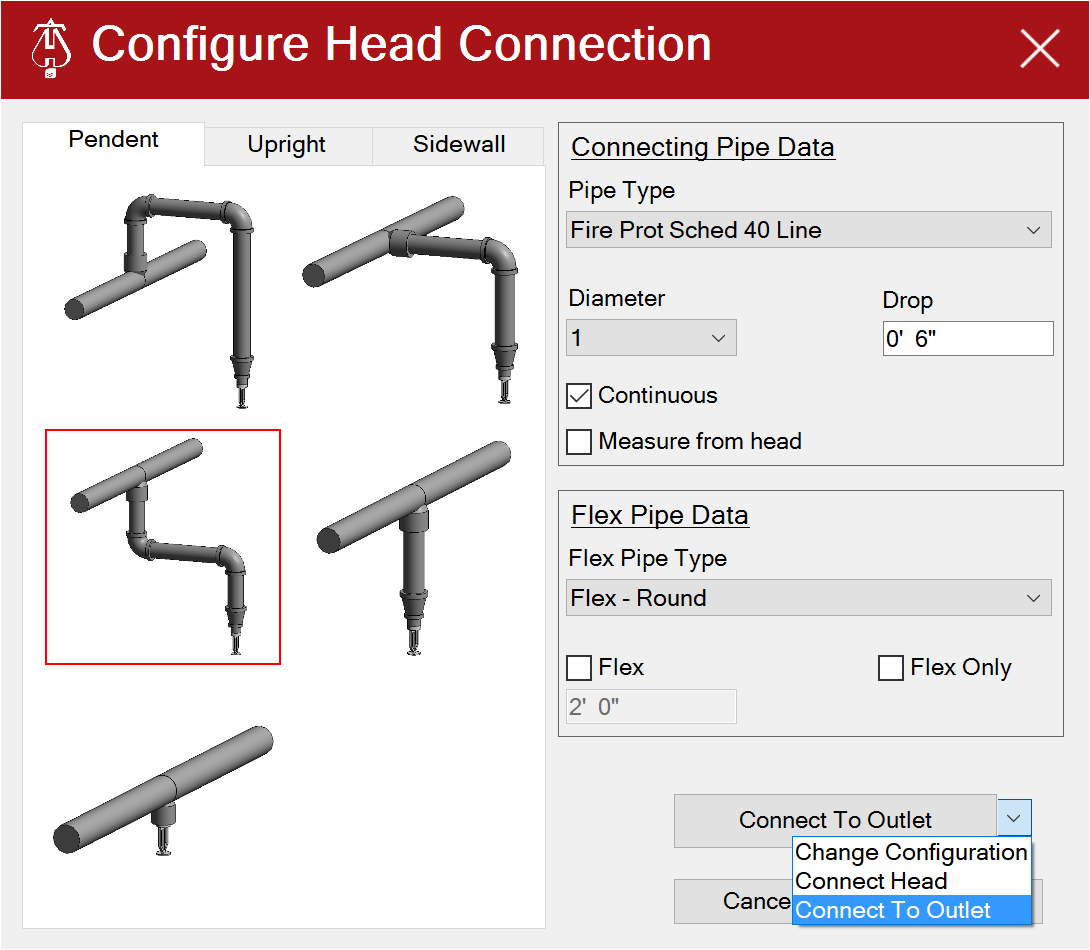
Main Dialog

The Main Dialog has 3 sections.
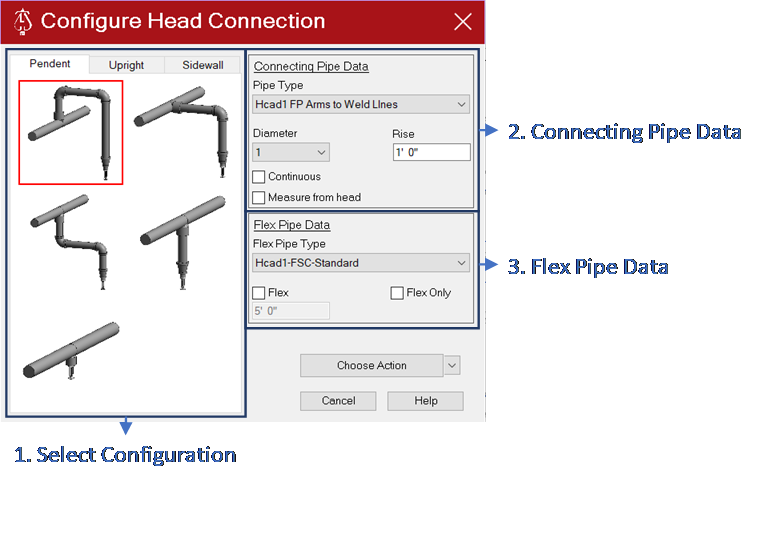
1. Select Configuration
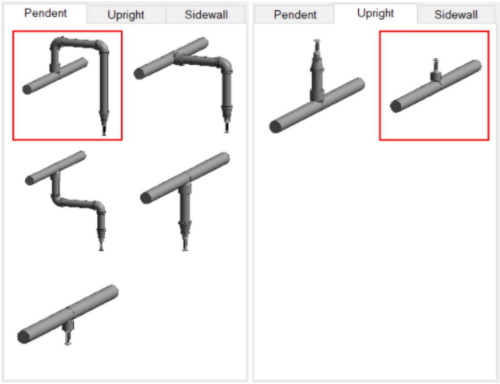
Start by selecting the type of head being used at the top, Pendent or Upright (Sidewall will be supported in thee future)
Then select the style of configuration desired by clicking on the picture that best matches
- Changing the selection will update the required information in the Connecting Pipe Data section
- Although all pictures show hard piping, all applicable configurations can be made with all or portions of it with flex pipe (as specified in the Connecting Pipe Data section)
2. Connecting Pipe Data
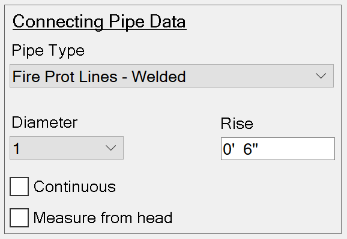
Pipe Type: Pulldown list of all pipe types in the project, will be used as the pipe type for the piping that connects the branchline to the sprinkler
Diameter: Sets the pipe diameter of the piping that connects the branchline to the sprinkler
Rise/Drop: Where applicable, will specify how high above or below the armover will be with respect to the branchline or sprinkler
Continuous: When checked will allow the program to continue running, allowing for multiple selections to be made
Measure from head: When checked, the Rise/Drop will be the distance of the armover from the sprinkler; when unchecked, the Rise/Drop will be the distance of the armover from the branchline
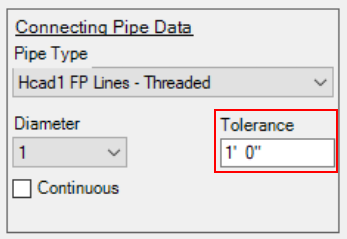
- Tolerance (Upright & Sidewall): Any head within the specified distance will be connected to the branch line.
3. Flex Pipe Data
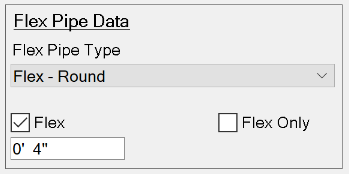
Flex Pipe Type: Pulldown list of all flex pipe types in the project, will be used as the flex pipe type for the flex piping that connects the branchline to the sprinkler for the length specified in Flex Length
Flex:
- When checked, allows the definition, in the text box below the checkbox, of the length of the connecting pipe(s) that will be flex pipe
- The length is measured from the sprinkler head. If the Flex Length is set to a distance greater than or equal to the length of all of the connecting pipe, then the entire connection will be flex pipe
Flex Only: all of the connecting pipe, then the entire connection will be flex pipe
4. Buttons
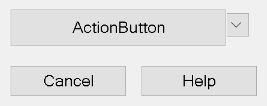
The Action Button has three options that can be changed by clicking the pulldown arrow next to the button
- Change Configuration: Used when sprinkler is already connected to a branchline, to modify the configuration of the connecting pipe
- When used, use a crossing window to select all sprinklers to be modified
- Can convert a directly connected upright to a sprig, as well as adjust the length of sprigs.
- Connect Head: Used to connect a head to a branchline using the configuration defined
- When used, first use a crossing window to select all sprinklers to be connected to a single pipe
- Then, select the single piece of pipe to connect the sprinkler(s) into
- Connect To Outlet: Used to connect a head to an open fitting outlet
- When used, You will be prompted to first select a single sprinkler, then the fitting with the open connector.
- Change Configuration: Used when sprinkler is already connected to a branchline, to modify the configuration of the connecting pipe
Cancel: End the Spacing and Layout routine and returns to Revit
Help: Displays this page on the default web browsing application
Configure Head Connection - Connect To Outlet
This function will connect a sprinkler head to a fitting having 1 open connector.
The configuration is automatically determined by the orientation of the fitting outlet. Here is what is needed.
- Connection Pipe Data
- Pipe Type
- Diameter
- Drop
- Add Flex Pipe Data if needed.
The Drop length is used to determine the length of any swing joints needed to connect the sprinkler to the outlet. Enter an appropriate length. You can use the Measure from head checkbox for bottom outlets. You may have unsatisfactory results using Measure from head with other configurations.
Examples
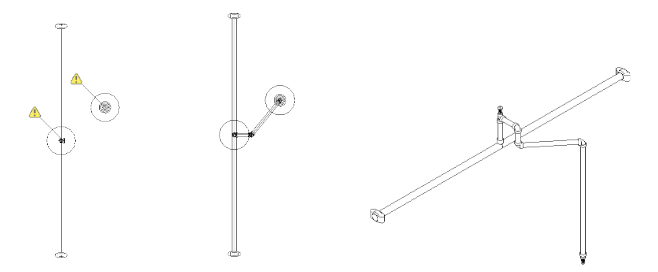
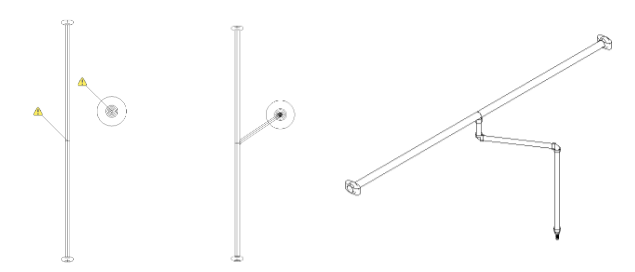
Outlet on Sprig:
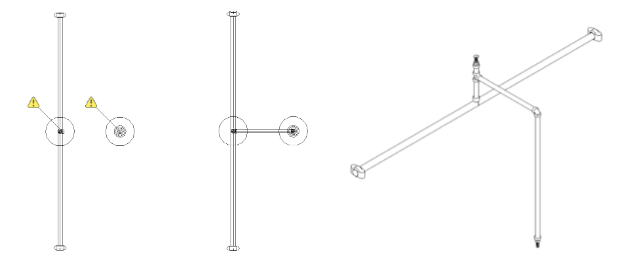
Outlet on Spring that aligns with sprinkler:
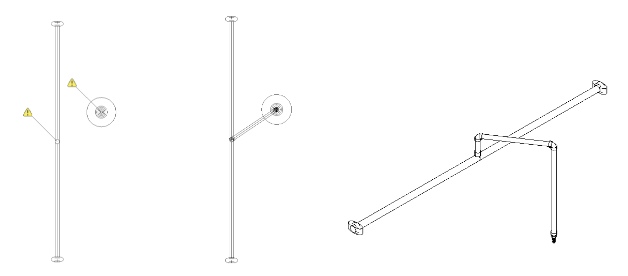
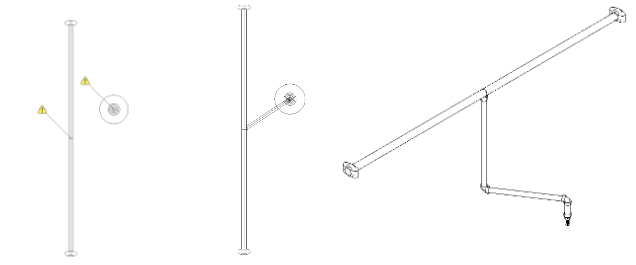
Top Outlet:
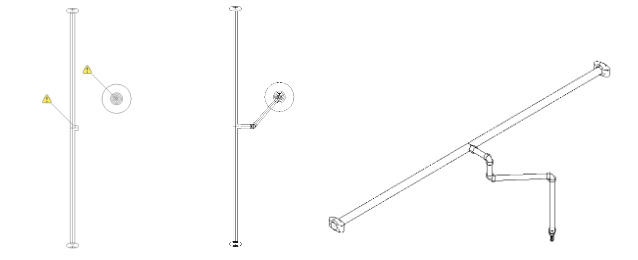
Side Outlet:
Bottom Outlet:
Bottom Outlet with Measure from head checked:
Additional Help (Videos and additional resources)
For more help regarding the Configure Head button: click here
For other help that might be relevant to Configure Head: click here
HydraCARDs (Troubleshooting)
For HydraCARDs regarding the configure head button: click here
For other relevant HydraCARDs: click here