Appearance
Slope Lines
Slope Lines is used to add pitch to your modeled system. It is a semi-automatic process. Pipes are sloped in sections. Typical workflow is to start at the beginning of the system and work your way to the dead ends.
How Do I Use The Button?
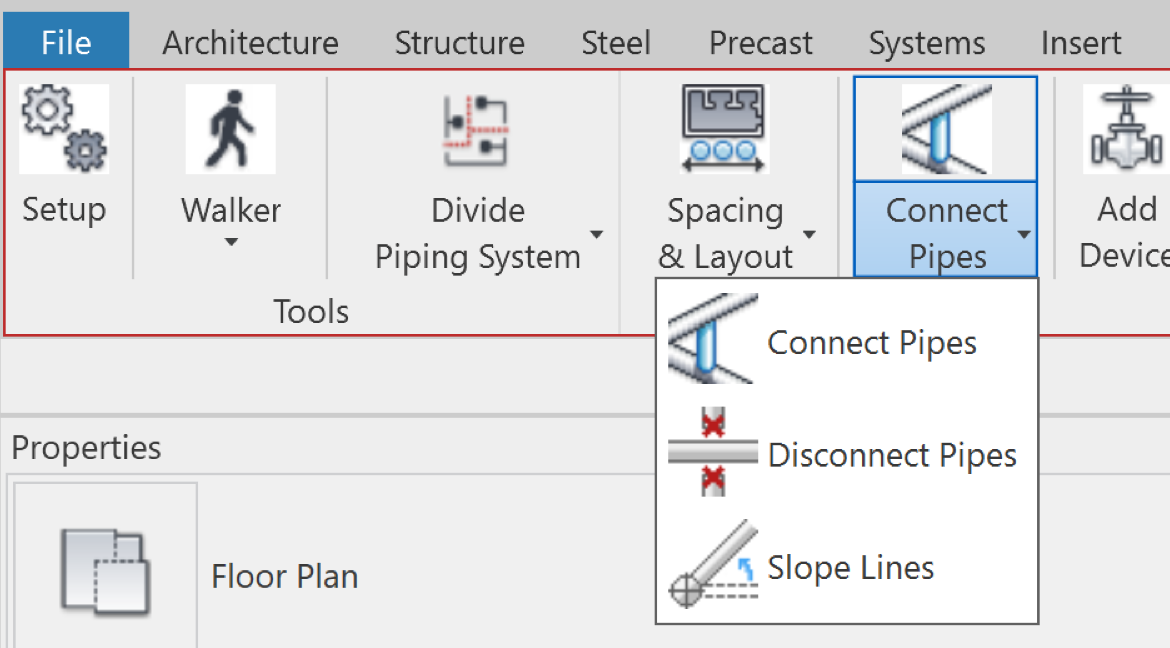
Click the Slope Lines button.
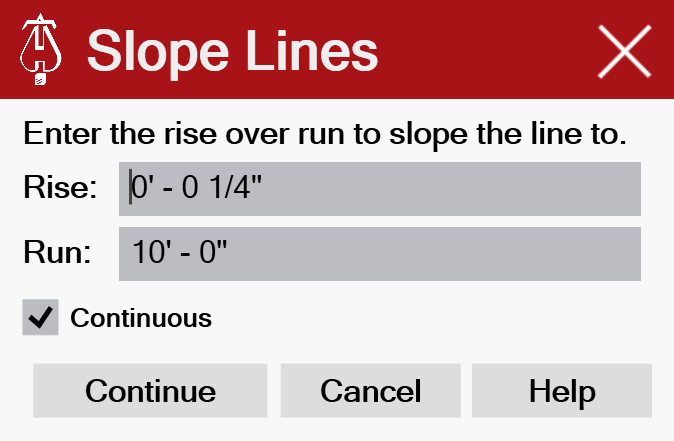
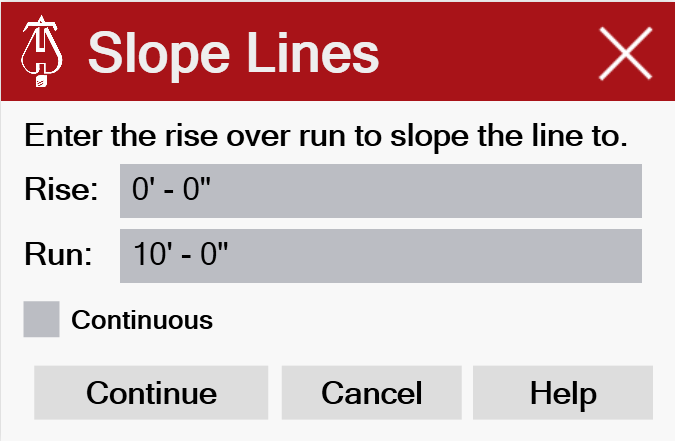
A setup dialog will open. Input the Rise and Run as needed. The Continuous checkbox will repeat the command until canceled.
You are prompted to select a pipe. Pick near the end where the slope will start. Note that the fitting needs to be one with a perpendicular connector like an elbow or a tee.
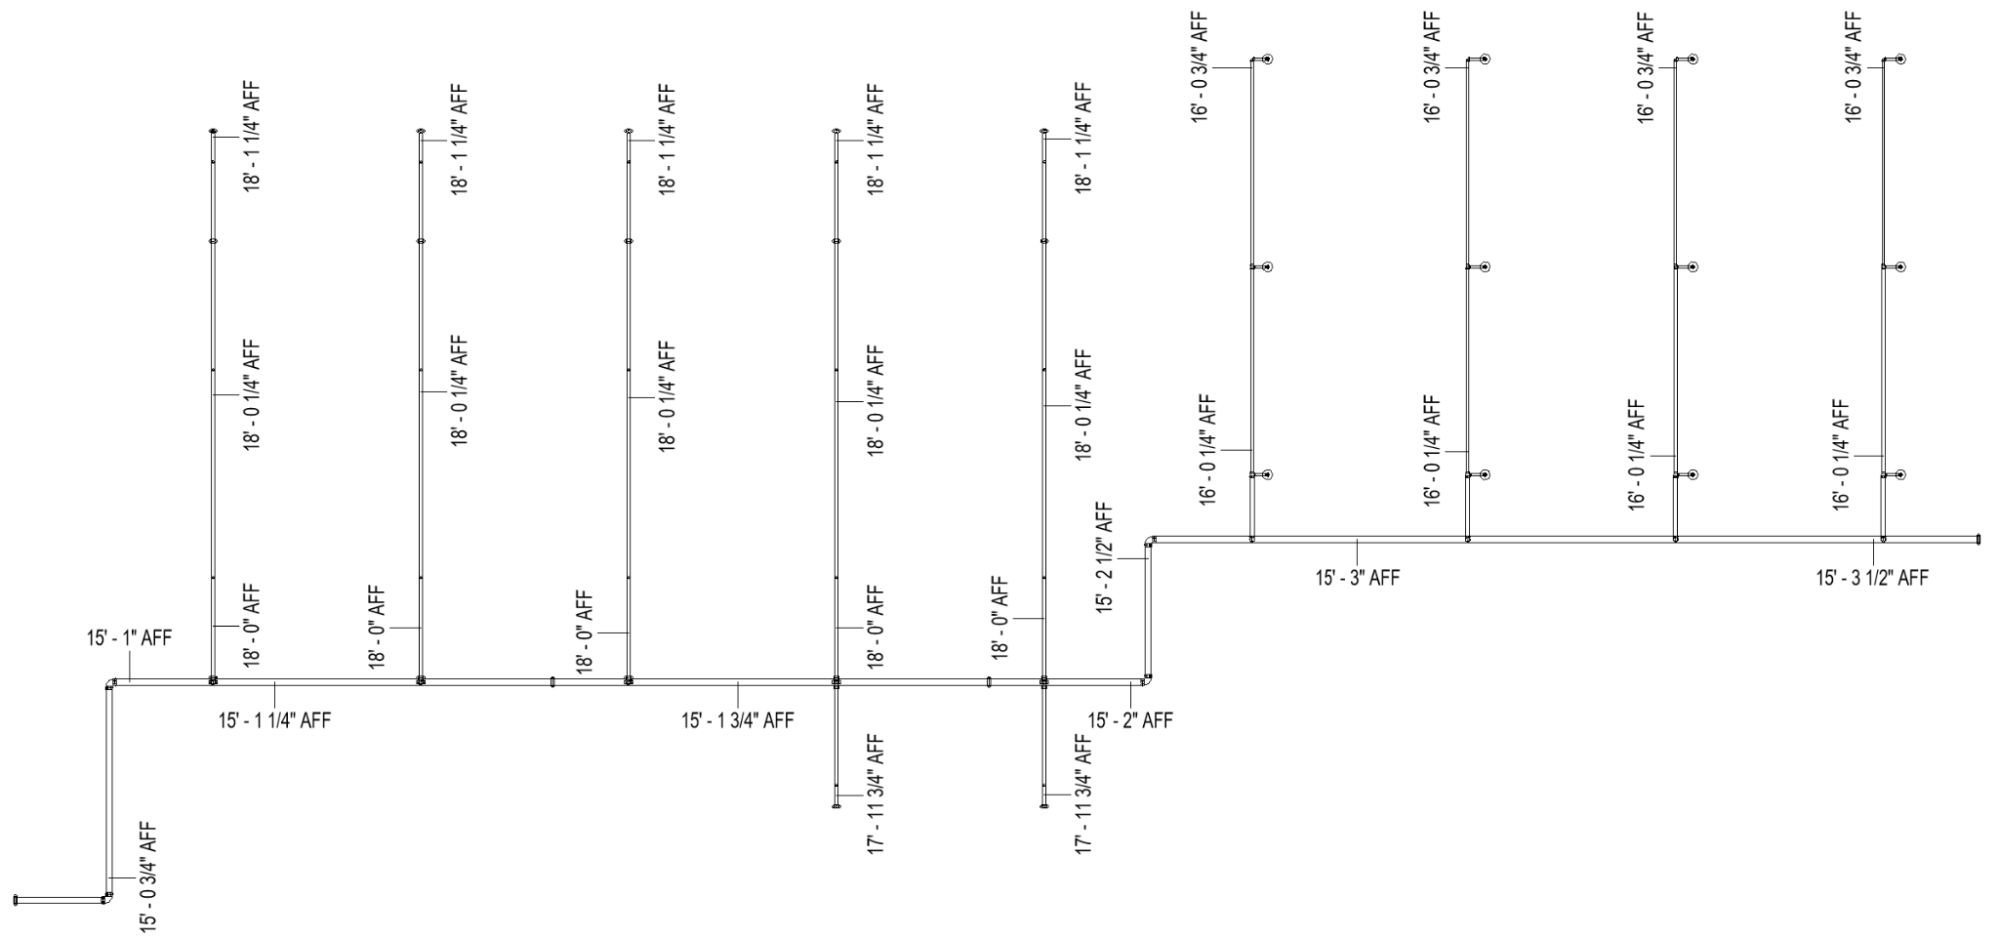
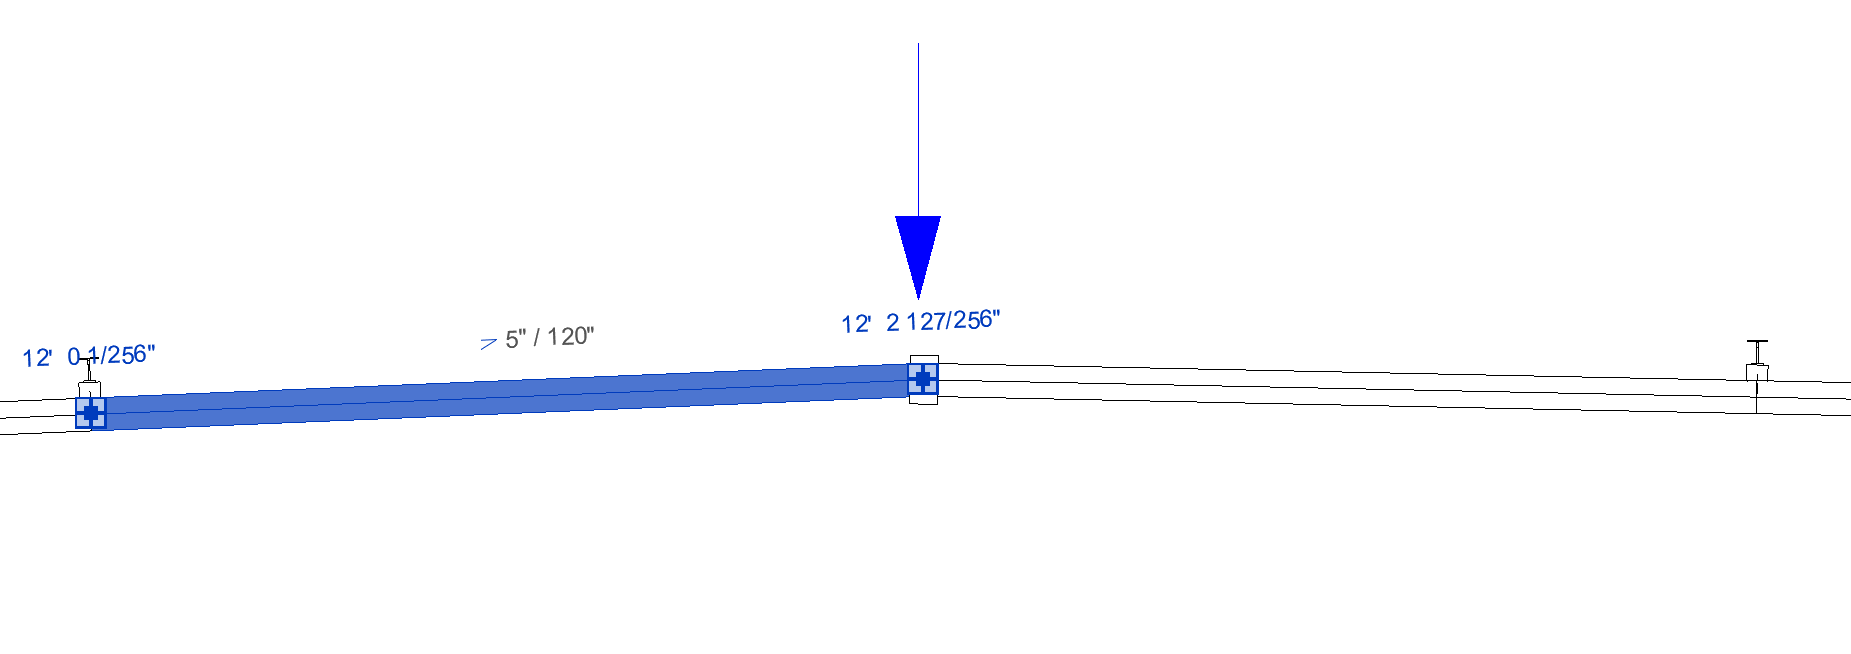
In this example, Starting with the mains, pick pipe at A. This will only slope the pipes along the main that are the same direction (green arrows). Then pick the pipe at B. This will slope the pipes along the main that have the same direction (red arrows).
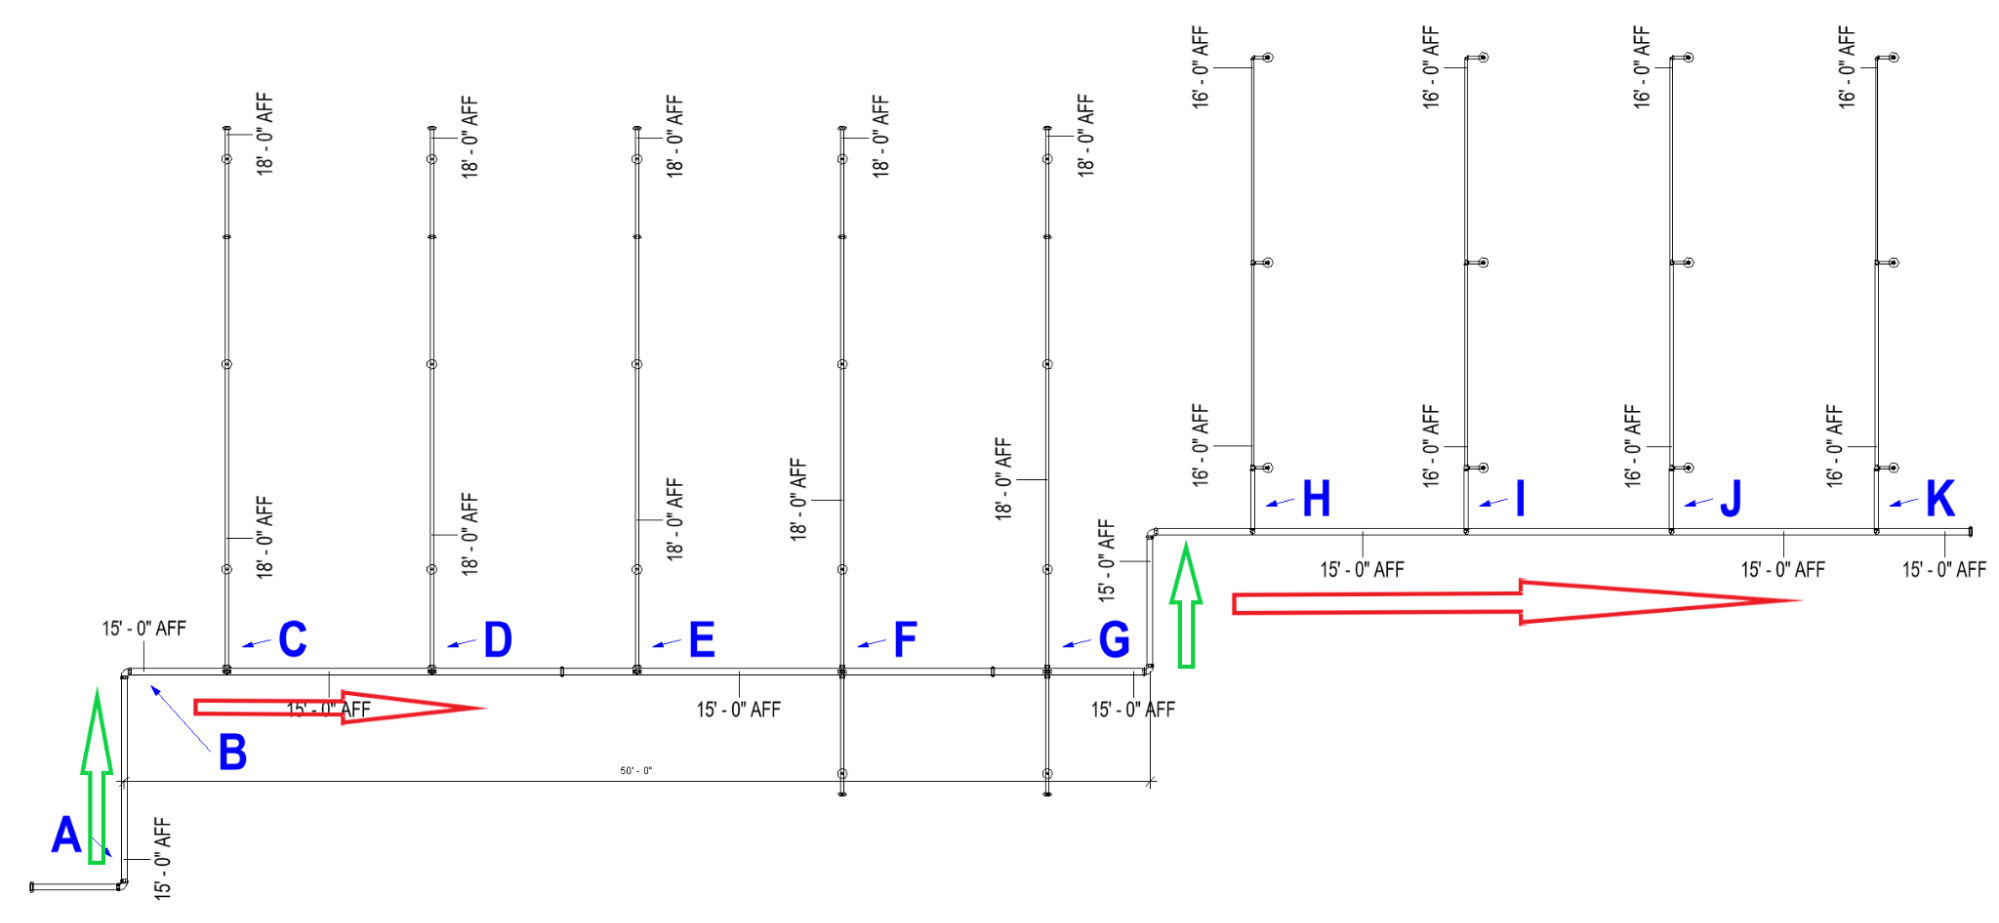
Continue by sloping the lines next. Pick pipe at C, D, E, ……. I, J, K.
Additional features and behavior:
Pipe sections can be flattened by setting the Rise to 0”
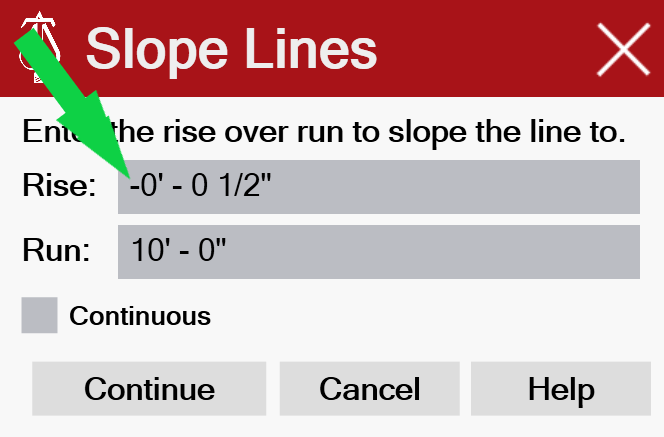
Adding a negative (-) slope will cause the pipe section to slope down.
Note: Gridded systems should be disconnected at the far main to prevent slope for walking through the entire system.
Pipes can be sloped at Couplings. This may be useful in following a pitched warehouse roof

Additional Help (Videos and additional resources)
For more help regarding the slope lines button: click here
For other help that might be relevant to slope lines: click here
HydraCARDs (Troubleshooting)
For HydraCARDs regarding the slope lines button: click here
For other relevant HydraCARDs: click here