Appearance
Tag Setup
To jump to a video explaining the Tag Setup button, click here.
Tagging runs of pipe using Tag Setup, typically done in a Fabrication View, is a prerequisite needed for running the Create Stocklist command. Tag Setup is used to assign a name to lengths of pipe, which are then used to identify them later in the Stocklist.
Summary
- Click the Tag Setup button.
- Select if the tagged pipes are going to be Lines or Mains under the ID Type section.
- Additionally, choose whether these pipes are Welded or Threaded under Fab Type.
- Click OK when ready to continue.
- Click the pipe you'd like to apply the listing tag to.
- Note: The start end of the pipe must have a fitting on it. (Elbow, Tee, Coupling, etc.)
- After selecting and applying tags to all pipes necessary, press Escape to exit the Tag Setup tool.
Example video of Tag Setup Button
How Do I Use The Button?
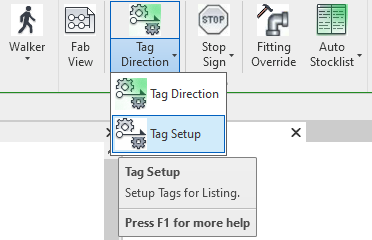
To begin using the Tag Setup tool, click the dropdown menu beside the Tag Direction button on the HydraLIST ribbon. Tag Setup will be an additional option in that dropdown menu.
Upon clicking the button, the dialog box shown below will display on screen.
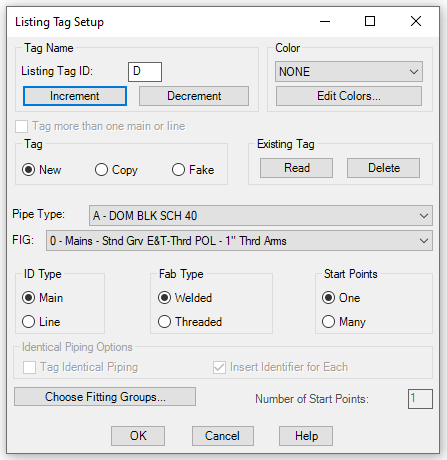
In this menu, Listing Tag ID will be either the letter or number the tags will increment or decrement from depending on the user's selection. Selecting Main or Line under ID Type will dictate what the listing tag is named. Example being, if Listing Tag ID is A, set to increment and ID Type is main, tags will go Mn-A, Mn-B, Mn-C and so on.
Under Fab Type it can be selected if these pipes are welded or threaded. If the Pipe Type automatically chosen isn't what is wanted, it can be changed by selecting a different type via that dropdown menu.
Once all the selections in the menu are what's wanted, click OK.
It will open back up the Revit project, it's important that at the start of the first pipe selected, there is a fitting. (Elbow, Tee, Coupling, etc.) From that pipe, begin assigning listing tags to pipes in the project.
When done, pressing Escape will exit this prompt and allow other options to be selectable again.
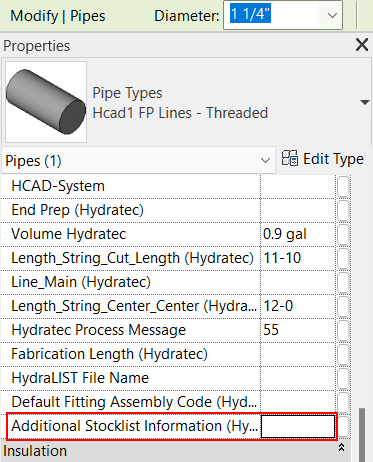
After successfully running the command, info will be added to the property shown above. This should not be manually edited, or set without use of the Tag Setup, Tag Direction or Stop Sign command. Having bad info in the property shown above could causes errors, and cause these commands to not function properly.
Additional Help (Videos and additional resources)
For more help regarding the Tag Setup button: click here
For other help that might be relevant to Tag Setup: click here
HydraCARDs (Troubleshooting)
For HydraCARDs regarding the Tag Setup button: click here
For other relevant HydraCARDs about Tag Setup: click here