Appearance
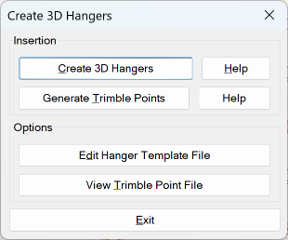
Create 3D Hangers
Layer(s): HANGERS, HCAD-3d_Hangers, HCAD-3d-Hangers_Attachment_Zone
Shortcut: 3DH
Associated: Hanger Setup
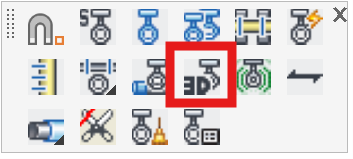
Ribbon: Insert Panel

This command has two main functions. Create 3D hangers makes a set of 3D hangers, building on the previously inserted 2D hanger. Generate RTS Points creates a point list for use with many robotic total point stations.
Create 3D Hangers:
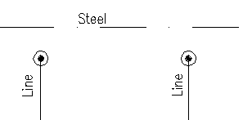
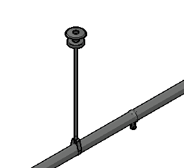
3D hangers are created at the locations of inserted 2D hangers. 3D hangers will only be added to piping that has been raised to 3D at least once. Pipes must have pipe sizes on them.
Pick the existing 2D hangers to transform. You can press Enter to select all hangers or pick them individually or with a window. Raise your drawing to 3D using the Go to 3D (S3D). Here you will see the new 3D hangers.
Edit Hanger Template File opens a template where you can add or edit 3D Hangers. 3D hanger attachment block names, rod diameter, and attachment zone information for hanger types and sizes can be added here. If more hanger types and sizes are needed, make a copy of this file before editing, in case of error.
Generate RTS Points:
Generate a .csv file containing coordinates and hanger types for use with Robotic Total Stations. A numbered label will be placed next to each selected hanger. This command will first create 3D Hangers and will then create the point file.
The overall process can be summarized in the following steps:
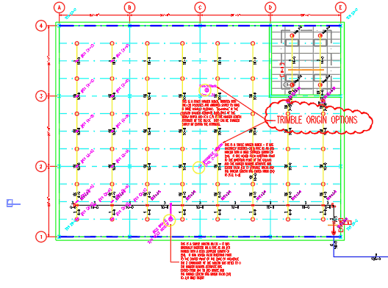
The design process is used to create a 3D model of the sprinkler system. That model includes the layout of hangers, seismic connection points and set control or benchmark points.
The Create RTS Points command is used to generate the CSV file of RTS Points and to annotate the drawing identifying those points. One of the features of the RTS point creation process is the specification of a starting point number (1000, 2000, 3000, etc.) so that it is easy to distinguish between various files that relate to pour sections.
The CSV file and the associated drawing are delivered to the RTS machine layout operator. The layout operator then downloads the CSV file to the controller.
Example
Open the HydraTools > Tools > Training Drawings > Generating a Hanger Point List for Use with RTS Stations drawing.
Start the Create 3D Hangers command.
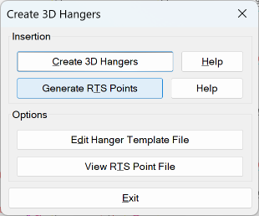
Pick Generate Points for RTS Station.
Select your desired hangers by picking or with a window. Press Enter to finish the selection.
The User Specified Rod Size dialog box will open.
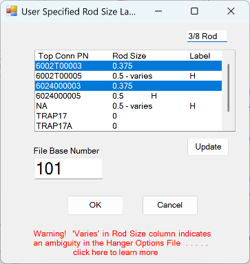
Enter a File Base Number to set the first label number. These will be incremented by 1 for each location.
In the list box any Top Connection Part Number that ends in 03 is a part number for a 3/8” device. Hold the Ctrl key down and select all the PNs that end in 03 as shown. Type into the text box at the top the label you would like to associate with those PNs (3/8 Rod is shown here).
Press Update and that label will be permanently associated with all of those hangers.
This process should be repeated for the PNs that end in 05 and could be labeled as ½ Rod.
If a future project includes new hanger types that have not been defined here, you will need to repeat this process to include them in your labeling scheme.
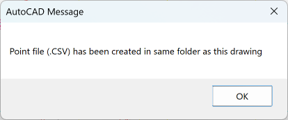
Press OK and then retrieve your CSV file from the same folder as your drawing.
HydraCARDs (Troubleshooting)
For HydraCARDs regarding Create 3D Hangers: [Click Here]