Appearance
Set up Ceiling
Layer(s): CEILING, CEILING2, STEEL
Associated: Insert Ceiling
Opens the Ceiling Setup Dialog box.
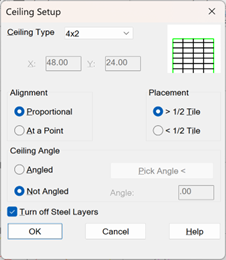
This is an automatic routine for setting up and inserting ceilings.
The Ceiling Type pull down menu offers a variety of grid sizes. Custom allows any size of ceiling to be inserted.
If Turn off Steel Layers is selected, the steel layers will be left OFF after insertion to improve drawing clarity.
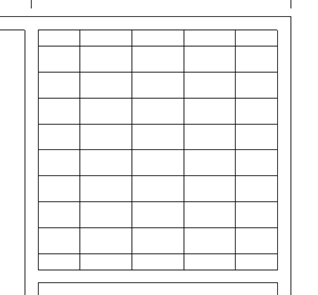
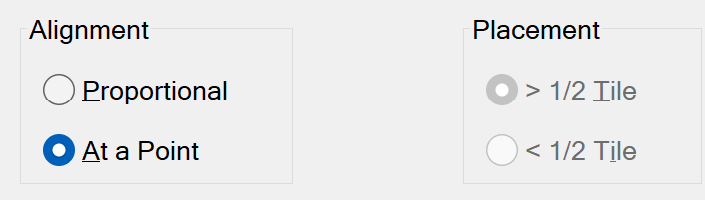
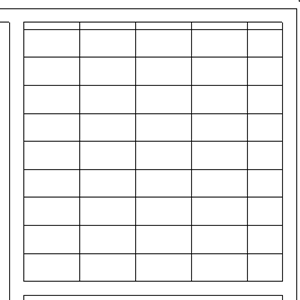
With Proportional selected, the ceiling grid will be centered in the room selected. The example to the left was inserted with > ½ Tile selected. Tiles will not be cut any smaller than ½ of a tile.
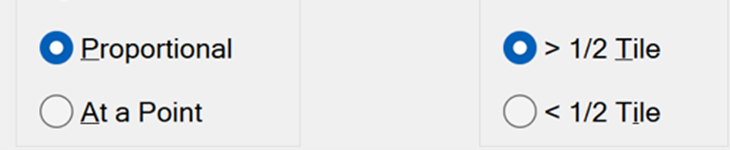
With At a Point selected, the grid will begin at a specified point. Remaining fractional tiles will be placed at the opposite end of the room from where the original point was picked.
Configure the Ceiling Setup box as shown.
Press OK and HydraCAD will prompt:
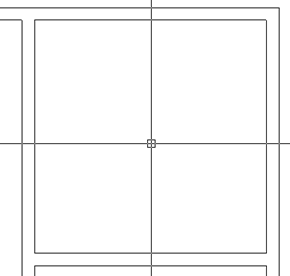
Pick Point in Room
Pick a point anywhere inside the room walls. HydraCAD will then prompt with:
Pick Reference Point for Starting Point of Ceiling
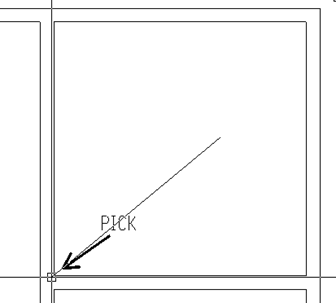
Pick a point that you would like to reference from. The example to the left shows the bottom left corner of the room selected as the reference point.
When picked, the box below will appear:
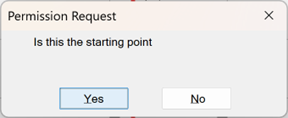
Press Yes, and the ceiling pattern will be inserted. Full tiles are inserted starting at the bottom left corner of the room. Excess fractional tiles are inserted to the right and above the starting reference point, along the walls.
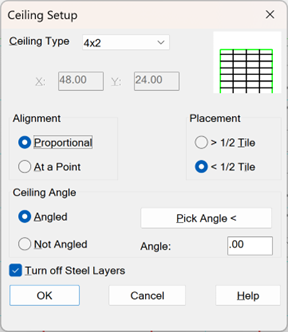
If your room is at an angle, select Angled. Use the Pick Angle < button to select a line or polyline at the same angle as the room or enter the angle with the keyboard.
The grid will be inserted on the same angle as the room.
HydraCARDs (Troubleshooting)
For HydraCARDs regarding Set Up Ceiling: [Click Here]