Appearance
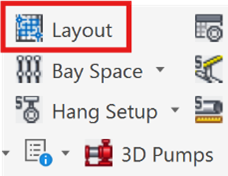
Sprinkler Layout

Layer(s): SPRNKS
Shortcut: SL
Associated: Select Sprinkler
Ribbon: Insert Panel
If you have not yet selected a sprinkler, the command will open the Sprinkler Block Selection dialog box. Select one of your sprinklers and press OK.
The Sprinkler Spacing and Layout Setup dialog box will open.
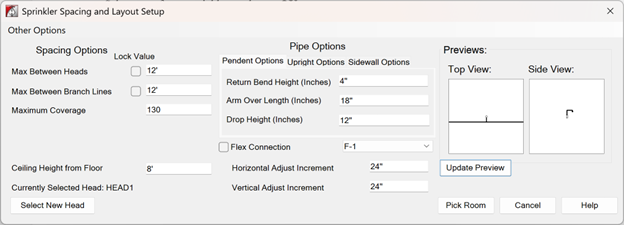
Enter the Maximum distances between Heads and Branch Lines, Maximum Coverage and Ceiling Height. The Lock Value option will force the entered value.
Select New Head will open the Sprinkler Block Selection dialog box where you can select another sprinkler.
Pipe Options allows you to select Pendent, Upright or Sidewall configurations. Enter the appropriate distances for your selection.
The Flex Connection option will be available if there is a Flex Pipe Definition in the drawing.
A Preview graphic appears on the right based on your entries. If you adjust the distances, use Update Preview to refresh the graphic.
The Horizontal and Vertical Adjust Increment are the distances that the head will move when you attempt to reposition it.
When you have configured the dialog box, press Pick Room to place sprinklers.
Pick the diagonal corners of a room or any rectangle.
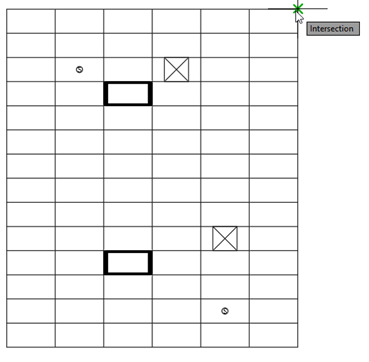
The program will insert temporary sprinklers and pipes.
The current spacing will be shown.
Pick near the sprinklers to be moved.
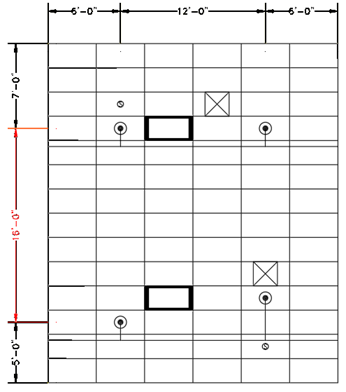
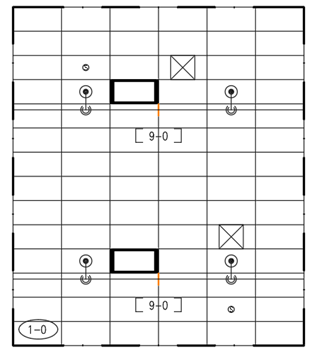
They will move the Adjust Increment specified in the Layout dialog box. In this example, the bottom left head was moved. The distance between sprinklers now exceeds the specified maximum and appears in red.
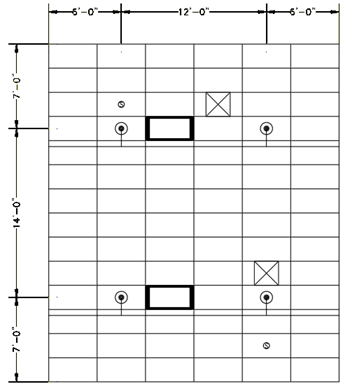
Right click when you are satisfied with the spacing. The Options dialog box will appear.

Revise Setup will take you back to the Layout dialog box where you can adjust the settings and return.
Adjust Mode allows you to pick the corners of the rectangle again.
Insert Sprinklers coverts the temporary pipes into actual ones. Ceiling and pipe elevations are added as shown here.
Cancel removes the temporary heads and pipe and stops the command.
The open-ended pipes terminate at the borders of the rectangle and must be joined to the pipes in the adjacent areas. Join Pipes and Move Lines are useful commands to accomplish this.
Descriptions on use follow.
HydraCARDs (Troubleshooting)
For HydraCARDs regarding Sprinkler Layout: [Click Here]