Appearance
Auto Line

Layer(s): SPRKDAT2, SPRNKS, SPRNK2, SPRKDATA
Shortcut: AUL
Associated: Main / Line / Auto Main
Ribbon: Draw Panel

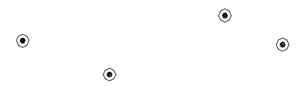
Connect sprinklers with lines directly or by inserting armovers.
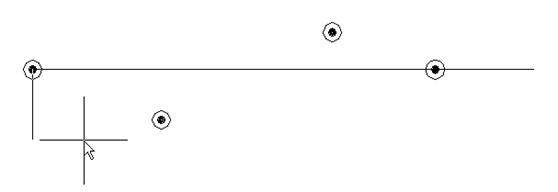
The example here shows sprinklers that require pipe connections.
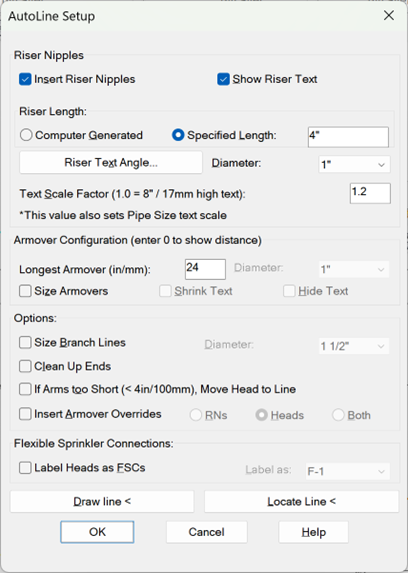
Start the Auto Line command and the AutoLine Setup dialog box will appear.
Press the Draw Line < button.
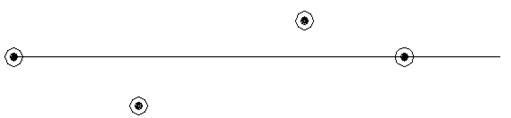
Draw a line from the insertion point of the first sprinkler to a point beyond the last sprinkler as shown below.
Tip - If the end heads are not directly on the line it is always a good idea to draw the line longer than you need it. This ensures that the program can properly connect to those heads.
Upon returning to the dialog box, uncheck Insert Riser Nipples and type in a value for Longest Armover. All heads within this distance will be connected to the selected lines.
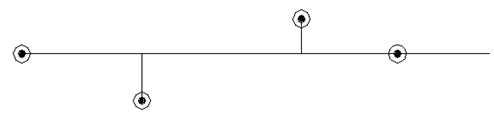
The example shows a value of 24, which means any sprinklers within 24 inches of the branch line will be connected with armovers. Sprinklers more than 24 inches from the branch line will not be connected.
Press OK and select the line.
Right click to execute.
Note that the second sprinkler from the left was not included since it is 2’-8” from the branch line which exceeds the 24” maximum length.
If none of the heads are directly on the line you drew, just draw it anywhere you want it next to the heads to be connected. Then, pick Locate Line and pick a sprinkler head to reference from, then pick the line. Type in the exact distance you want the line to be from the head chosen (this is the armover length). The line will be moved to that location.
Tip - It is not necessary to use the Draw Line and Locate Line commands in this dialog box. You can draw the line and locate it any way you want (such as offset) before starting this command.

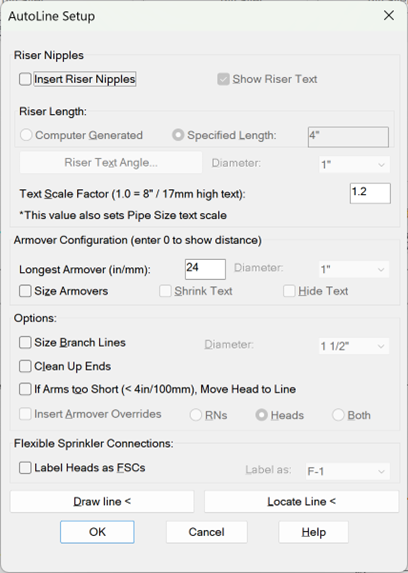
You can also pick the maximum armover length with the mouse. Start the Auto Line command and set the Longest Armover value to 0.

Press OK and then select all of the heads and pipes with a window.
Next, pick a point beyond the most distant sprinkler.
Now, all sprinklers will be included.
If you want riser nipples inserted with your armovers, (thereby making them return bends), check the Insert Riser Nipples option. This will allow you to select the Riser Format button to specify the angle of the text to accompany the riser nipple. If you do not want text to appear beside the riser nipple symbol, check the Hide Text option. This will also allow you to select the Computer Generated or Specified Length option. This allows you to specify the Length as well.
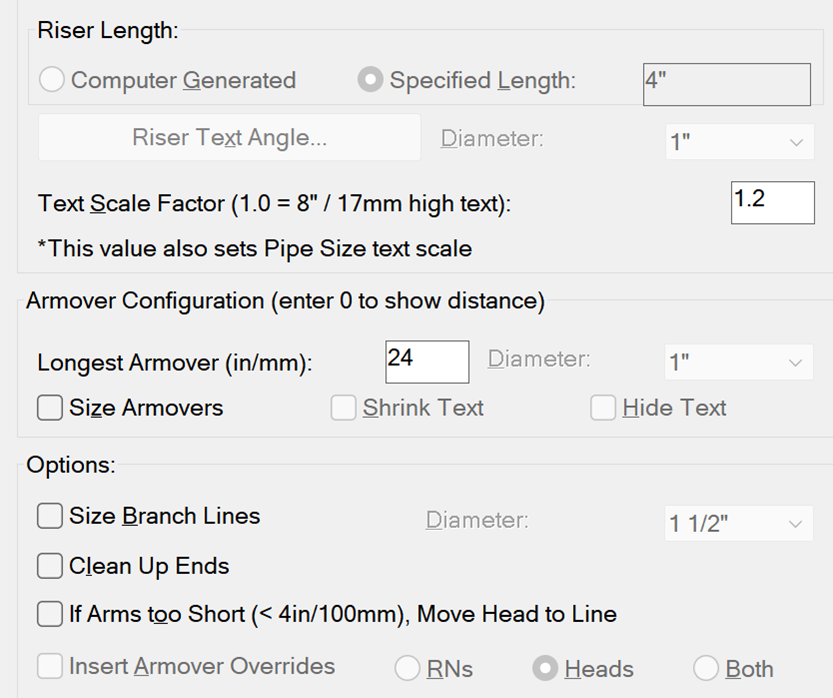
Tip - Most users choose the User Supplied option along with a Diameter of 1” (25mm) and a Length or 4 in (100mm) for the ‘up’ piece of their return bends.
The Text Scale Factor controls the size of the riser nipple text. This setting also controls the pipe size text height, so be aware of the implications of changing this.
If you do not intend to fabricate all or part of your return bends, use the Insert Armover Overrides option to make this easy. An AutoList run will result in the associated piping being entered into the HydraLIST program in a Line section named ARM1. You can then delete this entry from the stocklist to exclude that pipe from fabrication.
To send the ‘up’ piece of the return bend to this ARM1 section, choose the RNs option. To send the actual Armover piece, use the Heads option. To send both the up and the Armover piece to the ARM1 section, choose Both. The ‘down’ or drop piece will be listed, as always, in a section named DRP1. For more information on overrides, please refer to the Listing chapter of this manual.
You have the option of sizing the Armovers and the Branch Lines. The Clean Up Ends option will erase the pieces of the line that extend past the furthest heads at each end.
If Arms too Short is selected, sprinklers that are less than 4” from the line will be moved to the line.
If you have Flexible Sprinkler Connections defined in your drawing, they will be available in the dialog box.

When checked, FSC tags will be applied to the sprinklers connected with armovers.
HydraCARDs (Troubleshooting)
For HydraCARDs regarding Auto Line: [Click Here]