Appearance
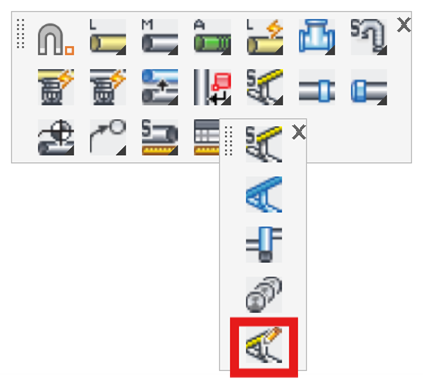
Edit Riser Nipples
Layer(s): SPRNK2, SPRKDATA
Shortcut: ERN
Associated: Riser Nipple Setup / Insert One RN
Access various riser nipple editing tools. You may also double-click on a riser nipple to use the Edit Riser Nipple Settings command found here.
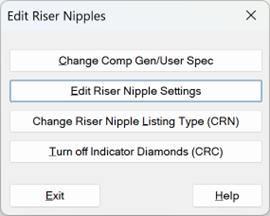
You can change riser nipples from Computer Generated to User Specified
You can edit the specifications of riser nipples
You can change how they are treated by the AutoList command
You can turn off the indicators added the above command
Change to Comp Gen/User Spec(ified)
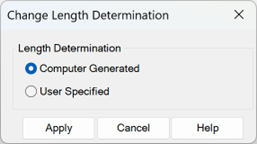
Select the appropriate radio button. Pick as many riser pipe tags as you want and press the Apply button to make the change.
Edit Riser Nipple Settings
Clicking this or double-clicking on a riser nipple will ask you to pick a riser nipple (circle or text). The editing dialog box will appear.
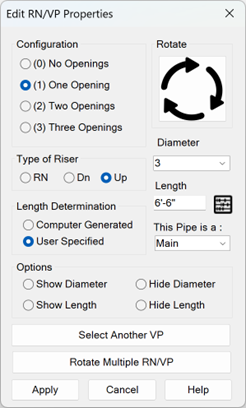
Changing the number of openings automatically changes the connection configuration of the directly connected pipes (i.e. from elbow to tee) and the orientation of the connected pipes, elevation-wise.
Select the Number of Openings with the radio buttons. If you have pipe connections, there must be openings. The openings occur for the highest pipes:
(0) No Openings: A riser pipe with no connections. This is rarely used and will not be covered here.
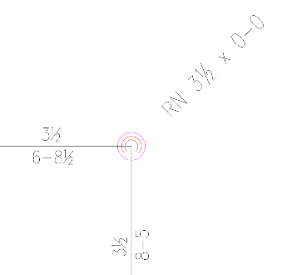
(1) One Opening: For two pipes connected by an elbow.
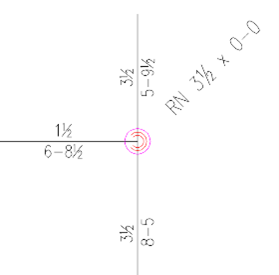
(2) Two Openings: For pipes connected with a tee.
(3) Three Openings: Where one of four pipes is at a different elevation. This is rare, and configurations like this often requires the use of the Stacked Riser Nipples command explained earlier.
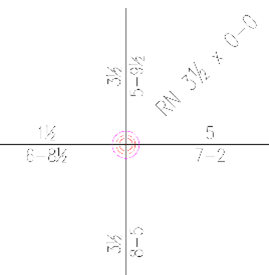
Use Rotate to orientate the symbol openings to the correct position. The openings will point to the higher pipes. Select the Type of Riser and Diameter with the radio buttons and pull-down list.
Select Computer Generated or User Specified to indicate how the length will be determined. Computer Generated lengths will be automatically calculated from pipe elevations. This is the preferred method as math errors are eliminated, especially on sloping pipes. Computer generated riser pipes will have a magenta circle around the symbol. The lengths are automatically updated when switching from 3D to 2D.
Use Length when you want to enter the length of the riser pipe. Enter a valid AutoCAD distance in the length input box or use the button and dialog box to choose a length.
Use This Pipe is a: to change the way a riser nipple(s) lists. See the Change Riser Nipple Type command, below, for more details.
Press the Select Another VP button to select a different riser pipe to edit. You will not be able to cancel any changes made to the prior pipe. The Cancel button is disabled until you select a different riser pipe.
Press the Apply button to apply any changes made to the riser pipe and close the dialog box.
Change Riser Nipple Listing Type
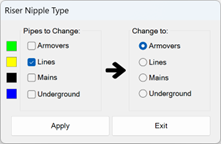
This command will override the listing instructions for the selected riser nipples. This is most often used to change riser nipples to that default to the Line specification to the Armover specification.
Upon use of this command, indicators will appear that show the current configuration.
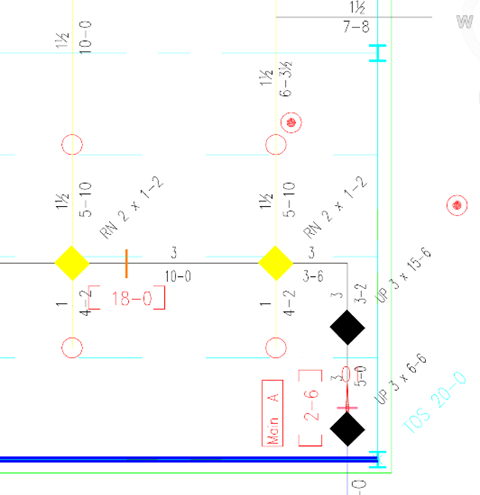
Applying or exiting this command clears the indicators.
Turn Off Indicator Diamonds
If the above indicators are still on the drawing after using the above command, this will clear them.
Tip - You can also double- click the riser nipple to edit it. This will launch this same command.
HydraCARDs (Troubleshooting)
For HydraCARDs regarding Edit Riser Nipples: [Click Here]