Appearance
Tagging Example 10

Tagging a grid with welded mains and welded lines with grooved outlets at top and/or bottom of riser nipple
For this grid system, tagging usually requires one tag per main, one tag per riser nipple and one tag (or more if preferred) per branch line.
1. Tag the mains with the fabrication method shown.
2. No Stop signs are required.
3. Tag the riser nipples and lines as indicated in this example. The lines must list before the riser nipples.
4. Define Drop or Sprig elevations with DefLines.
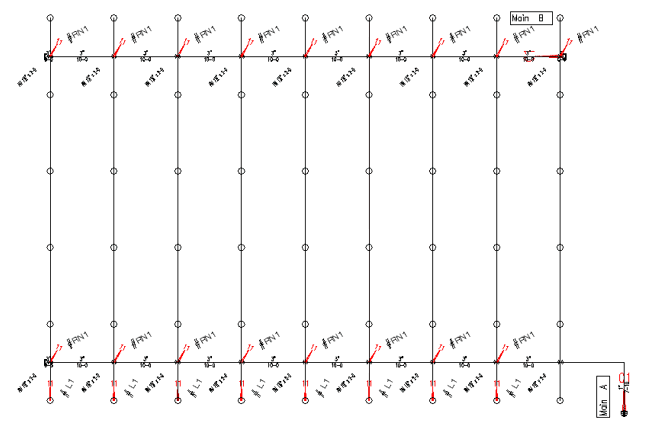
Here is the complete view of the example. Note the location of the main tags.
Step 1 - Tag the mains. Select the New Tag command from the Listing toolbar. Setup the dialog box as shown to the right. The Listing Tag ID will be _A (Space A) for the first main. The tag will be New. Choose any color you want. Pipe type will be Domestic Black SCH 10. The fitting group will be Mains – Stnd Grv E&T - Grv GOL.
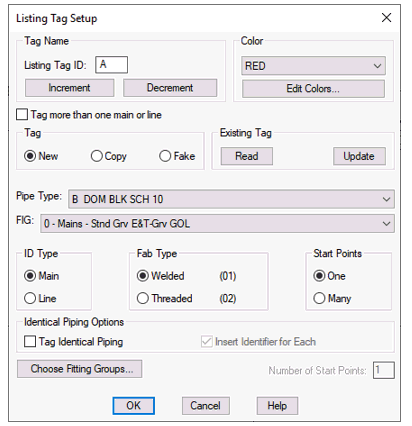
If you don’t have this fitting group in your list, add it using the Fitting Mapping command. See the explanation for this later in this chapter.
Tag type will be Main and Fab type will be Welded. There will be One start point.
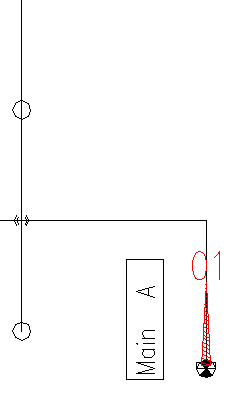
Place the Main tag at the start of the grid.
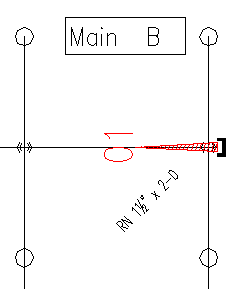
Step 2 - Tag the second main with the same Listing Tag Setup as the first main. This tag will have the Listing Tag ID of _B (Space B). Locate the tag as shown. The tag will start at the cap at the top right corner of the grid.
Step 3 -Tag the riser nipples. Select the New Tag command from the Listing toolbar. Set up the dialog box as shown to the right. The Listing Tag ID will be RN1. The tag will be New. Choose any color you want. Pipe type will be Domestic Black SCH 10. The fitting group will be Welded Lines - GOL RNs + Adacaps Stnd Grvd. This will specify grooved outlets for the riser nipples and Adacaps to be placed at the end of the branch lines.
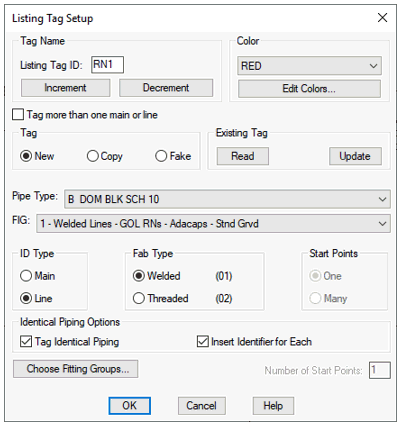
If you don’t have this fitting group in your list, add it using the Fitting Mapping command. See the explanation for this later in this chapter.
Tag type will be Line and Fab type will be Welded.
Select Tag Identical Piping and Insert Identifier for Each.
Follow Example 6 to tag several riser nipples at once.

Step 4 - Tag the ends of the lines with the same Listing Tag Setup as the riser nipples. This tag will have the Listing Tag ID of L1.
Locate the tags as shown. Make sure that all of the lines are tagged in the same way.
Step 5 - If necessary, define Drop or Sprig elevations with DefLines.

 HydraDOCs