Appearance
Reference Points
Layer(s): HYD2
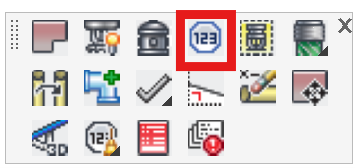
Shortcut: RP
Associated: Flowing Heads / Clean up Reference Points / Dummy Reference Points / Find Reference Point
Ribbon: Process Panel
You can either enter all your own reference points, let AutoCalc insert them, or do a combination of the two. Reference points are also known as node points. The two terms are interchangeable.
AutoCalcs will always insert reference points at the following locations:
When flow is added from a head, a fixed flow, or at the intersection of three or more flowing pipes.
When there is a pipe size change.
When there is a pipe type change.
You may find it helpful to label your own reference points so that the calculation output can be more easily interpreted. For example, it is common practice to label the top and the bottom of the main system riser as TOR and BOR respectively.
General Settings
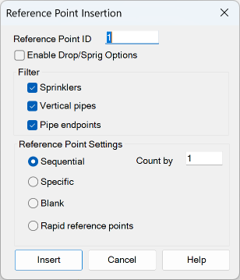
Reference Point ID – Enter up to four characters, letters or numbers or a combination (A101, M100, etc)
Enable Drop/Sprig Options – Turn on this option if you would like to manually insert reference points on sprinklers which are setup as drops or sprigs. It allows you to insert reference points at the top of the drop or the bottom of the sprig or at the sprinkler. The direction of the dragline from the sprinkler head will determine where the reference point will be placed. Hover around the sprinkler head to see your options.
When using this option will turn off the vertical pipe and end point filters as those points will get in the way when attempting to insert the nodes on drops and/or sprigs. You can turn those filters on if you so choose to.
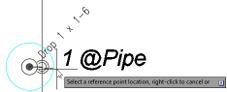
To insert a reference point at the bottom of a drop, hover your crosshairs below the sprinkler head. For the top of a sprig, hover your crosshairs above the sprinkler head. For the top of a drop or the bottom of a sprig, hover beside the sprinkler head as shown here.
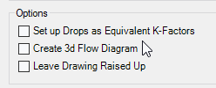
It is important to note that you must NOT select the Set up Drops as Equivalent K-Factors check box in the AutoCalc Setup window if you plan on using this option for your reference points.
All reference points inserted here are magenta in color and are placed right at the selected location. Do not move these reference points or they will not be used. After AutoCalc has run, white reference points will be inserted away from the magenta ones, and near the points they reference. There are cleanup tools for reference points further down the toolbar. These will be explained fully later in this chapter.
Continuing with the Reference Point dialog box:
Check which objects you would like reference points to be inserted for: Sprinklers, Vertical Pipes and/or Pipe endpoints.
Sequential will activate the Reference Point ID and Count by fields for multiple points. For the Reference Point ID value, enter a number or letter that you would like to start with such as a 1 or an A.
Specific is used for a named ref point. You will be prompted to enter a name, such as BKFL, DPV, etc.
The Count by value indicates the incremental increase which will be made for each subsequent insertion. For example, if the Reference Point ID and Count by values are 1, the first reference point label will be 1, the second insertion will be 2, the third 3, and so on.
Blank will add a blank reference point to the picked location. AutoCalc will insert a label in sequence where the blank point is when the routine is running. This is helpful if you have a long main which you would like to have broken up into sections in the HydraCALC screen. If the main is all one size, the automatic process will only insert reference points at the beginning and end of the main. By placing blank reference points along the main, the pipe will appear as sections in the HydraCALC screen and you can subsequently change the size of those sections.
Rapid Reference Points are used to quickly insert Reference Points at the top and/or bottom of riser pipes. Start the command and the dialog box will open.
Note: Combine Sequential ref points with a Sprinkler filter with Rapid Ref Points to quickly node the entire system.
For Pipes to Select, choose from Lines + Mains or Armovers + Lines.
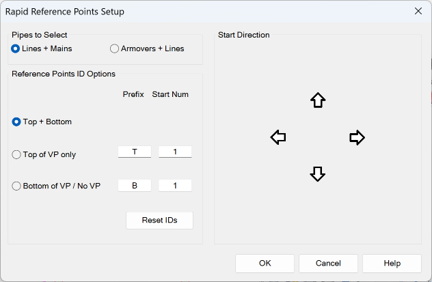
Choose to add ref points to the Top of VP only or Bottom of VP / No VP or both Top + Bottom.
Enter a beginning string for the points. T and B are used here. Also, select a starting number. In this example, multiple risers will have the sequence T1, T2, T3, etc. The four character limit includes these prefixes as well.
Select the Start Direction with the arrows. This tells the program which direction the reference points should be inserted, i.e., to the right, to the left, etc. For example, you have several riser nipples, and you want the left riser nipple to be T1, the next to the right T2, the next to the right T3, etc. In this case you would select the right arrow as shown. Labeling will start at the left and move to the right.
When you have the dialog set up, press OK and select your branch lines and main with a window. Right click to insert the Reference Points. A Rapid Reference point name cannot exceed two characters.
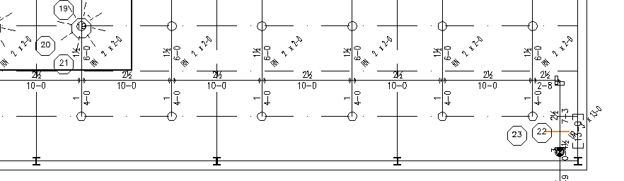
Here is an example of automatically assigned reference points with no blank points. Since the main is all 2 ½” pipe, the AutoCalcs routine has labeled the main from point 21 to point 22 as one length. Point 21 was inserted at the base of the riser nipple since this is the first line with an operating sprinkler, and the pipe size changes to 2”. Point 22 was inserted at the top of the main riser since the pipe size changes to 3”.
If you want to insert nodes at every branch line, even though there is no flow from the sprinklers, you will have to insert reference points at the base of the riser nipples before running AutoCalcs. Here is another example. Start the Reference Points command and select Rapid Reference Points.
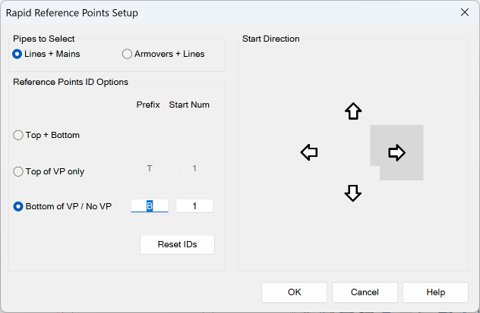
Set up the dialog box to insert reference points at the Bottom of VP starting with B1.

Select the Main and Branch pipes with a crossing window when prompted. The reference points will be inserted.
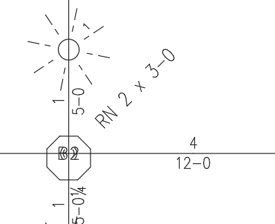
Now, the AutoCalcs routine will insert reference points at all branch line intersections.
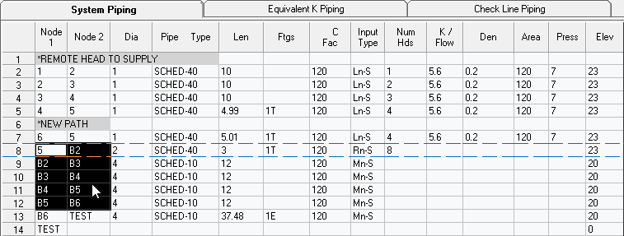
The resulting HydraCALC screen will show nodes B2 to B6. Use this method to insert reference points which would normally not be picked up by the AutoCalcs routine.
At this point, you should enter all reference points that you will require. Once you are transferred to HydraCALC, you cannot add reference points and have them automatically inserted into the drawing when you return.

Do not move the reference points after they have been inserted. New points will be inserted after running AutoCalc and placed in a less cluttered area.
HydraCARDs (Troubleshooting)
For HydraCARDs regarding Reference Points: Click Here