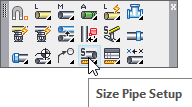
Appearance
Size Pipe Setup

Layer(s) affected: SPRKDATA
Alias: SZP
Associated Commands: [Size Pipe Toolbar]
HydraCAD Ribbon: Insert Panel
Used to assign lengths and diameters to pipes. The command will place a diameter and length label at the midpoint of the pipe. This information is used by the listing and hydraulics program.

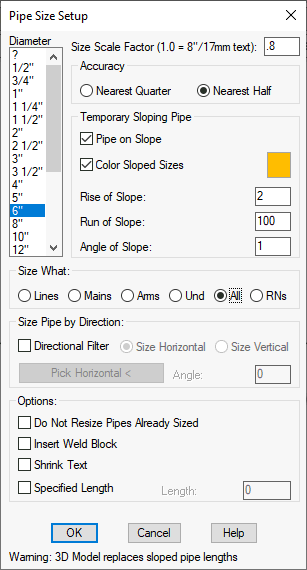
The command opens this dialog box.
If you would like to select the diameters for yourself through the AutoCalcs routine, leave the diameter as a ?. If you would like to specify your own diameters before entering Hydraulics, label the pipes with diameters. This label will take precedence over the AutoCalcs routine and will be carried over to Hydraulics. For example, if you want to use a 4” (100mm) main but are not concerned about the branch line diameters, just label the mains for 4” (100mm) and leave the rest of the pipes as a ?. It is not necessary to size any pipes before using AutoCalcs, but it is recommended that you do so if you already know which sizes you want.
The Size Scale Factor value determines the size of the pipe dimension labels. If you want the labels to be twice the default size, enter a 2 here. Most people prefer a value between 0.8 and 1.0.
Select Nearest Quarter or Nearest Half inch for pipe length rounding. If the Pipe on Slope box is checked, the Rise and Run value boxes become active. Enter these values from the keyboard. The program will insert the actual length of the sloped pipe; not as it scales in the plan view. If you would like to show these sloped pipes in color so that they are easier to recognize, then select the Color Sloped Sizes item and pick the Color swatch to select the color you want to use.
Use the Size What radio buttons to filter pipe types. For example, if Mains is selected, only main pipes will be sized even though line pipes may be selected as well.
You can filter pipes by direction if desired. Check the Directional Filter and select Horizontal or Vertical. Only the indicated pipes will be sized. Use Pick Horizontal to specify the reference angle if the building axis is not at a 0° and 90° angle.
*Tip* - Use this option along with the Lines option selected to label armovers (return bends, goosenecks) quickly.
Check Do Not Resize Pipes Already Sized to retain existing tags. Normally, if a size is already on the pipe, it will be erased and the new ones added.
If the Insert Weld Block box is checked, a weld block will be inserted instead of a pipe size tag. You will be asked to pick the pipes that will add up to the length of pipe to be labeled with the weld block.
Shrink Text will make the dimension text to 1/20th the size of regular text.
Use Specify Length to insert your own length rather than the scaled length. Listing and Calcs will use the Specified Length. This is especially useful for underground piping or long runs of supply piping. Do not use Attribute Edit or double-click on the pipe size to do this.
Press OK and select the pipes to receive sizes.
*Tip* - If you wish to turn off either the pipe diameter or length, you can do so by picking the HydraTools->Modify->Attribute->Hide Attributes command (HAT).
HydraCARDs (Troubleshooting)
For HydraCARDs regarding Size Pipe Setup: [Click Here]

 HydraDOCs