Appearance
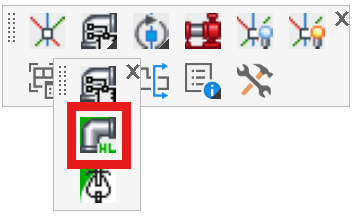
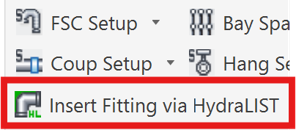
Insert Fittings via HydraLIST
Layer(s): 3D_DETAIL,CONST3D
Shortcut: I3D
Associated: Turn Ski Poles On / Off / Flip / Spin
Ribbon: Insert Panel
Note: Although you can gather Miscellaneous items in HydraLIST for your 3D Risers, we recommend that you use the Parts Tree/Valve Selector instead.
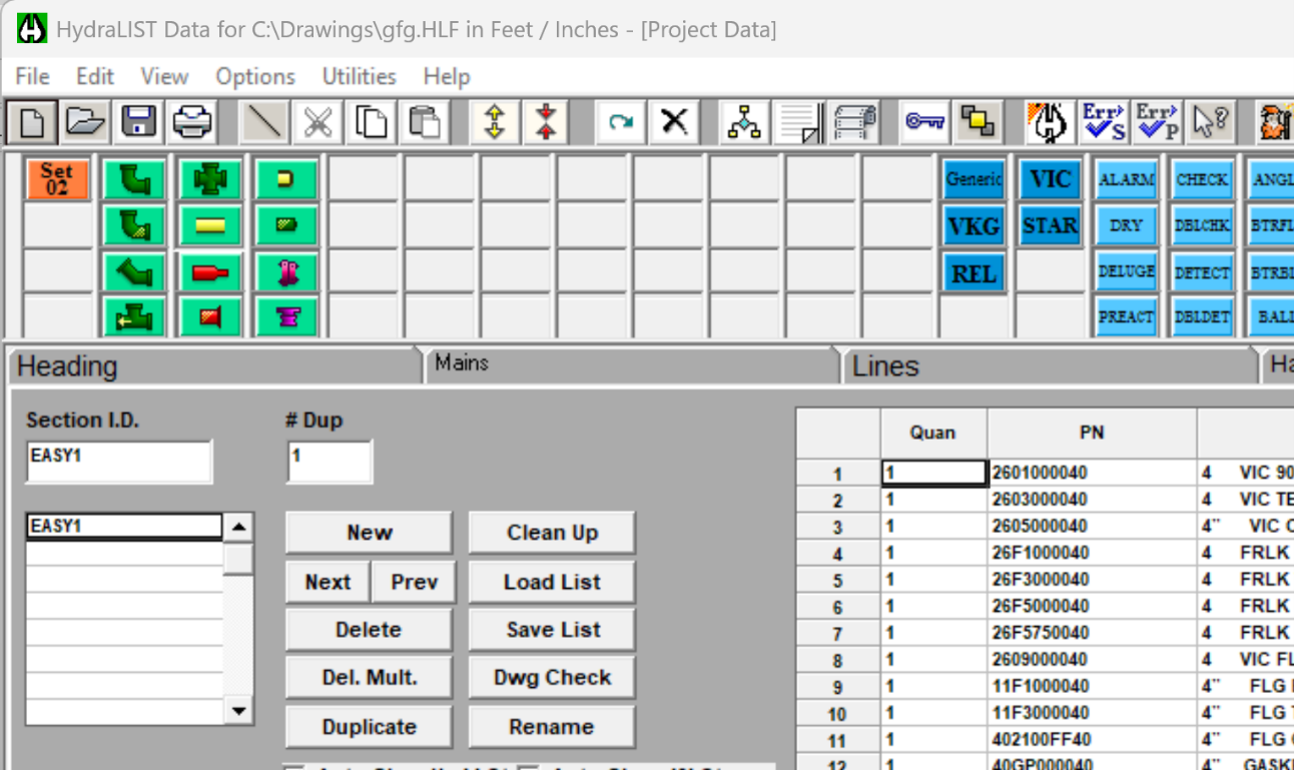
The first tab, Miscellaneous, is used for this command.
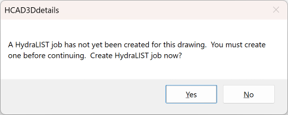
To build a riser using a HydraLIST file, the HydraLIST filename must match the drawing name, but with a .HLF extension. Picking Insert Fittings via HydraLIST without previously having created such a HydraLIST job will prompt you for permission to create that file.
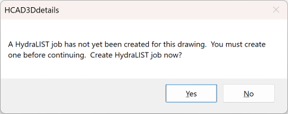
If you choose Yes, a HydraLIST job file will be created with a set of default fittings. This job will have same name as your drawing but with a .HLF extension and will be in the same folder as your drawing file.
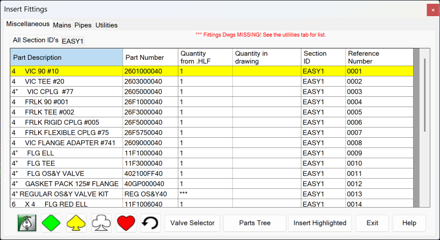
Select the fitting you want to insert, and pick Insert Highlighted or double-click on the fitting.
After selecting a ski pole, the fitting will be inserted immediately if you have pre-selected a card symbol, as mentioned above. If you have not pre-selected a card symbol, you will be asked now to pick one:
Pick the desired orientation.
To open the HydraLIST job that contains these fittings, pick on the HydraLIST icon in the Insert Fittings dialog box.

Navigate to the Misc tab and double-click on the EASY1 Section I.D. This will show what parts are included by default. You can add to or delete fittings here as needed. Refer to the HydraLIST manual for complete details.
Building and Inserting a 3D Main
The second tab of the Insert Fittings dialog allows you to select, view and insert mains built using HydraLIST. Refer to the HydraLIST manual for complete instructions on how to input a main.
To build a main, riser or manifold using a HydraLIST file, the HydraLIST filename must match the drawing name, but with a .HLF extension. Picking Insert Fittings via HydraLIST or Launch HydraLIST without previously having created such a HydraLIST job will prompt you for permission to create that file.
If you choose Yes, a HydraLIST job file will be created with a set of default fittings. This job will have same name as your drawing but with a .HLF extension and will be in the same folder as your drawing file.
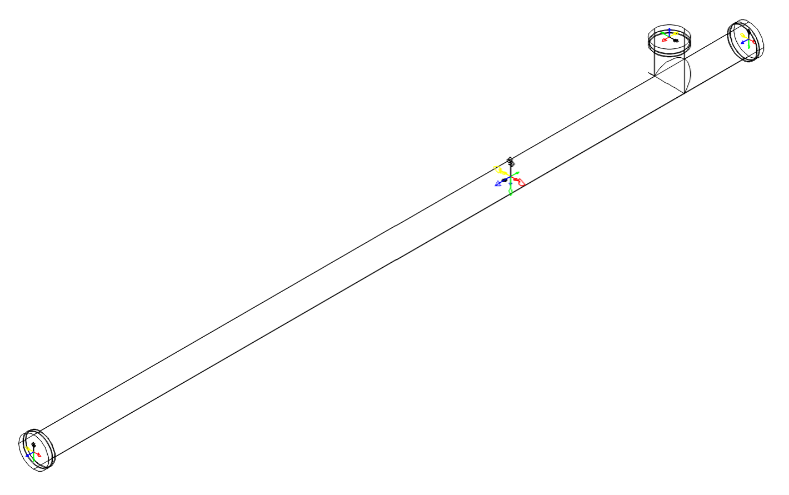
Create the main you want to insert.
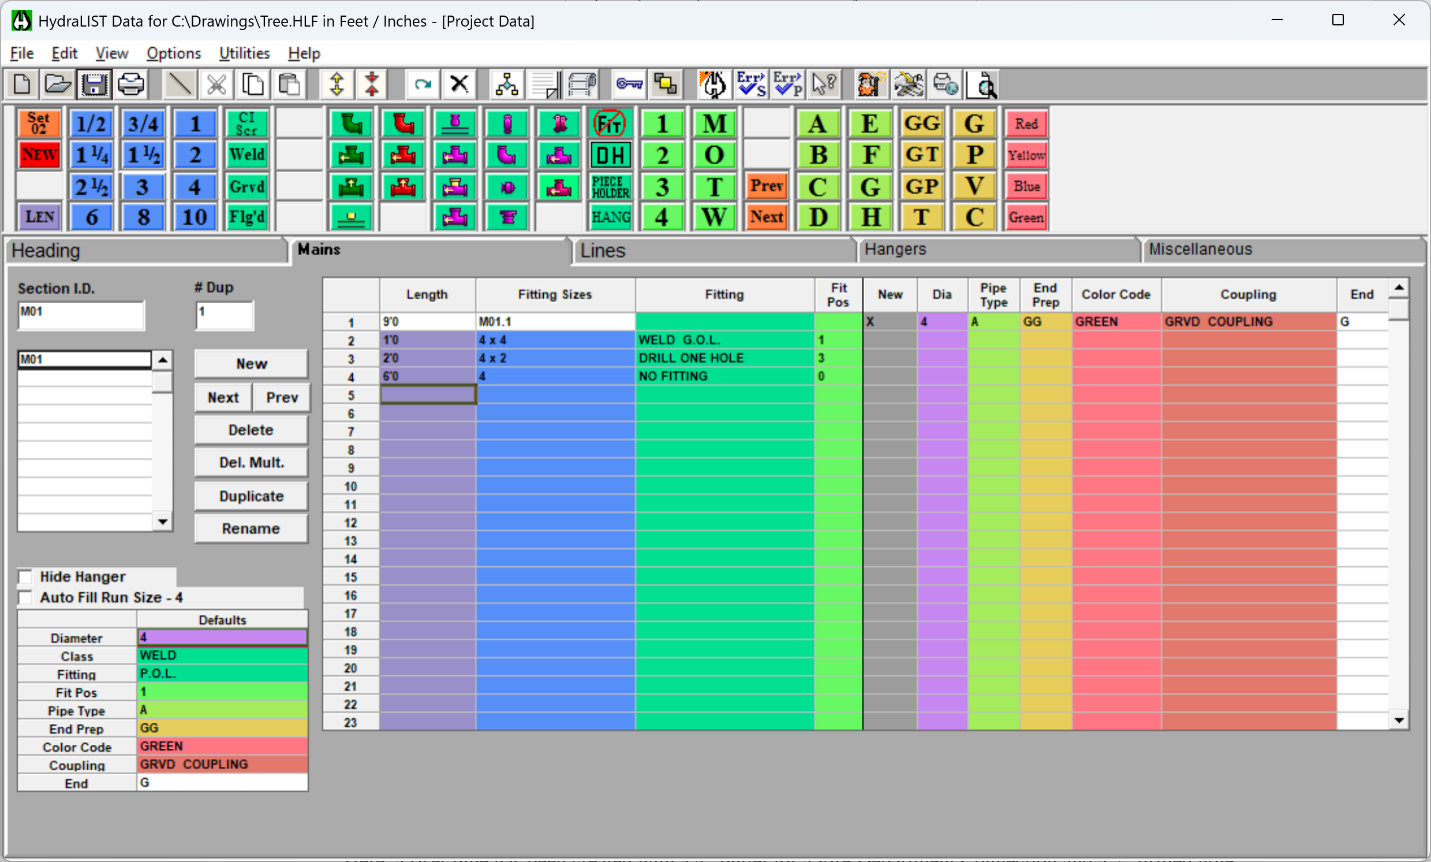
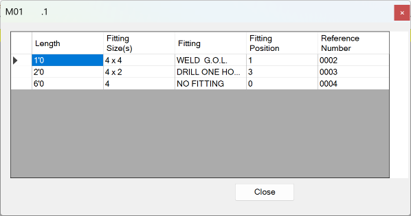
Here, a riser pipe has been created with a 4" outlet for a Fire Department Connection and a 2" drilled hole for a Flow Switch. Save the HydraLIST file and exit HydraLIST.
Back in the drawing, pick the Mains tab of Insert Fittings. Here, is the main that was shown above being created in HydraLIST.
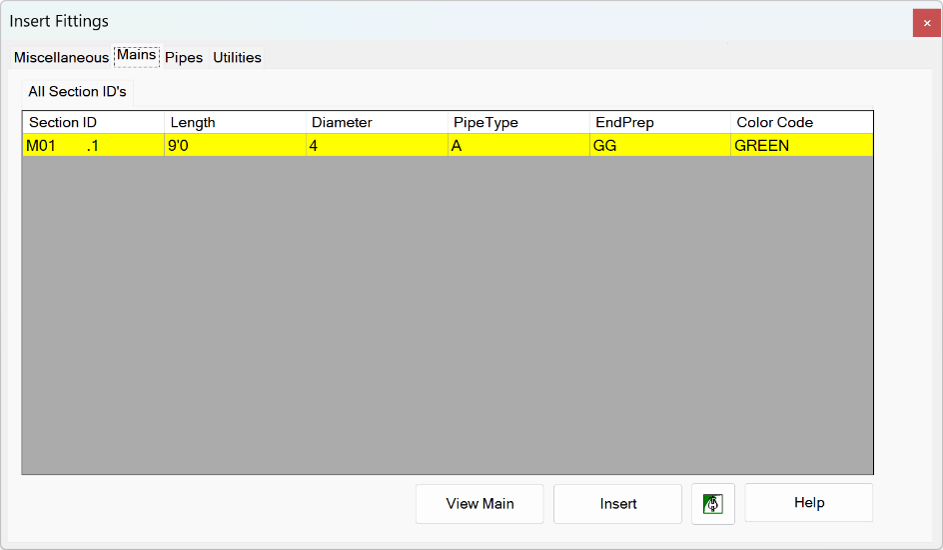
You can select View Main to see a description of this main.
You can select Insert to add the main into your drawing.
You can pick the green HydraLIST button to open HydraLIST and modify the fabricated pipe or create a new one.
Inserting Pipes with End Preps
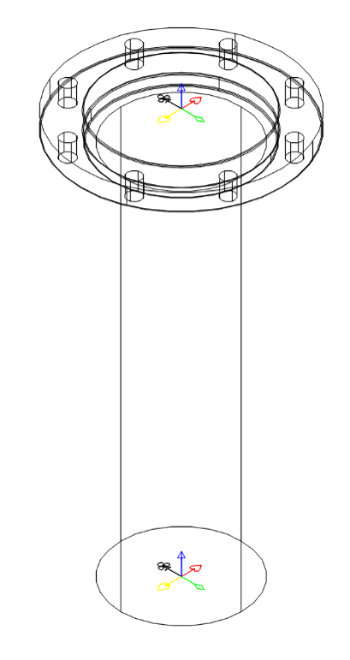
The third tab, Pipes, is used to create and insert pipes for your 3D riser. Often, the first thing drawn (after the first ski pole) is the pipe that comes up out of the floor and ends with a flange. Once you have at least one ski pole, you can insert the pipe.

Select a pipe diameter. You may need to do this to get the End Preps lists to populate. Select both End Preps and enter the Length the pipe should be.
Above, End Prep1 is Plain End. Diameter is 6". End prep 2 is Flanged. Length is 22".
Press Insert Pipe. Pick the existing ski pole, or pick Add Ski Pole to insert one.
The pipe on the below will be drawn.
Adding Fittings to a Pipe or Another Fitting
Each Fitting, Valve, Main or Pipe that is inserted will include at least one ski pole. Those with more than one outlet will include a ski pole for each of those outlets. This makes it easy to stack fittings, pipes and valves.
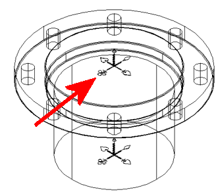
For example, when inserting an elbow on a flanged pipe, view the Ski Pole to determine the direction.
If a symbol (such as a white club) is selected, the open end of the elbow will be in the same direction.
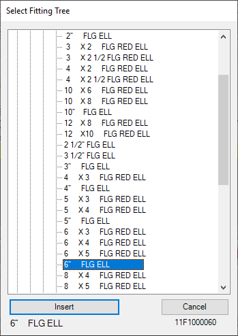
If you subsequently select and insert another fitting, say, a Flanged Fittings > 90 Elbow > 90 > 6" FLG ELL and return to the drawing.

Pick anywhere on the Ski Pole of the flanged pipe inserted earlier. Where you pick on the Ski Pole is irrelevant because you have already determined the orientation of the elbow in the Insert Fittings dialog box.
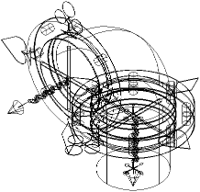
The flanged elbow is inserted in the chosen direction.
If you insert a component in the wrong position, you can resolve the problem in one of three ways.
Use the AutoCAD undo command.
Close the Insert Fittings dialog box, then pick and delete the item and start over
Or, you can rotate the item using one of the rotation commands covered in the next topic.
There is also an Undo button located on the Miscellaneous window for quick access.
Rotating and Flipping Fittings and Pipes
You can rotate Ski Poles and Fittings by using the Spin and Flip commands, covered later in this chapter.
Utilities
Utilities is the fourth tab on the Insert Fittings dialog box. The Utilities tab has two functions: updating your HydraLIST (HLF) file with the fittings inserted in the drawing and creating simple 3D fittings.
The Fitting Creation section of the dialog box allows you to specify one or all missing fittings.
Create a single 3D fitting by choosing the Select One radio button. Select a single part from the Missing Fittings list and press Go to create the fitting. HydraCAD will search the parts database for the takeout information required to build the fitting.
Choose the Select All radio button to have HydraCAD attempt to build all components displayed in the Missing Fittings list. Press the Go button to begin the operation. When you have completed all 3D components, the Missing Fittings list will be empty.
You may be notified that it is unable to automatically produce a complex fitting. Contact Hydratec for help on complex fittings by emailing us at [email protected].
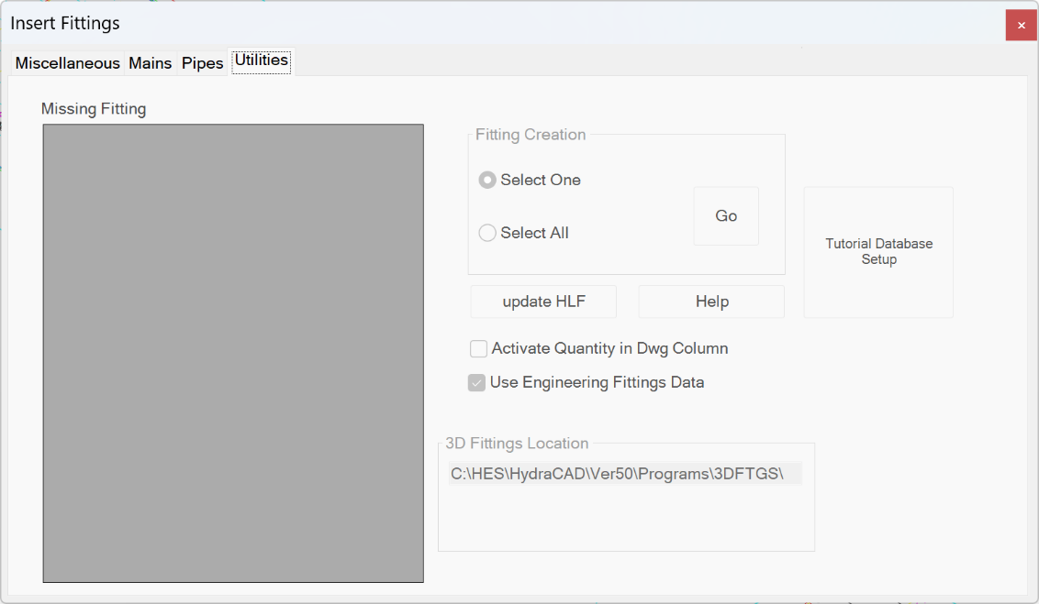
You can create these complex components using the 3D Fitting Builder and/or AutoCAD commands. See Creating 3D Fittings in the Appendix for information.
The Update HLF button allows you to instantly update your HydraLIST file to reflect the quantity of 3D fittings inserted in your riser detail. Only items listed in the Miscellaneous tab are updated. Pipes and Mains require manual updating.
When you have completed your 3D Riser, return to the Utilities tab and press the Update HLF button.
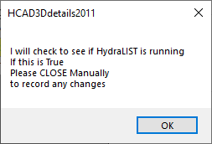
If you are running HydraLIST, close the application. HydraCAD will examine your 3D detail and update the HydraLIST file for every instance of discrepancy between the quantity in your drawing and the quantity selected in HydraLIST.