Appearance
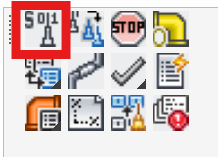
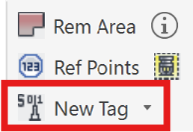
New Tag
Layer(s): SL01, DMN3, FAB_DEF
Shortcut: TN
Associated: Copy Tag
Ribbon: Process Panel
Create and insert listing tags. These tags tell AutoList how piping should be fabricated.
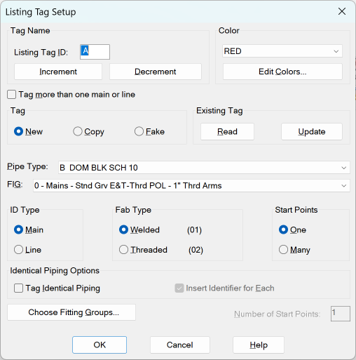
Enter a Listing Tag ID, keeping in mind the rules of how listing tags work, on the previous page. The Default is [space]A, which is ideal for tagging your first main. The space ensures that this tag will be listed first.
Use Increment or Decrement to add to or subtract from the last ID.
Select a Color from the list, or just use RED. This color is used on labels and reports to designate the 'color' of the main, for sorting and installation purposes. Press Edit Colors to add colors that do not appear in the list.
The ID and color are assigned to the next tag inserted and will be associated with HydraLIST printouts. For smaller jobs you may want to use only one tag and list the entire system under one ID and color. For larger jobs, you can break the system into listed areas, each having their own ID and color.
Check Tag more than one main or line if you want to consecutively tag mains or lines one after the other, with the same fabrication setup. The ID will be incremented by one each time you pick a new pipe. The main or branch line configurations do not have to be identical. The only requirement is that the fabrication scheme is the same for each main or line picked. The insert command will continue to ask you to pick the next pipe until you press Escape.
Types of Tags
For Tag, the choices are New, Copy, and Fake.
New means the next tag will be the first instance of the Line or Main you are tagging. You cannot use New twice for the same ID.
Copy tells AutoList to add a duplicate to the list of whatever is listed by the New tag that shares that Listing Tag ID. The piping configuration 'downstream' from the Copy tag does not matter, it simply adds a second (or third, fourth, etc.) copy of the Line or Main with the same ID. You can have any number of Copy tags that match a New tag. Use this when you have multiple welded branch lines that all have the same configuration. Label the first one with a New designation and all the rest that are identical with a Copy designation.
The rules are straightforward:
You may only have one New tag with a given ID. Additional lines or mains of that same configuration should receive a Copy tag.
If using Copy tags, there must be one New tag with the same ID as the Copy tags.
Tip - If you need to tag many identical piping configurations, the best way is to choose the Tag Identical Piping option discussed later in this section.
Tip - If you have already moved on or decided to tag all your New mains and lines first, use the Copy Tag command instead. This is the next button on the Listing toolbar.
Fake is a special case and should not be used without checking with Hydratec. It is placed on a riser nipple that you don't want to be listed.
More Settings
The Existing Tag area of the box is for reading or editing tags. Use the Read button and select the listing (triangular) tag to see its properties. Use the Update button to change an existing tag's properties to the current values set in the Listing Tag Setup box.
The Pipe Type value corresponds to the type of pipe to be used for the line or main. Pick a type from the list. The Pipe Type list is read directly from the HydraLIST database.

The FIG or Fitting Instruction Group specifies the fabrication method for the line, main, or riser nipple about to be tagged. Select the method from the five choices in the pull-down list. If you cannot find the appropriate fabrication method from this list, you can set a different five using the Fitting Mapping command or by picking the Choose Fitting Groups button. For more information on this, see the Fitting Mapping command later in this section.

Select Main or Line for the appropriate ID Type. The choice is mostly self-explanatory, except that welded branch lines are usually labeled with a type of Line. This choice has no bearing on the stocklist, but rather on the block inserted by AutoList.
Select whether the fabrication will be Welded or Threaded (think of as Non-Welded).
Tip - Branch lines that use a threaded (non-welded) configuration such as Cast Iron, Ductile Iron or Malleable Black Screwed, or are CPVC or Copper, do not need to be tagged. Instead, specify the listing method for these branch lines in the Default Branch Setup portion of the Start AutoList dialog box.
Identical Piping Options
If a drawing has a situation where part of the piping on one line is identical to another part of the piping on the same line (think 21' sections of grooved pipe where it is 10-6 between heads, and are 5'3 from each end) or if much of an entire line is identical to other entire lines, or both, then it is smart to use the Tag Identical Piping option. See Listing Example 4, below for a demonstration of this feature.

The Insert identifier for Each option will place a main or line ID on each identical 'piece'. Uncheck this if you don't want your drawing too cluttered. You can always copy the ID yourself where you want it.
Start Points

Typically, a main has one start point. You would select the One button in the Start Points item. This will gray out the Number of Start Points field and set the quantity to 1.
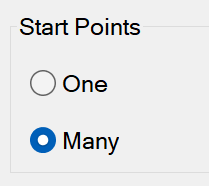
However, if a main comes to a tee and splits, say, left and right, you may want to tag both the left and right with the same Main ID so that they get listed together in the same Main section of the stocklist. You would select the Many button in the Start Points item. This will activate the Number of Start Points field and set the quantity to 2. The maximum number of Start Points allowed per main (or line) is 9.
Inserting the Tag
Pick OK to insert the tag. Pick a Main, Line, or Riser Nipple.
If you pick a Main or Line, you must pick near the end of the pipe where you want the listing to start. The listing will continue in a 180-degree direction from that end, along the line or main (away from the end picked). The arrow that is inserted must point in that direction. If the arrow is off at an angle, or point in the wrong direction, then you must erase the arrow and restart the command.
Correct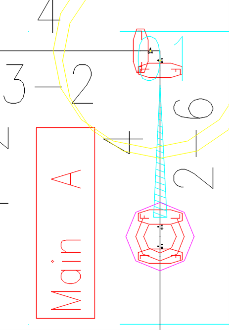
Inorrect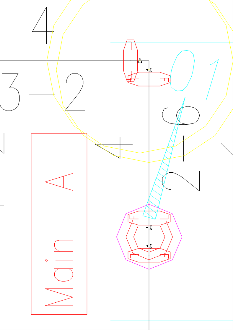
If you pick a riser nipple, you will be asked if the tag is at the top or bottom. If you select top, the list will begin at the top of the nipple and travel down the riser nipple. If you select bottom, the list will begin at the bottom of the nipple and travel up the riser nipple. In both cases, listing will continue along any pipes connected at the top or bottom, respectively, unless another listing tags picks up from there. For riser nipples, the listing arrow will point up and to the right if listing starts at the bottom and down and to the left if listing starts at the top.
Tag at Bottom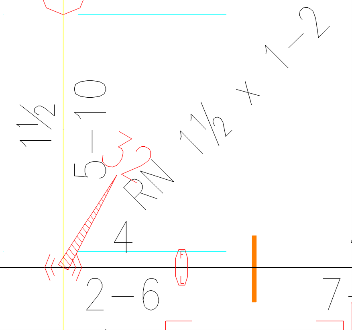
Tag at Top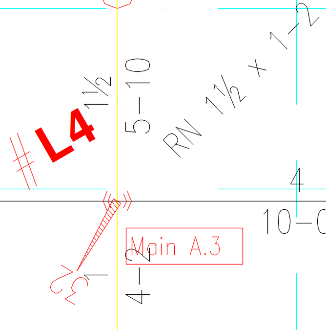
If you selected Many, you will be prompted for additional insertion points after the first tag is inserted, until the Number of Start Points value has been reached.
After the Listing tag is inserted, you are prompted to pick a location for the tag label. Pick an uncluttered area. The label does not play any role in the actual listing process and may be erased if required.
The Listing Tag Setup dialog box will automatically increase the Listing ID incrementally for each subsequent New Tag insertion.
Understanding the Tags
Looking at a listing tag, you can understand what listing instructions are set to. We mentioned that the orientation or angle of the tag does 'mean something'. The color of the tag matches the Color set in the dialog. You will notice two numbers at the apex of the arrow. The left number refers to the FIG group being used. There are five FIGs stored in the settings dialog (numbered 0-4). A left digit being a 3 means the FIG with a number 3 assigned to it in the FIG list (the fourth in the drop down) is being used for this tag. If the FIGs are later changed, you must keep in mind that this WILL affect your stocklist if you AutoList it again. The number to the right of the apex is the Fab Type. 1 for welded and 2 for threaded.
HydraCARDs (Troubleshooting)
For HydraCARDs regarding New Tag: [Click Here]