Appearance
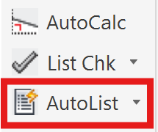
Start AutoList

Layer(s): SPRKDATB, SPRNK2V, HANGER2, ERROR, FAB_DEF
Shortcut: SAL
Associated: Refer to HydraLIST Manual
Ribbon: Process Panel
Starts the setup for the AutoList program.
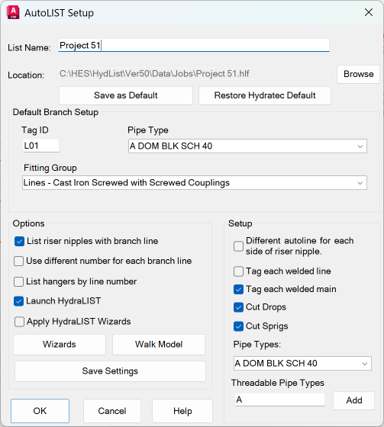
The List Name will become the HydraLIST file name. The path is displayed below this name. The Location is the HydraLIST jobs path by default. Change it with the Browse button and Save as Default if desired. Restore the Hydratec Default path to return to the original setting.
Piping in SPRKDAT2 without an AutoList tag but is connected to a main that is being listed will be fabricated as specified in the Default Branch Setup section. The Tag ID is the syntax for the first automatic line tag. For additional lines this ID will be incremented by 1 each time.
Pipe Type is the type of pipe to be used for the fabrication of automatic branch lines. Also select the default automatic Lines fab type from the Fitting Group list.
Primary Listing Options
Select List riser nipples with branch line to have riser nipples listed as part of their branch lines. Otherwise, they will be listed separately with their own line number.
Identical branch lines and riser nipples are grouped and numbered together. If Use different number for each branch line is selected, each branch line will be listed with its own number, even if the lines are identical. This is sometimes used when building a line out of random lengths of pipe.
Hangers will be grouped according to branch line number if List hangers by line number is checked. Otherwise, the hangers will all be listed in one section.
Launch HydraLIST causes HydraLIST to open to this job when AutoList is finished.
Save Settings will return the current settings the next time the dialog box is opened.
Setup
Check Different AutoLine… to number branch lines on both sides of the riser nipple differently. Unchecked, both sides will be listed under the same ID. If the riser nipple is not listed separately, it will be included with one of the branch lines, usually the one to the left at the top or bottom of the riser nipple.
If Tag each welded line and/or Tag each welded line main is selected, a block will be inserted with the respective incremental welded line or main number (i.e. L1.1, L1.2, Main A.1, Main A.2, etc.) for each section (i.e. 21'-0"). These numbers match the numbers assigned to the HydraLIST input on the Mains tab and this feature does not change this numbering, only the insertion of these blocks.
Check Cut Drops and/or Cut Sprigs to apply the takeout to these. Leave unchecked and the lengths in HydraLIST will be the same as what is shown on the drawing.
To specify which pipe types are threadable select from the Pipe Types list and pick Add to include it to the Threadable Pipe Types field. Threaded pipe types you use most often should be the first in the list. This pipe type will be used if a threaded outlet is encountered on a pipe that is tagged as welded.
If you are using our standard database, it is a good idea to have at least the pipe type "A" (Schedule 40) entered in this list. If the Threadable Pipe Types field is blank, the program will thread any pipe which is tagged as threaded even those that would normally be grooved.
Other Options
Apply HydraLIST Wizards will enact whatever wizards are set through the Wizards button.
Wizards allow you to quickly change your fitting manufacturer or fitting type without changing your Listing Tags.
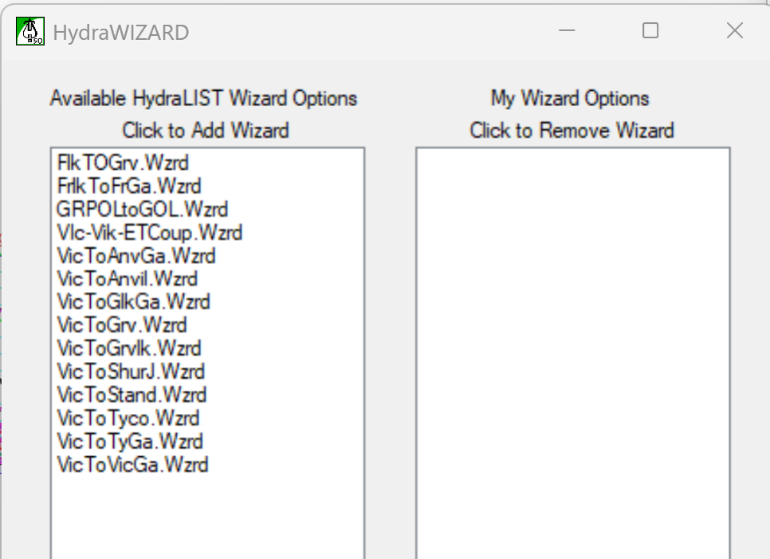
Select the Wizards on the left to move to the application list on the right.
Make sure to check the Apply HydraLIST Wizards box to activate these wizards on the next AutoList.
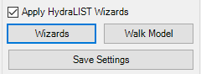
Walk Model is an error checking utility for the piping plan model. Start the command and the plan will Go to 3D.
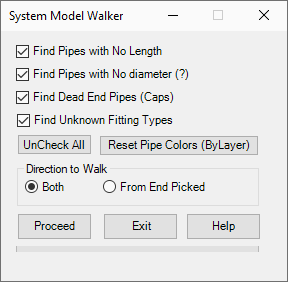
Select the items you want to check for errors. Select from the Direction to Walk options.
Proceed and pick a pipe. All pipes checked will become blue. Found errors will be circled in yellow.
Use Reset Pipe Colors to return to the original colors.
Running AutoList
Press OK to start the AutoList process.
When the process is finished the listing tags and cut lengths will be inserted. Line labels and main labels will also be inserted.
Use HydraTools > Layer Control > Center Dimensions (CEL) or Cut Dimensions (CUL) to select which dimensions show up on your plan. Or use HydraTools > Layer Control > Pick Off (PF) to turn off the one you do not want to see.
HydraCARDs (Troubleshooting)
For HydraCARDs regarding Start AutoList: [Click Here]